How to fold a paper airplane. How to make a paper airplane
Hi guys! In this material we will talk about how to make paper airplane for 100 meters flight . Generally speaking, almost any aircraft can fly quite far - it all depends on the altitude from which it was launched. Design Features paper airplanes affect their ability to plan. So an airplane that can glide for a long time will fly for a very long time and far from a height, for example, the 16th floor. The wind will additionally help speed up and prolong the flight of such a paper craft. Let's start our rating of the farthest flying aircraft.
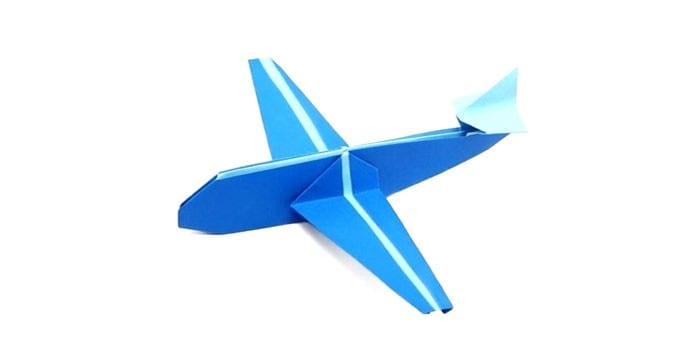
5th place - the simplest paper airplane models
Everyone settled down at this place simple models airplanes that even a child can assemble and which we all assembled in class and let the girls and teachers see. For such tasks, ordinary blunt-nosed airplanes and gliders are quite suitable. Here are 10 of the best easy-to-assemble paper airplanes.
This is the simplest and most popular paper airplane - almost all people know it because they have been collecting it since childhood.
The following aircraft model has a fast and smooth flight. Due to the front supporting wings, the nose does not collapse, providing stabilization, lift and long flight.
The next one will be a blunt-nosed aircraft with increased collision resistance.
The fifth will be assembling a modified plane with a blunt nose. The circuit is simple, but requires careful assembly.
Now I propose to assemble a good airplane from paper with nose wings and vertical rear stabilizers. The shape of the wing of such a glider allows you to fly longer in a straight line.
The next plane has a sharp nose and flies rapidly forward. The fins on the wings stabilize and prolong the flight of such a paper fighter.
The following design has good piercing abilities - the craft looks like a space fighter. It seems that it was created to exterminate enemy personnel.
The largest wings are those of a glider, which has a rather ridiculous appearance. But this does not prevent him from flying very long and far.
The amazing design of this airplane makes it look like a space shuttle or a Boeing. He flies not far, but effectively.
4th place - paper plane "Albatross"
We bend a sheet of A4 paper in half and draw it with our fingernail so that the fold is perfect.
We bend the edges of the paper inward towards the central axis.
After this, we bend the edges at an obtuse angle again towards the center. The edges of the paper should lie symmetrically on the central axis of our craft.
Then we bend the nose of the paper airplane towards the tail and align the centers of symmetry.
Add corner folds so that the left side is parallel to the right side.
We bend it back and bend the sharp nose of the plane back along the flight path. We iron all the seams with our nails.
We bend the wings so that a large area of the wings remains load-bearing. We do everything extremely symmetrically so that the plane can fly further.
At the end we form the tail. In principle, the bend of the tail can be done as in the photo of any size.
We straighten the resulting bends upward so that it ends up in the space between the wings.
We bend the vertical stabilizers upward parallel to the main axis of symmetry of the paper airplane. This is the plane we have - try to fly it quickly.
If you still have any questions about assembling this aircraft, then watch the detailed video with comments.
3rd place - diagram of an airplane made from paper “Hawk”
Now we will assemble another complex aircraft.
First step. Fold the sheet in half exactly in the middle. The quality of the flight will depend on the evenness of the folds. All stages of the aircraft are done in a mirror manner - left and right.
Second step. We bend the left and right sides towards the center.
The third step is to once again take the left and right edges of the paper and bend them towards the central axis of the plane.
The fourth step is to bend the sharp end of the workpiece towards the tail. In this case, the bend line of the sheet should pass through the point of intersection of the edges in the middle of the paper craft. Centering is checked by matching the central bend along the long side of the sheet.
Fifth step. We bend the edges of the paper on the left and right again towards the center, as in the photo. It is important here that the inner layer of paper does not bend or form wrinkles.
Sixth step. We grab the outer fold and open it, and then wrap it inward as shown in the photo. We do the same from the other side of the plane. We take the formed pockets and bend them inside out.
Seventh step. The pointed nose needs to be bent in the opposite direction about 1 cm deeper than the logical fold line. Pockets are formed there, which we bend inside the nose from approximately the middle.
Step eight. We also wrap the tip opposite the sharp nose.
Ninth step. We bend the paper airplane wings parallel to the keel. If the wings of your paper craft match, then the base of the airplane is assembled symmetrically.
Tenth step. We bend the edges of the wings parallel to the main axis of symmetry to form flaps. The plane is ready.
A detailed video on how to assemble such an airplane with your own hands from paper is given below.
2nd place - diagram of an airplane made from paper “Thunderstorm”
We will continue to assemble a paper airplane that will fly for a long time according to a highly complex assembly scheme. We will need, as always, a sheet of A4 paper. This can be plain white or colored paper. You can also take sheets from magazines with medium paper thickness.
The first step is to bend the sheet in half. We remind you that depending on how smoothly and symmetrically your plane is assembled, it will fly in exactly the same way. After bending the sheet in half, unbend it and then move on to the second step.
The second step is to bend the corners to the center - on one side and the other. It turns out to be such a preparation.
Third step. The edges of the paper that formed an obtuse angle on the left are correctly bent again along the line of the nose of the aircraft to the right corners of the paper blank. See how it looks in the photo. Straighten the folds of the paper near the nose especially carefully so that everything is symmetrical.
Fourth step. We see a point at the intersection of the bends of the left and right edges of the workpiece. Along the line through this point you need to fold the airplane in half, as shown in the photo. You can check yourself by matching the lines of the central fold. After bending, unbend, turn over and bend in the opposite direction.
Fifth step. Turn the plane over again and fold the sides on the left and right towards the edge of the inner sheet. See photos and videos for more details.
After this, turn the plane over again and bend the nose forward again.
We turn it over again and turn the strip of folded paper towards the tail of the aircraft blank.
Sixth step. We bend the plane along the central longitudinal axis. It is convenient to bend the stabilizers on the wings in this position parallel to one and the other side.
Seventh step. We bend the wings to the base. Here you can bend it in different ways and experiment, but it is considered optimal to bend it from the nose to the fender liner.
Everything should fit together smoothly and be symmetrical. Then the paper plane will fly exactly 100 meters or more and not lean left or right.
If the plane is going to fly downwards, then you need to bend the back of the wings slightly upward. Thus, the flow of oncoming air will lower the tail of the aircraft and raise the nose up.
1st place - paper airplane diagram “Falcon”
This is probably one of the most beautiful paper airplanes that you can make with your own hands, because it is very similar to the real thing. To fold such a long-flying airplane with your own hands, follow detailed instructions with photos and video at the end.
1 – take a sheet of medium-weight A4 paper and fold the sheet in half to make a paper airplane.
2 - fold a sheet of paper in half for the longest-flying paper airplane.
3 - fold the paper along the edges to make a cool airplane with your own hands.
4 - we also bend the second side of an airplane made from a sheet of paper.
5 - iron the resulting corners of the paper airplane in half again.
6 - open each wing of the plane and turn them around.

Every child has tried at least once to build a passenger plane out of paper. The guys tried to make the design so that it would fly further and more smoothly, but more often than not, that’s where the whole hobby ended. However, having matured, some begin to ask the question: “How to make an interesting three-dimensional model of an airplane with your own hands?” If you are one of them, then you will find answers to all your questions in this article.
Materials
To make a bulk passenger plane out of paper, you need to be very careful about the choice of material, as it will have a direct impact on the quality finished product. You will need:
- Paper;
- Glue;
- Scissors;
- Ruler;
- Tweezers;
- Dye;
Paper
How high-quality the aircraft model will be will directly depend on the paper chosen. It would be logical to choose the densest one, but the harder the material, the harder it bends. Therefore, if you have to make a layout with many small details, then it is better to give preference to thinner paper, but not less than 160 g/sq.m. You can, of course, do the work from cardboard, but you won’t be able to print the details on it.
Glue
How to make a durable airplane that won’t fall apart at the first whiff of wind? Right! Using high quality glue. It should not soften the paper or leave unpleasant yellow marks. It is better to choose a universal or specialized glue for modeling. This one will last for a long time and will help preserve the original appearance of the paper airplane for a long time.

Scissors
Well-chosen scissors will add neatness and elegance to a paper airplane model. Firstly, they must be sharp and not damage the paper. Secondly, modeling is a rather long and labor-intensive process, so it is better to give preference convenient models. And thirdly, for details different sizes You will need different scissors, so it would be nice to have at least 3 types in your arsenal.
Ruler
Almost any ruler is suitable for building an aircraft model. The main thing is that it is rigid, because the fold lines may turn out crooked, and then it will simply not be possible to create a beautiful paper model of the aircraft.
Tweezers
This tool will be needed for gluing small parts. You can use ordinary cosmetic tweezers, but it is worth noting: the longer and sharper it is, the easier it will be to work.
Dye
Some parts have to be printed, while others, on the contrary, require working with paint. Before painting, paper requires mandatory treatment in the form of varnish, primer, putty and sanding, after which you can use anything to add color. However, if your budget allows, it is better to stay at professional paints for modeling, such as Tamiya or Humbrol.
Knife
Sometimes the design contains such small details that even the smallest scissors will not work for cutting. This is where a paper knife comes to the rescue. The main thing is to choose a model with a thin, sharp blade.
Airplane assembly
Choosing everything wisely necessary tools, you can start making a passenger plane out of paper. If you already have extensive modeling experience, you can make the drawings yourself. For those who are gluing airplanes for the first time, it is better to go to the website https://izobretaika.in.ua, where the most various schemes and templates interesting models. So, how to make a beautiful and voluminous model?
- We print the stencil on a prepared sheet of thick paper;
- Carefully cut out each piece with scissors (for smaller ones, use a knife);
- After all the parts are cut out, use a ruler to mark the fold lines;
- Next, glue all the parts together. You need to start with the main body of the aircraft;
- Attach the tail and wings to the “body” of the structure;
- Add smaller details such as the landing gear, windows and doors;
- The paper passenger plane is ready.

Airplane painting
If you decide to resort to simple circuits and paint the plane yourself so that the color goes on evenly and lasts a long time, It is very important to follow these steps:
- The paper must be impregnated with solvent-based varnish;
- Next, primer is applied (for convenience, you can use a spray);
- The resulting layer of soil needs to be sanded (sandpaper is perfect);
- After this, the structure is puttied, thereby removing unevenness and smoothing the surface;
- Pay attention to small parts; it is better to additionally treat them with super glue for additional strength;
- Apply paint to the evenly puttied model;
- Let the plane dry. And everything is ready!
The work area should be well lit so that you can see every detail clearly. Scissors or a knife must be selected in accordance with the size of the elements: for large ones, large ones with straight blades are suitable, and for small ones, manicure scissors or a knife. It is recommended to cut out each spare part as needed in order to avoid confusion and not lose anything. To keep the details neat, twist the sheet of paper, but never bend your arms.
Folds
Leaning the ruler against the fold, run something blunt along it. This way you guarantee yourself neat lines while assembling the model. If you need to highlight sharp edges, it is recommended to use a knife, but only apply light pressure. This way the corners will come out clear and even.
Decide which fold you need: external or internal. To perform the first, you need to achieve a certain convexity of the part by bending it so that one of the sides is higher than the other. And in order to get the second one, then, accordingly, on the contrary, you need to make sure that you get something like a hole.
Gluing parts
This stage should be given special attention, since the appearance, quality and durability of the model will directly depend on it. Many models have tabs designed for gluing, so you need to apply glue to them and press them together. It is very important not to overdo it; if you pour too much of the substance, it can damage the structure of the aircraft, thereby making it less presentable. Squeeze out a small drop and spread it over the rest of the surface. If you need to place one spare part into another, apply glue to the sides.
Bending round parts
Sometimes a passenger airplane made of paper may have a rounded “body”. To make it look natural, it is very important to round the details correctly. To do this, place the element in your palm and run something like a pencil or pen along the inside; for smaller details, you can safely use toothpicks. This way you will achieve the desired shape and easily glue the spare part in the form you need.
Joining parts
The edges of some cylindrical elements, such as an airplane frame, can sometimes be difficult to glue together. To do this, it is recommended to leave additional space on one side without a pattern, which will “hide” under the other. This way the surface will have a perfectly smooth appearance. Glue can be applied to one edge or to both, the main thing is in moderation.

Since making a passenger plane with your own hands is far from easy, those who managed to build it can certainly be proud of themselves. Aviation is a rather complex section of modeling, since products require special attention, time, concentration and painstaking work. By following simple recommendations and approaching the matter wisely, anyone can get a beautiful, neat layout.
Probably every adult in our country knows how to make a paper airplane. After all, this simple toy, originally from childhood, invariably delights and amazes with its ability to fly. Before the dominance of tablets and other gadgets, it was ordinary paper airplanes that delighted boys of all ages during recess.
How many schemes for assembling this toy do you know? Did you know that from an ordinary sheet of A4 paper you can fold many various types aircraft, including long and far flying ones, as well as military models?
Are you already intrigued? You can start folding airplanes right now. After all, all you need for this is paper, desire, a little patience and our diagrams. Let's fly!
The simplest diagrams of a basic aircraft model
Before moving on to complex models, let's brush up on the basics of aircraft construction. We present to your attention 2 of the most simple ways fold the airplane.Using the first scheme, it is easy to get a universal airplane familiar from childhood. It does not have any special takeoff and landing characteristics, but folding it is not difficult even for a child. An adult can complete the assembly in just a minute.

If even the first scheme seemed too complicated to you, use the simplified method. It allows you to get the desired result as quickly as possible.

He's in the video:
An airplane that flies for a long time
Every child’s dream is a long-flying airplane. And now we will help you make it a reality. Using the diagram provided, you can fold a model that differs in flight duration.Remember that flight performance is affected by the size of your aircraft.
Excess weight, which means the length of the wings, prevents the plane from flying. That is, a glider must have short, wide wings. Another friend of planning is the absolute symmetry of the model.
You need to throw it not forward, but upward. In this case, it will stay in the sky for a long time, smoothly descending from a height.

Find answers to the remaining questions and all the subtleties of folding a paper glider in the step-by-step video tutorial.
Circuits that provide fast flight
Do you want to take part in an aircraft model competition? They are easy to arrange at home. Just make high-speed airplanes out of paper - and you can set your own records.
Step-by-step following our photo instructions is the key to success. A number of general recommendations will also help beginning paper aviation enthusiasts.
- To improve flight performance, use only a completely flat sheet of paper. Ideal for regular office printers. Any bruises and folds will repeatedly worsen the aerodynamic properties of the model.
- Iron all folds with a ruler to make them clearer.
- Sharp nose of an airplane increases its speed, but at the same time range decreases flight.

Ready-made crafts can be painted with the children. This exciting activity will allow you to turn a folded piece of paper into a real attack aircraft or an unusual fighter.
Approach creating your models like a science experiment. The speed and ease of assembling origami airplanes allows you to analyze their flight and make the necessary changes to the design.

Be sure to check out the video master classes on how to create fast paper airplanes to avoid annoying mistakes and learn from the experience of others.
Paper long-range fighter
Describing this aircraft model, many enthusiastically promise that it will be able to fly 100 meters and call it a super-airplane. At the same time, they are not at all embarrassed that the officially registered flight distance record paper airplane total 69 m 14 cm.
However, doubts aside. In any case, such a cool handsome man is worthy of your efforts to create it. For this craft, stock up on a sheet of A4 paper (you can take thick colored paper, so that the airplane turns out to be as beautiful as possible), with boundless patience and accuracy. If your goal is a realistic fighter, take your time assembling it and follow the photo instructions step by step.
There is also a video at your disposal from which you will learn how to properly assemble a paper fighter plane that stays in the air for a long time.
A model that features stable flight
A paper airplane takes off and immediately begins to fall, or instead of a straight trajectory it writes arcs. Does this sound familiar to you?Even this children's toy has certain aerodynamic properties. This means that it is the duty of all beginning aircraft builders to approach the construction of a paper model with full responsibility.
We invite you to fold another cool airplane. Thanks to its blunt nose and wide deltoid wings, it will not go into a tailspin, but will delight you with a beautiful flight.

Do you want to perfectly master all the intricacies of building this glider? Check out the detailed and accessible video tutorial. After a powerful charge of inspiration, you will definitely want to fold an airplane with your own hands that will flutter like a bird.
The corn plane is an original craft for young aircraft modelers
Do you have a growing boy who already loves making things, gluing and cutting? Give him a little time - and together you can make a small model of a corn-crop airplane. It will definitely bring a lot of joy: first from joint creativity, and then from having fun with a toy he made with his own hands.
For work you will need the following materials:
- colored paper;
- double-sided colored cardboard;
- Matchbox;
- scissors;
- PVA glue.
First of all, cover the matchbox with colored or white paper. Cut a strip of cardboard 3 cm wide. Half of its length will correspond to the length of the aircraft fuselage. Fold the strip in half and glue it to the box.

Cut out two identical rounded wings, their width should be slightly larger than the width of the box.
Glue the wings to the plane. You can entrust this to your little helper; he will be happy about such an important mission and will do everything well and thoroughly. Cut and glue a rectangle to the front to hide the box.

Cut two elongated ovals for the tail of the plane and a strip for the vertical part. It needs to be folded as shown in the photo.

Glue the blanks to the tail of the corn plant. The resulting cardboard masterpiece remains to be decorated according to your wishes. You can glue stars or small pictures to it. A propeller made from thin strips of paper would be a good addition.

Such a wonderful airplane can be taken to kindergarten as a craft or to please dad on February 23rd.
Video bonuses
Do you want to get a plane that can not only take off high, but also return back to your hands? Do you think this can't happen? But you are wrong.Tireless experimental craftsmen have developed a design for an amazing aircraft - boomerang.
With it, you can show your friends a stunning trick: a launched airplane will obediently fall right into your hands every time. To become known as the master of paper airplanes, check out our video - you will definitely succeed.
It would seem that all the paper airplane samples have already been reviewed and tested in practice, but we still have something to surprise you with. We invite you to watch a video lesson on creating a realistic glider plane.
You don't even need origami folding skills, you just cut out the outline from paper. This model has excellent flight characteristics, and the whole secret lies in... ordinary plasticine. Watch the video, be surprised and amazed.
Creating various paper airplanes is not only a wonderful activity that allows you to drive away boredom and put away the ubiquitous gadgets. It develops intelligence, accuracy and fine motor skills hands That is why it is so useful to include this type of activity in the program of joint leisure with children.
Perhaps the first unsightly model will be your child’s first step towards a serious interest in aircraft modeling. And it is in your family that a brilliant designer of passenger airliners or new jet fighters will grow up. Anything is possible. There is no point in looking too far into the future, but devoting an hour or two to folding paper airplanes is definitely worth it.
Reading time: 9 minutes
As a child, everyone was fond of throwing paper airplanes to each other. Many adults remember this type of entertainment only when children appear, when the basic skills for assembling complex origami crafts are already lost. To please and temporarily occupy your child, learn how to make a paper airplane using a simple pattern, teach the craft to fly, and what is needed to fold the model.
How to make paper airplanes
The art of aerogami has been around for over 50 years. During this time, folk craftsmen were able to come up with and skillfully implement hundreds of different models paper airplanes. Some of them fly for a short time and only along one trajectory, but there are also those that are capable of covering long distances. Modern designs of a boomerang or an unusual glider have appeared.
How to glue a paper airplane
A thick sheet of A4 paper, a ruler, glue, scissors and perhaps felt-tip pens is all you need to glue a paper airplane together with your own hands. It will be good if you find a ready-made drawing on the Internet in advance and simply print the drawing. If there is a dotted line in the photo, this is the fold location. The arrows in the sketch indicate the rotation of the paper in a certain direction, and the straight lines indicate the location of the cut.
Origami airplanes
It will be easier for beginners to assemble a glider model from ordinary materials: A4 sheets, thin paper, notebook sheets or newspaper clippings. The main requirement for the material is that it is shaped like a square or rectangle. To make an origami airplane, you just need to follow clear instructions. There is one more little trick: to make the parts hold their shape better, aerogami professionals recommend running a ruler along the fold.
How to make a paper airplane - step-by-step instructions
To ensure that the assembled model holds its shape well and does not fall apart when touched, you need to adopt a few tips:
- It is optimal to use small sheets with a density of 100 g/m².
- During work, you must strictly follow the instructions, iron the bends well and fold the material according to the pattern.
- To launch a paper airplane, it is important that all parts are symmetrical. Especially for balance, you need to pay attention to the nose and tail.
Simple airplane
When teaching aerogamy to children, it is better to start with mastering simple models. The method for making a classic layout is as follows:
- Prepare a landscape sheet. Turn it towards you with the short side.
- Fold the sheet in half and mark the middle of the sheet. There is no need to smooth out the fold.
- Unfold the paper and fold the edges so that the corners touch the marked center line.
- Grab the top of the sheet so that the fold is where the two folded corners meet.
- Fold the top left corner in the same way. Repeat the same action with the upper right corner.
- A triangle should have formed, bend it upward.
- Fold the model in half. Form the wings.
Airplane
This model is almost no different in assembly method from the previous version, the only difference being the blunt nose. To assemble the airplane, follow these instructions:
- With a piece of construction paper, do the first 4 steps from the instructions above.
- Bend the upper left and right corners so that a straight line 0.8-1.5 cm long remains in the center.
- Secure the part using the lower triangle.
- Turn the model out along the center fold.
- Straighten all the parts, set the desired wing angle.

Paraglider
Thanks to its wide wings, this model can soar beautifully in the air. To make an airplane from a sheet of paper, you need to follow the tips:
- Bend and unfold the rectangular sheet lengthwise as always.
- Measure about ¼ of the way from the top and fold toward the center.
- Bend both corners inward so that their noses do not extend beyond the intended line.
- Turn the model over and fold the folded half over itself.
- Fold and fold the small corners in the center.
- Fold the model along the central fold, unfold the nose and form the wings.
small plane
The dimensions of this model are small, so be prepared to do some painstaking work. How to make a paper airplane:
- Take any sheet of paper measuring 20*20 cm.
- Fold in half, press the fold.
- Fold in half again to form a square. Mark the center.
- Fold one half of the piece of paper onto ¼ of the sheet and make a mark.
- Bend the sheet inward from the ¼ mark to the top edge to form a triangle. Press down the edge.
- Turn the edge out so that a small triangle forms on top.
- Turn the sheet over and bend the other side of the triangle inward.
- Bend the wide end towards the pocket, not reaching the edge a few millimeters.
- Do the same with the other side.
- Place the fingers of one hand under the fuselage and hold the nose of the plane with the other. Lift the paper slightly with your hands.
- Fold the corner into the pocket. Repeat the previous two steps on the other side of the sheet.
- Fold the side of the large pocket up. Do the same on the other side.
- Open the model, bend its front edge inward.
- Turn the workpiece over and press the front part, using the corners as a guide.
- Fold the plane in half, go along the folds.
- Fold one side down along a line that is parallel to the center fold.
- Do the same on the other side.
- Fold the edge of the wing up for better aerodynamics. Straighten the model with your hands.

Big plane
This model can be used to decorate a child's room. To fold the liner, prepare cardboard, glue, scissors, a matchbox and follow the instructions:
- Cut a long strip of cardboard, 2cm wide. Fold it in half.
- Using glue, fix the edges in the center of the matchbox at the top and bottom.
- Cut two strips of cardboard 4 cm wide. Round the edges.
- Glue it to the matchbox on the sides.
- Cut a thin strip of cardboard and fold it in half.
- Fold the edges of the strip up, making a 1 cm indent from the edge.
- Glue the blank to the tail.
Square plane
Many people are used to seeing flying machines with a pointed nose, but not all models can look like that. Try folding a paper airplane differently:
- Turn the sheet of paper with the wide side facing you. Fold in half.
- Turn the sheet over to the other side, with the narrow side facing you. Fold in half.
- Unfold the sheet to the other side. Fold the edge toward the center of the fold.
- Fold the corners on both sides.
- Turn the sheet over so the folded side is facing you. Fold the edge up to the center.
- Fold the plane along the center perpendicular line.
- Fold the folded edge over. Open the pocket, holding the center with your fingers.
- Unfold your pocket. Fold the wings to the triangle marked in the center.
Volumetric airplane
After you have mastered simple models, you need to learn to understand more complex schemes. Described below step-by-step instruction, how to assemble a volumetric flying plane:
- Bend the sheet lengthwise and unfold it.
- Fold the paper in half. From the center, fold the edges down, and then unfold half.
- Unfold the sides, tuck each flap inward.
- Bend some of the wings back.
- Bend the wings from the bottom a short distance.
- Press the fold lines with your fingers. Bend the resulting lines parallel to the folds of the wings.

Beautiful plane
You can decorate a child's room with paper crafts by collecting a whole collection of different models. To make flying machines pleasing to the eye, they can be made from colored paper or cardboard and decorated with appliques - numbers, inscriptions or stars. Looks good on a shelf in a nursery volumetric models passenger liners. You will have to spend a little more time making them.
How to make a passenger plane out of paper
To create this model, you must download and print the Concorde airliner assembly diagram in advance. Then, to fold the passenger plane, follow the instructions:
- Make folds in the center and top corners.
- Fold the side parts towards the middle, then bend their edges back along the dotted line.
- Fold the shape right side up along the center line.
- Fold the corner along line 5, smooth it out, and then return the figure to its original position.
- Repeat the same on the other side.
- Tuck the edge inside the body along the dotted line, then pull its end back and bend it along line 6.
- Bend both wings up and secure the tail with tape.
How to make a cool paper airplane
There are also models of devices that are capable of soft gliding. long time or take long-distance flights. They are slightly different in design from their simple counterparts. If you want your airplane to fly further, choose a model that has narrow wings and long tail. Balanced airplanes with a large wingspan are capable of long flights.
How to make a paper airplane that flies
If you are bored with learning the basics of aircraft construction, try making a cool model with good aerodynamics:
- Draw a middle line and fold the corners along the edges.
- Fold the product crosswise exactly in the center and turn it over.
- Fold the corners at a slight angle, just short of the fold.
- Fold the resulting corner, straighten the bent part on the other side of the plane.
- Fold the model along the base, forming wings at equal distances.
- Make small folds of the wings along the edges.

How to make a paper airplane that flies far
This design provides for the formation of additional wings in the nose of the device, which will ensure flight range. To make a paper airplane, follow the instructions:
- Mark the center line, fold the edges to it at an angle of 90 degrees.
- Turn the workpiece over and fold the corners toward the center again to form a sharp edge in the center.
- Lift the triangle from the back and fold the resulting square in half.
- Mark the fold with a pencil and tuck the rectangle into the middle of the pocket.
- Bend the wings at a 90 degree angle.
How to make a military plane out of paper
Boys who are interested in war games, shooting games and armored vehicles will love the idea of creating a collection of military aircraft at home. There are a lot of models of such aircraft. You can fold a Fighter, Bomber, IL-2, Messerschmitt or other equipment. To make such toys look colorful and be as similar to the original as possible, it is recommended to make them from colored paper.
Fighter
Manufacturing options for such paper toys You can find it on the Internet or make a fighter out of paper according to this scheme:
- Take a leaf rectangular shape. Fold in half along the wide part.
- Bend two corners towards you.
- Bend the corners diagonally again, starting the movement of the hand from the sharp nose.
- Fold the product crosswise so that the sharp part is in the center of the opposite side.
- Turn the paper over and fold the top edges down.
- Turn the resulting corner towards yourself.
- Bend the figure in half. Shape the wings and flaps of the airplane.

Bomb carrier
This beautiful model It's a little more difficult to create, but the result is worth the time spent. To make everything work, follow these tips:
- Fold the top of the sheet into a double triangle.
- By analogy, bend the left corner, aligning the top of the sheet with the right side.
- Make a fold of paper that will pass through the intersection point of all the resulting lines.
- Fold the side triangles inward along it.
- Mark a center line at the bottom of the paper.
- Draw a line that is parallel to the base of the triangle.
- Turn the paper over to the other side.
- Fold the corner towards you.
- Turn the layout over again and fold two corners up, first folding the top in half.
- Turn the figure over and bend the corner.
- Fold the right and left edge that is inside the layout.
- Bend the corner away from you, fold the plane along the central fold.
- Bring the edges inward, fold the shape in half, and then unfold it towards you.
Long-haul aircraft
This model can cover any distance. It has good aerodynamics, is well balanced and weighs little. A long-distance aircraft is made like this:
- Make marks in the center of the sheet and bend the upper corners.
- Fold the sheet in half, forming a roof with sharp corners.
- The edges of the future wings are folded inward to sharpen the nose even more.
- The layout is turned face down, then the back is folded vertically. without touching the bottom corners.
- Bend the wing so that it covers the entire length of the workpiece.
- Set the wings to the desired angle of inclination.
Video
We present to your attention a selection of paper diagrams of World War II aircraft. These are flying scale models of famous aircraft. Among them there is sure to be an airplane model that you like. Each diagram has a history of the aircraft printed on it, as well as brief gluing instructions. The difficulty level is at the “below average” mark.
- In order for you to get a model airplane that can fly (flight performance will need to be improved through trial and error - by making the nose of the glider heavier and changing the angles of the wings, etc.) you need to use a regular office paper A-4 format.
- You can print aircraft diagrams on any printing device. To make the planes look more beautiful, it is better to print the scans on a color printer.
- You can cut out the parts with any tool convenient for you - scissors or a paper knife. The main thing is that they are sharp and the details are neat.
- There are bend lines on the parts that should be pressed with the back of scissors or any other similar object. This is done to ensure that the bends are perfect.
- PVA or a dry glue stick is ideal as glue. In order for the parts to be glued together properly, PVA glue must be applied with a thin brush. Wipe off excess with a napkin or finger.
Paper diagrams of World War II aircraft
- This is a scaled-down flying model of the British single-seat fighter Hawker Hurricane, developed in 1934.
Hawker Hurricane fighter
- Paper model of the German Junkers JU-87 dive bomber and attack aircraft. This plane is a symbol of the victories of Germany in 1939-1942. The Junkers JU-87 is known for its signature feature - the roar of a siren during a dive.
Junkers attack aircraft JU-87
- American Lightning reconnaissance and heavy fighter aircraft, developed in the late 1930s. This aircraft was used by American aviation for reconnaissance, including night reconnaissance, horizontal and dive bombing.
Lightning Heavy Fighter
- Model of the English heavy fighter Mosqito. The aircraft's first combat flight took place in 1943. The fighter was successfully used by the Royal Air Force during World War II to carry out targeted strikes.
Mosquito fighter
- Another model of an American fighter from World War II is the Airacobra P-39. This aircraft is the most popular because it was supplied by the American authorities to the USSR as assistance in the war with Nazi Germany.
Airacobra P-39
- The Thunderbolt P-47 fighter is also a representative of American military aviation. This aircraft is considered the largest single-engine fighter of its time. It was also supplied as aid to the USSR.
Thunderbolt P-47 fighter
- Japanese light carrier-based fighter Zero Sen A6M. The aircraft was produced from 1940 to 1945. It had a technical advantage over Allied aircraft until 1942, when the Americans began using the Lightning fighter.
Carrier-based fighter Zero Sen A6M
- German single-seat fighter Focke Wulf - FW-190. Due to its versatility, this aircraft was used by the German Luftwaffe as an interceptor, fighter, and escort fighter.
 Crochet Christmas potholder
 We make beautiful and festive garlands ourselves Cut out the letters Happy Birthday
 Royal Treasures: A Short Guide to Kate Middleton's Rings