Crochet Little Red Riding Hood costume for girls. Crochet Little Red Riding Hood
Little Red Riding Hood - knitted doll. Master class.
This doll with knitted clothes will be a wonderful friend for any girl.
Let's start with the head. We cast on the thread from which we will have two air loops, we knit 6 stitches into the first loop and start knitting in a circle, 2nd row: increase, 2 in each loop, we get 12 loops, 3rd row we make increases through one loop , we get 18, and so on in each row we must add 6 stitches evenly, we catch up to 36 stitches. Then we change the thread to the one from which the body will be and we knit without increments 36 stitches in each row, as many rows as necessary, if we want to have a girl with a long face, we need to knit a larger number of rows, and if she has a round face, then vice versa,
1.
then we begin to make decreases. First, we decrease through 4 stitches, we get 30 stitches in the row, then after 3 stitches - 24 stitches, and thus up to 18 stitches.
2.
The resulting head must be stuffed
3.
We stuff it with synthetic fluff; if it doesn’t work with your finger, then we help ourselves with a wooden stick.
4.
or with your finger, like this

then we knit several rows (an arbitrary number) without decreases, it will be more
6.
Now we’re making hangers. To prevent them from being sloping, you need to make two increments in each loop, we get 24 stitches
7.
in the next row we increase through 3 stitches, we get 30
8.
take a thread of a different color, this will be the top of the dress
9.
We knit several rows without increasing, the number of rows is arbitrary
10.
we note for ourselves that there should be a waist somewhere here, and we knit the next row only on one wall, the skirt will be tied to the second
11.
Take a thread of a different color (this is what we will have for the skirt and panties)
12.
knit a certain number of rows, stuff
13.
14.
we knit 15 stitches, now we will have legs
15.
Now we have 15 pets in each circle. We knit the legs-pants. Cut the thread, leaving a long end, as needed.
Our legs will be sewn on today, I decided so.
To do this, take a thread of the color that we will have shoes. We knit a chain of 2 stitches, in the first 6 stitches, then in the second round we make increases in each loop, we get 12 stitches
16.
knit three rows up and put a juniper bead inside for scent
17.
with the thread that is for the body, we knit several rows, stuff
18.

sew to the body with a knitted seam

It turned out ugly, but we'll fix it later
We do the same with the second leg. The result was a raskoryaka
21.
Now our girl has such an ugly hole, we sew it up with green thread, it’s not for nothing that we left a long end
22.
it turned out like this
23.
and no longer a raskoryak
24.
Now we have to knit her skirt. We cling to the remaining wall that we prepared at the waist
25.
here you need to make a sc, and in the next rows make even increases, first through two loops, in subsequent rows through three, four, etc.
26.
27.
then at a certain moment we decided that that’s enough, and we knit without increments
28.
We finished the skirt, now we need to make a frill
29.
it turned out something like this
30.
But what about our legs? something needs to be fixed. Let's make her some frills there too
31.

33.
Now the apron
We knit a chain of VP absolutely by eye and make rows on them with ticks from dc
Here my camera is glitched and there is no photo of the apron at work
The apron was sewn to the skirt
Competition entry No. 39 – Little Red Riding Hood
Hello. My name is Diana. I decided to take part in your competition because I recently knitted a hat for my daughter. I found a picture on the Internet, bought threads and knitted a similar one. I learned to knit at school. I went to a knitting club with my sister. Now I can make all sorts of little things. I don't have the patience for big things. I have two children and am currently on maternity leave. In the summer we relax with our grandmother, so we have a little time for creativity. I get inspiration from the Internet. I hope someone likes my work. Sincerely, Zhogal Diana.
Little Red Riding Hood
Head circumference 49 cm, for a child 2-4 years old
To knit a hat you will need: hook No. 2, Iris threads (100% cotton).
Description of crochet hat
1 row– tie a chain of 7 air. loops, close into a ring.
2nd row– 3 air. lifting loops, 13 posts. with double crochet in a ring,
3rd row– 3 air. lifting loops, 1 post. with nak., 2 air. loops, 2 columns. with nak., 2 air. loops, then along scheme 1.

Finish knitting according to pattern 1. Knit another 3-5 rows with double crochets. Depending on the desired depth of the product.
Tie the cloves together scheme 2.
Knit 7 flowers:
1 row- a chain of 7 air. close the loops into a ring;
2nd row– 1 air loop for lifting, 10 single crochets in a ring,
3rd row– 1 air loop for lifting, 1 double crochet, * 3 air. lifting loops, 6 posts. double crochet for the previous stitch, 1 stitch. without a crochet*. Repeat 4 times starting from *. Look scheme 3. Sew flowers to the hat. Decorate with beads.

Tie 15 chains of 7-9 cm air loops. String the beads and braid them up to half the length of the chain. You should get 5 braids. Tie the braids to the top of the hat.
Buy a cord at the store (you can tie it) and pull it into the last row of double crochets.
Hooray! Spring is red! That's why today there's a little red riding hood on the program.
I suggest you knit an elegant hat, without any frills or frills, for any age. For experienced knitters who know how to knit embossed stitches.
You will need 100-120 g of yarn of medium thickness (230-250 m per 100 gram skein), hook number 3-3.5.
For convenience, the diagram is divided into 2 parts - a circular, central part, and a part connected without additions, in a straight line.
The circuit was created using the MyCrochet program and does not look very good... If you know of a better program for creating crochet patterns, please share the link.
Buy a ready-made hat in_my_group_VKontakte
Now let's start knitting. 

The hat is knitted in the round. At the top of the head, a relief 8-petal flower is knitted using “concave columns”.
Scheme 1

To begin, knit a chain of 6 air loops and connect them into a ring.
1st row – 3 air loops for lifting, 15 tbsp. double crochet into the hole of the ring, double double crochet;
Row 2 – 3 chain stitches, * above each st. with the double crochet of the previous row, knit a double crochet with a girth from the bottom - a concave double crochet, 1 chain loop* - a total of 16 concave double crochets;
3rd row – 3 air. lifting loops, 2 tbsp. double crochet in the same stitch, * single crochet in the next stitch. previous row, group of 5 tbsp. double crochet in next st. double crochet from the previous row *, finish with two tbsp. double crochet a group of five stitches - in total you should get 8 groups of 5 double crochets (petals), separated by one treble. without crochet;
4th row - above all groups of 5 stitches, knit “concave” double crochets (with a girth from below), separating from the 1st chain stitch;
Row 5 – under arches from 1 air loop knit 2 double crochets, separating them with 1 air. loop;
6th row - under the arches from 1 air loop, knit 3 tbsp. double crochet, and three more double crochets between the “petals” - a total of 96 double crochets;
At this stage the additions are completed, then the hat is knitted in a straight line.
Row 7 – knit a row of “concave” double crochets (with a girth from below).
Scheme 2

Next, rows 5,6,7 are repeated.
Buy a ready-made hat
 We make beautiful and festive garlands ourselves Cut out the letters Happy Birthday
 Royal Treasures: A Short Guide to Kate Middleton's Rings
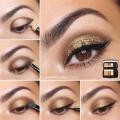 How to do makeup with golden eyeshadow?