Dress for girls with one-piece sleeves. Dress with one-piece sleeves - who is suitable and style options
Another hot topic of the season: long one-piece sleeve.
Having mastered this technique, you can easily model different styles of clothing with one-piece sleeve regardless of the season, type of fabric, etc., guided only by your desires or goals.
When designing a long one-piece sleeve, the angle of inclination of the upper cut is of great importance.
With a slight slope or its complete absence, when the upper line of the sleeve runs horizontally (at a right angle to the lines of the middle back and front), the bodice of the product will have a fairly large volume, a softer shape with slack in the armhole area.
With a large slope of the upper cut of the sleeve, the bodice will have a strict, clear shape in the shoulder and armhole area. Freedom of movement in this case is ensured by the gusset, cut-off barrel, and other design techniques, which we will consider in the following articles.
The width of the sleeve in this design is directly dependent on the angle of inclination of the upper cut and the depth of the armhole. The widest sleeve can be obtained with a minimum angle of inclination of the upper cut and a deepened armhole.
In this article we will look at one of the options for designing a bodice with long one-piece sleeve without gusset (kimono), in which the upper cut is a continuation of the shoulder line.
This design is based on a drawing of a pattern for the base of a dress with a semi-fitted silhouette. If necessary, achieve more loose fit you can increase the increase in loose fitting by distributing it evenly between sections of the base mesh (back, armhole and front).
If you have not yet created a pattern for the base of the dress, you will need this drawing in the future when mastering the modeling of various types and styles of clothing.
Let's copy the back and front of the bodice of the dress onto a blank sheet of paper. There is no need to transfer all letters and auxiliary lines. Copy only those letters and lines that will participate in the construction. Look at our drawing and the situation will become clearer.
Before proceeding directly to the construction of a one-piece sleeve, it is necessary to fulfill the main condition:
To do this, draw a line from point G4 down to the intersection with the waist line. Together with the side line, we transfer the side dart, as shown in Fig. 2.
In our drawing, point G4 is located in the middle of the width of the armhole. If you are using a base constructed using a different method, divide the width of the armhole in half and draw a vertical line from the division point, thus creating a new side bodice line.

Rice. 2
And one more important note. When designing a soft bodice shape with a long one-piece sleeve, and this is exactly our case, the size of the side dart opening must be reduced to 1.5 cm in each direction. That is, the distance T2T3 = T2T4 = 1.5 cm.
We adjust the tuck solution. See fig. 3.

Rice. 3
Note:
Darts on the waistline of the back and front can be reduced, replaced with gathers or tucks (in accordance with the style of the product).
In products with straight, free shapes, darts at the waist may be completely absent.
Back
To provide additional freedom, we move the line of the shoulder and neck of the back up as follows:
From point A we set aside 0.5 cm upward and place point A11;
From points A4, O and O3 we set aside 0.7 cm upward and place points A41, O11 and O31, respectively;
From point P1 upward we set aside 1.5 cm and place point P11.
These values may fluctuate slightly in one direction or another depending on the tasks set, the type of product, the fabric used and other factors. We use as an example the values most often used in our practice.

Rice. 4
We connect points A11 and A41 with a smooth curve, thereby obtaining a new germ line.
We connect sections A41 O11 and O31 P11 with straight lines, continuing the shoulder cut to the right at a distance equal to the sleeve length measurement. In our example, the sleeve length is 58cm.
Thus, we set aside 58 cm from point P11, and you set aside your sleeve length measurement, and put point C.

Rice. 5
Note:
1. The dart at the back shoulder line can be reduced or completely absent.
2. If the model includes shoulder pads, the shoulder section is additionally raised according to the thickness of the shoulder pad.
The width of the sleeve is determined by the model (style) of the product. If you sew for yourself, the width of the sleeve will depend only on your desire. If you sew for your client, you will have to listen to his wishes.
From point C down at a right angle to the upper cut of the sleeve, draw a straight line, on which we set aside the width of the sleeve plus 2 cm and place point C1.
CC1 = Shr: 2 + 2cm = 36: 2 + 2 = 20cm, and you make the calculation based on your data.

Rice. 6
We draw segment CC1 with a smooth curve. To do this, divide the distance CC1 in half, set point C2, from which we set aside 0.5 - 0.7 cm to the right. Smoothly connecting points C, C2 and C1 we get a line for the bottom of the sleeve.

Rice. 7
From point C1 to the left, parallel to the upper cut (for a straight sleeve), draw an auxiliary line until it intersects with the side cut. We denote the intersection point with the letter C3.

Rice. 8
IMPORTANT! In this design, the distance G4S3 should not be less than 3 cm. If in your case this distance is less than 3 cm, you need to lower point C3 lower along the side cut to the required value.
Note.
Point C3 can be located anywhere on the side cut of the bodice, even at the waist line.
In our example, the sleeve is straight, so line C1C3 runs parallel to the top cut.
We continue building.
To the right and down from point C3 we set aside a distance equal to the segment Г4С3 and place points 1 and 2. See Fig. 9. This construction can be conveniently done using a compass, using a point C3 as radius.

Rice. 9
We finalize the line of the lower cut of the sleeve and the side line of the bodice with a deflection between points 1 and 2. See fig. 10. In this area, after cutting, it is done guy.

Rice. 10
If the product is cut along the waistline, in this case, to ensure freedom of movement, it is necessary to lengthen the side cut of the bodice by about 1-1.5 cm. This is done as follows. From point T3 downwards on the continuation of the lateral line we set aside 1-1.5 cm and place point T31. We draw the waist line with a smooth curve, connecting points T31 and T.

Rice. eleven
Shelf.
Solution bust dart reduce by 2 cm. Use compasses to construct. From point G7, as from the center, through point B9 to the right we draw an arc. Then we place the leg of the compass at point B9 and with a radius equal to 2 cm we make a notch on this arc, denoting the intersection point with the letter B91. We connect points G7, B91 and get a new dart line.

Rice. 12
Now we reduce the shoulder line by the same distance (2cm). To do this, from point P5 to the right along the shoulder line, set aside 2 cm and put the letter P51. We connect points P51 and B91 with a straight line. We connect points P51 and P6 with a smooth curve.

Rice. 13
For further construction, we will close the chest dart (for the duration of construction) and open it at point B3. You can open it in another place, for example, in a dart at the waistline (this is not important).
To do this, connect points G7 and B3 with a straight line, cut the front along this line and close the chest dart, combining points B91 and B7, and at the same time open the dart along line V3G7. See fig. 14.

Rice. 14
We raise the edge of the shoulder up by 1 cm. To do this, from point P51 up on the continuation of the armhole line, set aside 1 cm and place point P52.

Rice. 15
We connect points B3 and P52 with a straight line, continuing the shoulder cut to the left at a distance equal to the sleeve length measurement and place point C4. In our example, the sleeve length is 58cm.

Rice. 16
From point C4 down at a right angle to the upper cut of the sleeve, draw a straight line, on which we set aside the width of the sleeve minus 2 cm. and put point C5.
In our example, the sleeve width is 36cm.
С4С5 = Шр: 2 - 2cm = 36: 2 - 2 = 16cm You make the calculation based on your data.
We shape the segment C4C5 with a smooth curve. To do this, divide the distance C4C5 in half, put a point C6, from which we set aside 0.5 - 0.7 cm to the right. Smoothly connecting points C4, C6 and C5 we get the line for the bottom of the front sleeve.

Rice. 17
I would like to draw your attention to the difference in the design of the sleeve hem line on the back and on the front.
If on the back, using the smoothness of the line of the bottom of the sleeve (section CC1), we added 0.5-0.7 cm, then on the front, on the contrary, we “cut off” the same amount, forming a concavity of the line of the bottom of the sleeve (section C4C5).
See fig. 7 (back), fig. 17 (shelf).
From point G4 down the side line of the shelf we set aside a distance equal to the segment G4C3 on the back drawing and put point C7.
We connect points C5 and C7 with a straight line.

Rice. 18
For the next step we will use a compass. From point C7, as from the center, with a radius equal to the distance C7G4, we make marks on the lower cut of the sleeve and on the side cut of the shelf. We denote the intersection points as 3 and 4, respectively.

Rice. 19
In this design, the line of the lower cut of the sleeve smoothly transitions into the line of the side cut of the bodice.
We finalize the line of the lower cut of the sleeve and the side line of the bodice with a deflection between points 3 and 4. Look at Figure 20. In this section, after cutting, we make guy.

Rice. 20
Note.
Point C7 can be located anywhere on the side cut of the bodice, even at the waistline. The main thing is that it corresponds to the position of the C3 point on the back.
IMPORTANT!
Before you start cutting the fabric, you need to check the length of the lower sections of the front and back parts of the sleeve for consistency and, if necessary, adjust. The lower cut of the front part of the bodice can be 1-2 cm shorter, this difference is compensated for by the drawstring.
We return the chest dart to its original position. See Fig. 21.

Rice. 21
Note:
The chest dart in this design can be reduced.
If you are creating a pattern for a figure with a small chest volume (in products up to size 48), the chest dart may be completely absent.
I remind you:
If the product is cut along the waistline, in this case, to ensure freedom of movement, it is necessary to lengthen the side cut of the bodice by about 1-1.5 cm, similar to the back. This is done as follows. From point T4 downwards on the continuation of the lateral line we set aside 1-1.5 cm, put point T41. We form the waist line with a smooth curve, connecting points T41 and T5.

Rice. 22
At this point, the construction of a long one-piece sleeve can be considered complete. All that remains is to add a few comments, using which you can expand the number of bodice options on the same basis.
If you need pattern tapered sleeves, this can be done by moving the lines of the upper and lower cuts as follows. From point C2 up and down we set aside ¼ of the width of the narrow sleeve. For example, if the width of a tapered sleeve is finished form 24 cm, then we set aside 6 cm from point C2 (24: 4 = 6 cm). Let us denote the resulting points by the letters Y and Y1, and connect point Y with the shoulder point P11, and point Y1 with point 2.

Rice. 23
In the same way we build a narrowed sleeve on the shelf.

Rice. 24
Now that's ALL! The construction is complete.
The resulting drawing can be used as the basis of a bodice with a one-piece sleeve for further modeling. Using methods known to you, you can use it to create a wide variety of styles of blouses, dresses, dressing gowns, etc. For example, using various options moving the chest dart, etc.
Figure 25 shows two more options for different positions of the lower section of the sleeve. Only the back part is shown here; on the shelf, the lower cut is constructed in a similar way. If necessary, you can easily handle this yourself.

Rice. 25
This is just an example. Based on your goals and desires. Don't be afraid to experiment, but remember, the risk should always be worth it. Check the pattern and only after making sure that this is what you were aiming for, start cutting.
Cutting details

Rice. 26
There are other ways and techniques for constructing a long, one-piece sleeve. We will talk about them in our next articles.
You will succeed!
Download in one file | Turbobit | | |
The rights to this article belong exclusively to the author. Full or partial use of the materials of this article in electronic publications on the Internet is possible only if the following conditions are met:
Information about the author must be preserved. In the title or at the end of the published reprint the source must be indicated: www.site, the Internet resource "Sewing Crafts Master" with a direct, active, visible to the user, not blocked from indexing by search engines hyperlink to this article.
Republication of texts in newspapers, magazines or other replication outside the Internet is possible only with the written consent of the author.
Of course, every woman wants her outfit to look perfect and unique, so many people wear clothes that they sew themselves. It is believed that the pattern of a dress with a one-piece sleeve is the simplest, because this style does not have strict lines. Any clothing with such a sleeve looks feminine and elegant. How to make such a pattern with your own hands? Let's look at a few models.

Pattern of a straight dress with one-piece sleeves: master class
The main secret of a one-piece sleeve is that it needs to be cut out simultaneously with the back, as well as the front of the entire dress.

Necessary materials:
- scissors;
- paper or old wallpaper for patterns;
- pencil;
- centimeter for taking measurements;
- chalk or a piece of dry soap.
Construction of a dress pattern with a one-piece sleeve:

This creates a sheath dress pattern, and all that remains is to cut out the drawn elements, and then transfer them to the fabric and sew them.
Dress pattern with bat sleeves
When creating this pattern, you need the same materials that are used in the previous model.
The procedure for constructing a pattern:
- To create a dress pattern with a sleeve bat, you must first draw the top of the outfit, and then increase it to the desired length of the product. When creating a pattern, you must mark the entire length of the product.
- Then you should check the width of the hip area. The width of the part itself should be a quarter of the circumference of the hips, to which 1 cm is added so that the product lies freely.
- Mark the length of the sleeve. To do this, you need to start taking measurements from the neckline itself, ending with the bottom of the sleeve. Then mark the desired size on the pattern itself according to the measurements taken.
- It remains to mark from the very bottom line of the cuffs, the length of which is approximately 15 cm. Then you need to draw another straight line parallel to the bottom line and you can start cutting out the finished pattern.

The principle of constructing patterns different models Dresses with one-piece sleeves are similar, but there are certainly differences. If you want to sew summer dress, then you can use the following pattern, substituting your measurements.
To pattern a dress with a one-piece sleeve, you do not need to have any special skills. Even novice needlewomen can handle it. Experienced craftswomen It is recommended to choose draping materials for tailoring. It is important to take into account that one-piece sleeves have certain design features, so they try to make such products as short as possible. The sleeves become an extension of the dress, which gives the whole outfit an unusual and elegant look.
On the page, the option of phased construction of the foundation is considered shoulder product dresses with one-piece sleeves and modeling of the neckline, see Figure 9. The drawing is constructed without darts and seam allowances.
Using this drawing technique, you can, without changing the base pattern, prepare it for cutting on fabric and sew a simple, comfortable nightgown. Or model many other different products (dress, blouse, windbreaker).
To construct a pattern drawing except correctly taken measurements It is also necessary to take into account allowances for a loose fit, which are determined by the type of product or model and create the silhouette of the product. Increases also provide freedom of movement and an air gap between clothing and the body.
Rules for taking measurements for a dress pattern.
For details on how to take measurements correctly, see. And to construct a drawing of the basis of a shoulder product with a one-piece sleeve with a height of 158 cm, see Table 1 below.

Step-by-step drawing of a dress pattern
The human figure is quite symmetrical, as a result of which the drawing of the back and front is drawn to half the width of the product. We start the construction with a base grid, which consists of the following construction lines:
- Vertical grid midline
- Horizontal lines of the shoulder, bottom.
Basic grid - Figure 1
At the top of the workspace we build a rectangle. Its two vertical sides will correspond to the length of the product.
AN And A1H1= 80 cm
Side AN the drawing shows the line of the middle of the pattern.
The horizontal sides are equal to the value calculated by the formula: to measure the half-bust circumference ( Pog) need to add breast augmentation ( Pg) and divide the result by two:
AA1 And НН1= (Pog + Pg)/2 = (47.6 cm + 6 cm)/2 = 26.8 cm
The opposite horizontal sides on the grid in the drawing will correspond to: AA1 with the shoulder line, НН1 bottom.
The outline of the front pattern from the back differs only in the deeper neckline, so the front and back are built simultaneously on the same basic mesh.
Back and front neckline - Figures 2 and 3.

Neck width ( Shg), back and front.
On the base grid along the shoulder line from the point A you need to set the neck width to the right ( Shg), calculated by the formula: (half neck circumference divided by three) plus the increase in neck width is equal to (see below) and put a point IN 1.
(Shg) = AB1 = ((Posh) / 3) + (Pshg)) = (18.1 cm / 3 cm) + 1 cm = 7 cm
Neck width ( Shg) is equal to the segment in the drawing ( AB1)
Shg = AB1
Back neck width( AB1) and front ( AB1) are equal. Figures 2 and 3.
Back neck depth - Figure 2.
From A we retreat down the depth of the neck, which is equal to the width of the neck ( AB1) divided by three and we get the point IN.
AB = AB1/ 3 = 7 cm / 3 = 2.3 cm
The neck of the back should be shaped with a smooth curve through points B, B1.
Front neck depth - Figure 3.
From A we retreat down the depth of the neck, which is equal to: ( AB1) neck width plus an increase to the neck width we get a point AT 2.
AB2 = AB1+ (Pshg) = 7 cm + 1 cm = 8 cm.
We form the front neckline with a concave line, connecting the points B1, B2.
Construction of the sleeve - Figures 4 and 5.
Armhole depth and sleeve length - Figure 4.
From A1 we retreat down the depth of the armhole, calculated by the formula (shoulder circumference ( Op) divided by two) plus the increase in shoulder circumference ( Pop) we get a point G(see below).
A1G = ((Op) / 2) + (increase in shoulder circumference Pop) = (28.5 cm / 2) + 7 cm = 21.3 cm.
From points A1 And G to the right we build parallel horizontal lines with a length equal to the length of the sleeve ( dr) put dots A2, G1 see figure 4.
Eg, A1A2 = GG1 = dr= 7 cm
Draw the bottom line of the sleeve with a straight line connecting the points A2, G1.

Construction of a curved section - Figure 5.
We measure from the point G down a segment equal to the length of the sleeve ( dr = GG1) put a point G2.
GG2 = GG1= 7 cm
Points G1 And G2 connect with an inclined straight line. Divide the slope in half with a point G3.
G3 = G1G2 / 2
Thus it turns out that the segments G1G3 And G2G3 are equal.
From G3 to the left, build a perpendicular with a length of 1 - 1.5 cm and place a point G4.
We draw the deflection area with a smooth curved line, connecting the points G1, G4, G2. So, as shown in Figure 5.
Design of lines: waist, bottom and side cut - Figures 6 and 7.

Extensions of the product along the waistline, bottom and construction of the side cut - Figure 6.
Along the middle line AN From point B downwards we put aside the measurement - the length of the back to the waist ( Dst), we get T.
VT = DTS= 38.8 cm.
Along the bottom line from the point H1 to the right we extend the straight line by 8-12 cm, put H2.
H1H2 = 8-12 cm.
We build the lateral line with an inclined straight line, connecting the points H2, G2.
From point T to the right we build a horizontal line. Place points where they intersect with vertical lines T1 And T2.
Design of the waist and bottom line - Figure 7
From points T2 and H2, we retreat 1.5 cm along the top of the inclined vertical line, and place T3 and H3. Segments TT1 and HH1 need to be divided in half and points T4, H4 should be marked.
We form the waist line and the bottom of a smooth curved curve through points T, T4, T3 and H, H4, H3.
Contour lines of the product - Figure 8.

Trace the outline of the dress pattern drawing with a main solid line at the points B, B1, A1, A2, G1, G4, G2, T3, H3, H4 And N. When cutting, this part is a drawing of the back. Then we transfer the front part with dots onto tracing paper. B2, B1, A1, A2, G1, G4, G2, T3, H3, H4, N.
From one drawing we get separate parts of the pattern - front and back.
Modeling the base of the shoulder part of the dress.


Modeling the shape and neckline - Figure 9
Suppose you are not satisfied with the oval shape of the neck and you want to change it to a rectangular or V-shaped one, as suggested in our example.
To do this, you need to apply a new neckline cut line to the main pattern of the front and back, and cut off the excess part, as shown in Figure 9. When changing the pattern, you should take into account that the shoulder width of the back GR should be equal to the width of the front shoulder VP.
GR = VP
The neckline can be finished with hems and left as is. It can also be trimmed with ruffles or trim.
Modeling by changing product length - Figure 9
The simplest way to model is to change the length of the product. If you want to shorten the length of the dress, draw a new line on the front and back patterns parallel to the bottom line at the same distance as you want to shorten the product and cut off the excess parts.
If you need to lengthen the product, you can glue an additional sheet of paper to the front and back pattern from below.
Then extend the fold and side line on it, measure the increase in the length of the product on these straight lines, and then draw a new bottom line parallel to the previous cut, connecting the extended side and the fold.
Cutting is a very difficult and important stage in making clothes. If you make a mistake when cutting a material, it cannot always be corrected. Before you start cutting out the pattern, you need to check several times whether the pieces are positioned correctly.

On fabric, if the edge is hard and shaggy, it is better to cut it off, otherwise over time the fabric may shrink significantly.
Then you need to find the front side based on the quality of the weaving of the fabric on the edge and the brightness of the color. We determine the lobar thread (usually it runs along the edge or the fabric stretches less along the lobar than in the transverse direction).
The pattern pieces are laid out first with the large ones, which are applied to the fold, and then the smaller pieces. Then we pin them with pins and transfer the outline onto the fabric and add seam allowances.
The amount of allowance for seams and hem of the product is determined by the type and purpose of the seam, as well as by the degree of fraying of the processed section of the part in the product. Cut the fabric exactly along the drawn allowance lines.
Bias bindings are cut at an angle of 45 degrees relative to the grain line. If the length of the material for the bias tape is not enough, then it is cut out from several parts. If there are scraps left after cutting, do not rush to throw them away, they may be useful for processing loops.
After finishing cutting out the parts, before removing the paper patterns, you should first mark them in any way convenient for you, so as not to mix up the fabric parts.
Handmade one-piece tailoring - exciting activity. If you are good at sewing, then you have a chance not only to make a thing of one style or another, but also to make it truly original. In addition, a self-sewn item is ideally suited to the characteristics of your figure and will cost much less than a purchased product. The topic of today's article is a dress pattern with a one-piece dropped sleeve made of jersey. This thing is good for both work and romantic date, and for the holiday.
Features of the cut
Designing a pattern is not at all difficult; constructing a pattern will not take much time. Just spend a little time on this work, approach it responsibly, and then the result will be excellent. The simplicity of the cut is explained by the fact that working with a one-piece sleeve is much easier than with a set-in one.
Important! The material can be anything, but for light dress It is best to use thin, flowing material (for example, chiffon). To prevent the fabric from showing through, a lining of opaque fabric is sewn under the bottom. If the product is unlined, then wear it over a T-shirt with thin straps.
A one-piece sleeve is a sleeve that is cut out together with the back and front. That is, there is no seam between the bodice and the sleeve. The silhouette is very soft and feminine. If in some models with set-in sleeves the shoulders seem somewhat angular, then a one-piece sleeve gives an airiness to the figure.
Important! The sleeves, slightly tapered towards the wrists, emphasize the beauty and grace of the arm. The effect can be enhanced if you decorate the product with embroidery, beads or cuffs.
DIY dress with one-piece sleeves - possible options
First, let's decide on the sleeve length:
- Sports women with beautiful hands, but with a wide shoulder line, products with short sleeves, since they will make the figure visually more harmonious.
- Ladies with with full hands It is better to choose a style with elbow-length sleeves.
- A ¾-length sleeve made of non-elastic material will help hide overly muscular arms.
Batwing cut
The name of the cut is due to the fact that in appearance such a sleeve vaguely resembles a bat wing. It has many advantages:
- Versatility. This cut will suit women with different body types, different ages. Dresses with a tapered skirt that reach mid-thigh are suitable for slender girls. Choice overweight women- straight, floor-length models.
- A loose-fitting product helps hide certain figure flaws - massive shoulders or overly full arms.
- A smooth shoulder cut line will emphasize beautiful shape breasts Even small breasts will look expressive, and the tummy, on the contrary, will become almost invisible.
Important! The bat style visually shortens the silhouette, so you should only wear the dress with high heels.

Choosing a style
A one-piece sleeve does not have to be wide. A tapered sleeve is usually cut out of elastic fabrics. Such products are used in sewing outerwear or jackets.
Cutout
The choice of neckline is entirely up to your taste. Everyday dresses look good with a boat neckline and drapery near the collar. The collar collar also looks great. An evening product is appropriate with deep neckline or a cutout on the back.
Important! Brave ladies who are confident in the beauty of their figure can experiment with a back neckline that reaches to the waist.
Textile
For dresses of this type, well-draped textiles are best suited. For outerwear, give preference to soft, dense material. Elegant dresses are made perfectly from satin, velvet, chiffon, natural silk.
Who is the style suitable for?
As already mentioned, models with one-piece sleeves are universal, suitable for both slender and plump ladies. Girls with a “triangular” figure balance a narrow bottom and a wide top. For women with a “masculine” figure, a one-piece sleeve adds femininity, grace and sophistication.
However, there are exceptions to the rule. One-piece sleeve is a taboo for women:
- with large lush breasts;
- with large facial features;
- with an “apple” figure, with fat deposits in the chest and abdomen.
Straight dress with one-piece sleeves
You can make the base yourself or use a ready-made one. You can order the base from a professional seamstress and model various styles yourself.
Important! The same base is used for different types dresses - cut-off with a high waist, with a flared skirt, with reliefs, etc.
How to sew a dress with one-piece sleeves without a pattern?
We take the size of the canvas 2.0x1.5 m:
- Fold the fabric in half so that you get a 1.0 x 1.5 m sheet.
- Fold the fabric again. The side with a length of 1.0 m is the length of the product. The smaller side is a sleeve and ½ shelf.
- Measure 7 cm from the top down and to the side. Draw a smooth line to create a neckline. If you extend the neck line to the side, you will get a boat neckline.
Important! Draw on fabric with chalk or soap. Moreover, the latter option is preferable, since the soap can be easily removed with an iron.
- Set aside a quarter of the hip width from the middle, add 1 cm for the seam allowance.
- Draw a line parallel to the middle of the fabric. For example, if the total hip circumference is 96 cm, then step back from the middle by 25 cm (24+1). You will get 2 shelves - front and back.
- Step back 200 mm from the top fold - this will be the armhole line. Connect the armhole to the bottom using a smooth line.
Important! The batwing style features an armhole to the waist. The armhole line forms a semicircle.
- Now cut out the pieces, keeping in mind the seam allowances. Separately cut out the neck facing. If you plan a zipper at the back, take this into account at the cutting stage. Now all that remains is to stitch the seams of the product, process the neckline, sleeves and bottom.
Spring is coming, and that means it's time to put on dresses. Any dress looks very feminine on the figure and looks impressive. Let's try to figure out which dresses are suitable for whom.
1 Piece Sleeve Dress
Such a dress will always be relevant, because it gives a special femininity to the one who wears it. with a one-piece sleeve, it differs in that there is no seam between the sleeve and the details of the bodice. There is no angularity here, which is inherent in models with set-in sleeves.
This version of the dress does not allow you to clearly determine where the shoulder line ends. With this model you can emphasize the fragility and grace of your wrists.
Knitted dress
If you need to quickly update your wardrobe, then the best option- this is sewing a knitted dress. The pattern for a dress with one-piece sleeves is simple, and sewing it will not take much time. Therefore, pay attention to this option.

There is no need to make darts on such a dress; in any case, you don’t have to do them if your knitwear is stretchy enough, such as butter knitwear.
The pattern can be made directly on the fabric, or you can take a ready-made dress and trace the details. The pattern for a full sleeve dress made of jersey is very simple and can be created even without being a sewing professional. may be minimal.
When working with knitwear, you need to follow certain requirements, otherwise your dress pattern with a one-piece sleeve will turn out incorrectly. Do not stretch the fabric when cutting. It is best to mark cutting lines on fabric with chalk. The dress pattern with one-piece sleeves made of knitwear is loved by many dressmakers.
It is best to sew the details of knitted fabrics on a special sewing machine"overlock" or double needle of a regular sewing machine.
Silk dress
A dress with a one-piece sleeve made of silk looks very elegant. This is usually a dress with a baton sleeve or a kimono sleeve.

The pattern for a dress with one-piece sleeves (Burda Moden often offers these) is simple. But tailoring it has its own characteristics. Can be either lined or unlined. A lining is required if the silk for sewing is translucent or if your dress will be tight-fitting.

A dress pattern with a one-piece sleeve is not necessary in this case. You will need three to four meters of material that drapes in folds. It can be chiffon, satin, silk, satin, corduroy.
First you need to mark the middle of the material with chalk. The shoulders will be here. Put fifteen centimeters down, an armhole for the head will appear here. The armhole must be made carefully; it can be round, oval or rectangular. Mark the place where the belt will be on the dress and tie the waist with a ribbon. Don't forget to trim the edges of the fabric to prevent them from splitting. You can use a sewing machine, or you can do it by hand.
Leather dresses
Genuine leather is an interesting material from which, if desired, you can create outstanding products. A dress pattern with a one-piece sleeve made of leather will allow you to create Nice dress that you can wear for an evening out and more.

When going to the store to buy leather, remember that it is sold in pieces. Therefore, you need to calculate in advance how much leather you will need. For this you need finished pattern dresses with one-piece sleeves.
Before sewing a leather product, sew it from a cheaper material. This way you can check how it fits on your figure. When you sew leather on sewing machine, it is recommended to lubricate the skin on this section with sunflower oil, so your machine foot will move better.
You are unlikely to have to wash a leather dress. It's better to take it to the dry cleaner. All tips also apply to artificial leather, but it will be easier with it, since it is sold by the meter.
Linen dresses
Linen is a beautiful natural material from which a wide variety of products are created. A linen dress is perfect for wearing in the summer heat.
A dress pattern with a one-piece sleeve for linen exists, but some cutting features must be taken into account. Linen can shrink a lot when washed. Therefore, initially you need to purchase ten percent more of this fabric, and be sure to wash and dry it before cutting.
Print dress
Chintz is a well-known material that is inexpensive and comes in a wide variety of colors. That's why he's so popular. This material will make you a great dress for the summer.

The pattern for a dress with a one-piece sleeve made of chintz is very simple, and you don’t even have to take it from magazines. You can cut directly onto the fabric. You can sew a long one for yourself cotton dress in just an hour.
To do this you will need: two meters of cotton fabric, threads matching the color, tailor's chalk, scissors and a ruler, a sewing machine and an overlocker. Fold the fabric in half, you will end up with a square.
Draw a circle on the fabric with chalk and create a neckline. The result should be two parts that are shaped like a cone with a cut off top. There should be two side seams.
The side seams are sewn down using a sewing machine or overlocker. You need to leave 27 centimeters on each side for the armholes. From the remaining material you need to make a belt ninety centimeters long and ten centimeters wide, with which you will decorate the waist. The dress pattern with one-piece sleeves, a photo of which is in the magazine, is also suitable for chintz.
This dress can be worn with both sandals and high-heeled shoes. It is suitable for a simple walk or for evening out into the world
Chiffon dress
Chiffon is a very beautiful thin fabric from which you can create a great dress. But if you don’t have much experience working with this fabric, then it’s better for you to start by sewing loose models from it, since chiffon tends to “pull apart” at the seams. A dress pattern with 3/4 full sleeves for chiffon will work.
If you are cutting chiffon, be sure to use patterns. Before cutting, it is advisable to lay flannel cloth or a heavy blanket on the table, this will make it more convenient for you to cut. To make cutting easier, you can spray the chiffon with hairspray. At the same time, the needles with which you will sweep the chiffon must be even and not have jagged edges.
The dress pattern with one-piece sleeves is very suitable for chiffon, and sewing such a dress will not be difficult for you. The neckline of such a dress will be V-shaped, and it will need to be processed using a facing.
The front and back pieces need to be folded together and then the side and shoulder seams are sewn. Please note that the threads for this work must be thin so as not to tear the fabric. If you want to process them on an overlocker, then a three-thread seam will be quite enough, and you need to use threads no thicker than 40 count.
First, seams and cuts are processed using an overlocker. And then the edges of the sleeves and the bottom of the dress are sewn on a sewing machine. We determine where the waist is on our dress and sew an elastic band there. It is advisable to sew it in two lines.
Dress pattern with one-piece sleeves
You can sew such a dress by following the instructions of the Burda Moden magazine. To get the evening version, you need to take four meters of silk fabric with a width of 140 centimeters. A hidden zipper 60 centimeters long will come in handy.
The pattern kit includes the front front, which is cut together with the sleeves, the back along with the sleeve, the side part and the facing of the back neckline. There is a fold on the front that needs to be folded and basted, the fold should be ironed and stitched using a sewing machine.

The side parts need to be stitched from the corners, while the front and back allowances are notched in the corners. The lower parts of the sleeves are sewn to the one-piece parts of the sleeves and then sewn into the armholes of the side parts from corner to corner.
The dress is turned right side inward; you need to overcast the inner edge of the front neck facing. Use a single stitch to sew the shoulder seams and the top seams of the sleeves. After this, the dress is turned right side out. The hem allowances for the hem are ironed to the wrong side and can then be hemmed by hand.
The middle sections of the back parts are processed as follows: a hidden zipper is sewn onto them. The ends of the hidden zipper remain exposed.
 What nail design to choose this summer: photos of new items Manicure fashion trends summer for short
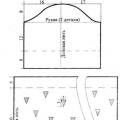 Sew a strawberry hat for girls with your own hands
 Who introduced the concept of physical education