How to make a rooster out of tinsel on the wall. How to make a rooster out of paper
Most guys are preparing for the New Year various crafts. Everyone wants their product to be interesting and original. You can choose bright and unusual options crafts for kindergarten for the year of the red rooster. Kids will definitely love making fancy birds with their own hands.
Master class: Cockerel made of pine cones and wireYou can consider in detail one of the options for making the symbol of the coming year. To create a symbol you will need:
- cone;
- chenille wire orange or red;
- eyes for toys;
- glue;
- acrylic paint;
- scissors.
Progress:
 Craft ideas for the year of the rooster
Both kids and parents will definitely remember the time spent on crafts for the garden - a rooster made by the whole family will become a worthy participant in an exhibition or competition in a children's institution:
- From paper. This material is affordable, but at the same time allows you to create a wide variety of products. It could be simple toy, glued from paper blanks.
- Made from plasticine. Modeling is one of the favorite types of creativity among preschoolers, so they will love the idea of making a cockerel in this way.
- Kids won’t be able to sew a toy, but with voluminous applique They can handle it from the blanks.
- From scrap materials. A rooster craft for kindergarten can be made from an ordinary disposable spoon, a cotton pad and pieces of paper. Such birds will be an excellent addition to New Year's compositions.

Many guys like to make something from cut out palms, and the symbol of 2017 can also be made this way.

In kindergarten it can also be three-dimensional based on a paper cone or cylinder. Such toys can simply become decorations for the room, or you can attach a ribbon to them and hang them on the Christmas tree.


Assiduous children can be invited to create an applique from buttons and beads.

Older preschoolers, together with their parents, can make a rooster craft for kindergarten with their own hands using real feathers. The product will look impressive and elegant.

The most long-awaited holiday for children and adults is the New Year, which everyone is looking forward to with great impatience. Decorating an apartment so that you feel the arrival of something fabulous and unusual is of paramount importance. Despite the fact that it is the 21st century, many are interested in how to make New Year's toys DIY for 2017. In this article we will look at various options making Christmas tree decorations for the New Year.
Rooster on the Christmas tree
Next year is the year of the Rooster, so you can create it from paper or other materials and hang it on the Christmas tree. You can make a lot of such cockerels and collect the pendants into a garland to decorate your home. If you are going to make a paper cockerel, use cardboard as a base, which you will cover on both sides.

- You will need multi-colored sheets of colored paper (you can use colored cardboard) and a sheet of cardboard. Draw the silhouette of a rooster on cardboard and cut it out.
- Using a cardboard blank as a template where necessary, draw the details on colored paper (cardboard): head, torso, wings and tail - first fold the sheets in half so as not to waste time preparing blanks for the second side.
- The next stage: we cut out our blanks.
- Now we glue the parts made of colored paper (cardboard) onto the cardboard blank. After the cockerel has assembled into a whole picture, you can decorate it with sparkles, beads - whatever comes to mind.
- Make a hole in the blank, thread a ribbon and hang it on the tree.


You can make a similar toy from felt and also use it to decorate a Christmas tree.


Draw the pattern by hand or use any ready-made one, for example, this one:

Homemade cockerels made using the origami technique will look original.

pillow toy
Not easy, but very exciting activity for making toys is the creation of a pillow in the form of a symbol of the year, which will delight you not only in the year of the Rooster, but much longer. You will need a pattern, fabric, filler, felt (depending on the chosen model), thread and needles. Here it's a matter of small things, we trace the pattern, sew the parts together, leaving a hole to fill the pillow with filler. We turn it inside out, put the filling inside the toy, and sew it up until the end.
Read Street fashion winter 2016-2017
Photos and patterns


There is also a more complex plan with fabric painting - this is batik, thanks to which the pillow will acquire a bright color. After you have traced the cockerel on the fabric, paint it using special paints; they can be replaced with gouache if you mix it with PVA glue. We leave it for a day so that the paint dries and continue to finish the pillow in the shape of a rooster.
From salt dough

Children are often asked to bring some New Year's crafts to school competitions. Make it from salt dough. A craft made from bioceramics can also be an excellent gift from children to grandparents. Moreover, this activity is so exciting that it quite claims to be a hobby.
Before you make a toy from salt dough, you need to prepare the dough itself. To prepare the dough, use fine table salt, regular wheat flour and water in a ratio of 2:4:2, respectively. First, mix flour and salt, and then add warm water, kneading the dough thoroughly for at least 10 minutes.
There is another recipe for making dough. In this case, take flour and salt in the same proportions, only the flour is pre-sifted. You need to take a little less than 1 1/3 cups of water. The cooking method will vary. According to this recipe, water must be brought to a boil and salt dissolved in it. Only then is flour added.
When the dough is ready, start making crafts. If you are doing crafts with your child, simplify the task by taking cookie cutters, for example, in the shape of Christmas trees or bunnies - they will turn out wonderful Christmas decorations. Make a toy (you can use beads or seed beads for decoration), don’t forget to make a hole at the top. To harden the toy, it is left for 24 hours or baked in the oven. After the toy has hardened, it is painted acrylic paints, gouache, watercolor, allow to dry well and cover with either colorless nail polish or nitro varnish for wood. Thread a thread or ribbon through the hole. So the New Year's gift is ready.
Photo ideas for crafts made from salt dough


Soap figures
Soap is always useful. A little unexpectedly, soap can also be used to decorate a Christmas tree. Soap toys for the Christmas tree are made by hand. The process is simple. First, we grate the baby soap on a coarse grater, melt it in a hot bath (make sure no bubbles form), pour the liquid into a mold and leave until it hardens.
Read Video: Zumba for weight loss

- If you want to make colored soap with a pleasant aroma, then add dyes to the base - these can be like food colorings, as well as the juice of berries or vegetables, for example, cherries, beets, carrots. Smell can be added using perfumes or flavorings.
- If instead baby soap use ready-made transparent soap base, then you can make soap with a “filler”. After you fill the mold halfway with melted soap, let it sit for 20-30 minutes, place a slice of lemon or orange on top, coffee beans and fill the mold completely with soapy liquid.
- In order for the soap to also have a beneficial cosmetic effect, ground coffee is added to the base, which will work as a scrub, various oils, lemon zest, ground cereals. Such a toy, which doubles as an excellent gift, will definitely not go unnoticed.
Big toys
Using threads, you can also create wonderful decorations without small size- giants. Just inflate the balloon, wrap it with a thread soaked in PVA glue and leave it for 24 hours. After drying, the ball is burst, leaving an airy New Year's toy made of threads, which, for decorative purposes, can be coated with silver or gold paint, decorated with beads, seed beads, sequins, and ribbons. Thread the ribbon and the accessory is ready. If you prepare two or three balls of different sizes, you can make a snowman.

Christmas trees are made from threads using the same principle. Use a Whatman paper cone as the base on which you will wind the thread. You can make such a toy in miniature if you take a simple sheet of cardboard instead of whatman paper. Light beads and ribbon bows are useful for decoration.
By the way, use a cone of whatman paper for the base if you are going to make Father Frost and the Snow Maiden. It is enough to glue such a cone, paint it, or make clothes from paper or fabric. The head can serve as an inflated balloon ik with a painted face.
For giant toys, boxes from under household appliances, which can be covered with foil, colored paper, appliques, or even made into a Nutcracker.
Read How to organize yourself

Snowmen

Snowmen made from socks – there is nothing more primitive, but it looks very original. To do this, we fill the sock with sand, buckwheat, and with the help of threads we give it a shape and sew on buttons. A white sock can be used to make a base, and a colored sock can be used to make clothes. Cute snowmen can also be made from an unnecessary light bulb; it is simply painted with acrylic paints and decorated with cotton wool and sparkles.

Small accessories will complement your festive table. Let's paint the wine glasses with acrylic paints. If you know how to draw, then you can easily cope with this work, if not, then use stencils. Be careful because... paint may run.
Sweet decorations
The following options are clearly for those with a sweet tooth.
Caramels
The appearance of Christmas tree decorations can be deceiving, because they may well turn out to be sweet candies. It's very simple: first, mix 300 g of sugar and 100 ml of water, put on fire, stir until the sugar melts and the syrup begins to boil, acquiring golden hue. The finished syrup is poured into pre-greased molds. vegetable oil, and leave to cool completely until the caramel hardens. Then we carefully wrap the candy in crispy plastic, tie it with a ribbon and you can safely hang it on the Christmas tree. It's even easier to melt caramel in molds.

Christmas tree made of candies
The New Year cannot be complete without a Christmas tree; a candy tree is not only a decoration, but also a delicious gift with which you can please your friends or family. But even a small child can handle the manufacturing technology:
- Make a cone out of cardboard, glue it or secure it with a stapler.
- Using the same stapler or glue, attach the candies.
- Lightly wrap the Christmas tree with tinsel.
- Ready.

A lot of toys can be made from scrap materials, the most important thing is imagination and the desire to make something unusual.
Photo


By eastern calendar the coming 2017 will pass under the auspices of the Fire Rooster. The Rooster loves rich colors in clothes and interiors, natural materials and original items. All these characteristics correspond to New Year's crafts that are suitable as souvenirs for friends and family. You can make a beautiful rooster with your own hands from different materials: paper, cardboard, cotton pads, fabrics. And to New Year's party V kindergarten or primary school you can sew a costume for the symbol of the coming 2017. In our article today, we have collected for you the most vivid and interesting step-by-step master classes with photos and videos of cockerel crafts for children and adults. Be sure to use them to create original gift for the New Year! And such a rooster with his own hands will certainly attract good luck to you!
Symbol of 2017 Rooster made from cotton pads with your own hands for kindergarten - master class with step-by-step photos
The first master class on creating the 2017 symbol of the Rooster with your own hands for kindergarten contains two options for crafts - from cotton pads and colored paper. An ordinary plastic spoon is used as the basis for the bright cockerel. Find out how to make a rooster symbol for 2017 with your own hands from cotton pads for kindergarten from the instructions below.
Necessary materials for a rooster made from cotton pads with your own hands for kindergarten
- disposable plastic spoon
- cotton pads
- white and colored paper
- scissors and glue
- marker
Instructions for a master class on a rooster made from cotton pads for kindergarten
- For the first option for kindergarten we will need: two cotton pads, a plastic spoon, paper and glue. First we make the wing blanks. Cut out wings from a piece of white paper folded in half, as in the photo below. Cut out a beak and scallop from red paper.

- Let's move on to assembling crafts for kindergarten. First we lay out a cotton pad, then the wing blank, and a spoon on top. Coat the second cotton pad with glue and place it on top, pressing it tightly with your fingers. Set aside until completely dry.

- Let's move on to the second option. For this in kindergarten we will need: yellow paper, a plastic spoon, glue, a piece of red paper. We cut out the shapes of the scallop and beak from red paper.

- Turn the spoon over and coat it generously with glue. Then wrap it in a piece of yellow paper and let it dry.

- Cut out a square from yellow paper and thread it through the leg, as in the photo. Fix with glue or tape.

- Glue the scallops and beaks to the blanks, and draw the eyes with a marker. Ready!
A simple do-it-yourself paper rooster for an elementary school or kindergarten - step-by-step photos of a children's craft
The next master class is devoted to simple DIY rooster crafts made from paper and cardboard and is perfect for elementary school or kindergarten. And don’t think that such a craft is purely decorative. A simple do-it-yourself paper rooster for an elementary school or kindergarten can be used, for example, as a cap for a New Year’s costume.

Necessary materials for a paper rooster for elementary school or kindergarten
- cardboard
- colored paper
- scissors
- pencil
- eyes

Instructions for a master class on New Year's crafts DIY paper rooster for school or kindergarten
- We roll a sheet of yellow cardboard into a cone shape and mark the joint line with a pencil.

- Apply glue to the cardboard and press firmly for several minutes. When the cone has set a little, cut off the excess edge.

- On orange paper we make marks for the tail blanks. We measure strips approximately 2-3 cm wide along the entire length of the sheet.

- We cut out the strips and wrap them tightly around a pencil.

- We remove and get wavy “feathers” for the tail of our cockerel.

- On white paper we outline two blanks 5 cm wide and cut them out.

- We fold each strip like an accordion and glue it to the base of the cone - these will be the legs of the rooster.

- We make wing blanks and small circles for the feet from orange paper.

- Glue the wings. We cut out two blanks for the scallop from red paper.

- Carefully glue the comb to the top of the cone, clasping it on both sides. We also cut out the blank for the beak and attach it.


- All that remains is to glue the eyes and ours New Year's craft ready for kindergarten or school with your own hands!
DIY craft for the New Year 2017 of the Rooster from salt dough for school
Salt dough is an excellent material for DIY crafts for school, including for the 2017 New Year of the Rooster. Our next master class is suitable for both kids and adults. How to do original craft for the New Year 2017 Rooster to school with your own hands from salt dough, read on.

Necessary materials for the New Year's toy DIY salt dough rooster for school
- salty dough
- watercolor paints
- water and brush
- beads
- plasticine knife
- cardboard
Instructions for making a rooster for the New Year 2017 from salt dough for school
- Salted play dough is easy to make. You need to mix 1 cup of flour with half a glass of coarse salt and half a glass of water. Knead a non-sticky dough and get to work. Roll the dough into a thick sausage and distribute it over the cardboard in the shape of a heart.

- From pieces of dough we form an eye and a beak. We attach them to the main part, lightly lubricating the joint with water.

- Add a comb and use a plasticine knife to make textured simple patterns on the body.

- We make 5 small balls and form a tail out of them.

- We make the wing from a larger ball and add texture to it with a knife.

- We decorate the rooster using beads or pearls.

- We use watercolors to paint a craft for school in bright colors.

- Let the paint dry a little and add color. We dry the craft with our own hands in the sun.

DIY Christmas toy Rooster made of felt, master class with photo
The next master class will tell you how to make a New Year's rooster toy out of felt with your own hands, for example, for school. Felt is a very simple and pleasant material, so don’t be intimidated by it. And a ready-made New Year's toy in the shape of a felt rooster will become a decoration for any Christmas tree.

Necessary materials for making a New Year's felt rooster with your own hands
- foam ball
- thin felt white and red
- red threads for knitting
- pencil, paper, scissors

Instructions for a DIY Christmas rooster toy made of felt
- Measure the diameter of the ball using a paper strip.

- Divide the strip into five equal parts and mark it on paper.

- Transfer the marks to the ball.

- We make markings on the ball, as shown in the photo below. Using a utility knife, make shallow cuts along the marks.

- From white felt we make 5 leaf-shaped blanks.


- We place the blanks on the ball and use a thin nail file to fix their edges in the slots.

- Now we cut out the blanks for the wings and head - two pieces each.

- Between the two parts for the head we fold a red thread imitating a comb. We also make a beard out of it. Glue and add eyes and a beak made of red felt.

- We trim the wings with red thread and glue them to the main part of the craft.

New Year's rooster for a DIY gift, step-by-step master class with photos
DIY New Year's rooster from step-by-step master class Below is perfect for a gift. You won’t be able to make it in kindergarten or elementary school—it’s too complicated a craft for children. But for creative adults, a DIY New Year's rooster as a gift (master class with photos) is perfect. Besides, finished craft It turns out to be good quality (this is not a craft made from cotton pads or paper), although it is made from a cardboard tray of eggs.

Materials for a New Year's rooster for a DIY gift
- cardboard egg tray
- scissors
- acrylic paints
- ball
- newspapers
- cardboard
Instructions for making a DIY New Year's rooster craft for a gift
- We cut off the internal partitions, cut them in half and connect the two pieces together.

- We cut off the side convex parts of the tray, as shown in the photo. We form the beak from a small triangular piece.

- From the flat part of the lid we cut out 5 blanks for the tail. From the remaining parts of the tray we cut out oblong blanks in the shape of leaves.

- Glue the leaf blanks onto cardboard in the shape of a wing (2 pcs.). We assemble the neck from the first blanks, add a beak and a comb made of cardboard. Inflate the balloon and wrap it with strips of newspaper dipped in glue.

- Let the papier-mâché dry and deflate the ball, cut off half of the workpiece and proceed to assembly.

- Paint the finished rooster with acrylic paints.


Despite its simplicity and cheapness, paper is one of the most interesting materials for crafts and creativity, because from it you can make so many different beautiful things with your own hands: appliques, flat and three-dimensional figures using the origami technique, entire paintings using the quilling technique, luxurious panels and much more.
In addition, there are so many varieties of paper and such a diverse range of colors that with its help any creative ideas and ideas.


Try to start by making not very complex products. For example, with some variation of the image of a cockerel.
What could he be like?
Many master classes are devoted to creating a paper cockerel with your own hands. You can make it the most different ways, depending on what image is expected, as well as on the purpose of manufacturing this product:
- If your child needs a craft for kindergarten, then help him make an applique with his own hands. To do this, you just need to print the template, cut out its parts, and then use them to make the same elements, but from colored paper. Glue all the parts onto cardboard to make a cockerel. Complete the applique - draw or also make grass and flowers out of paper, sunny skies, grains for a rooster, you can even create a whole family by adding a hen and chicks. It will turn out very beautifully if you take thick, shiny or velvet paper. You can decorate the craft with sparkles;

- The applique can also be experimental - for example, try gluing parts made of feathers and corrugated paper onto a blank figurine of a cockerel, but not just like that. If you dip the colored corrugated paper into a bowl of water and rinse it a little, the water will become colored and the paper will acquire interesting stains - this will add originality to the applique and make the craft unique;


- Another one interesting option DIY appliques - make a lot of blanks from children’s hands outlined on paper, then cut them out and chaotically glue them to the blank body of the cockerel, adding some more elements;

- With small children, it’s easy to make a three-dimensional cockerel with your own hands, which will become a wonderful character in paper puppet theater productions and will be useful for staging various fairy tales. To make it, you will also need a template from which you will need to cut out the parts. The base and body of such a cockerel will be a cone (it needs to be glued), and a cylinder-shaped head will be attached to it. Bend the rectangles along the fold lines, and form the wings, tail, comb and beak from the strips. Glue all the parts (see assembly diagram);
- It’s even easier to make a figurine from a paper cone with your own hands - cut and glue a cone out of colored paper, and glue eyes, a beak (folded triangle), a comb, feathers and a tail made of many stripes, as well as paws from an accordion to it;

- crafts made using simple and modular origami, the rooster will be described below;

- using the paper-plastic technique, you can also make interesting modular figures with your own hands - for this you will need a diagram and a template, according to which you need to cut and glue the parts, and then model a cockerel figurine;
- If you have at least minimal skills in quilling techniques, you can create entire paintings and panels. The easiest way is to use a ready-made bird template, onto which you just need to attach multi-colored shapes. To make more complex products, you can watch a special master class. Some masters even combine various techniques, for example, the body and head of a rooster are made from paper pulp or papier-mâché, and the tail, comb, wings and other details are made using the quilling technique (the “droplet” element);
- making a cockerel from corrugated tubes twisted from multi-colored corrugated paper will also look like quilling;


- beautiful and original figures can be made from the same papier-mâché and even from paper egg trays.

Making a cockerel using origami technique
- A beautiful cockerel is quite easy to obtain after some manipulations with a square sheet of paper. Mark the fold lines and fold the sheet diagonally. Then bend the corners of the fold lines.
- Bend about half of the paper figure back and make bends on both sides.
- Fold the top corner up and inward, and then turn the fold out.
- Then the upper corner bends to the right and inward again, and the fold bends first inward and backward, and then inward and forward. After this, the corners are bent on both sides inside the figure.
To make a modular cockerel, you will first need to make separate modules for it (about four hundred pieces), and then connect them together.
Making a cockerel from paper egg trays
- To make an original and beautiful cockerel from paper egg trays, take the tray, disassemble it into cells and cut out, as if individual tulips.
- Then glue them together using thin paper.
- Cut out the cockerel's beard from the tray and make a beak.
- Prepare cardboard blanks and start gluing feathers in rows from small to large.
- Make the belly of the cockerel like this: cover the balloon with scraps of newspaper and white paper. When it dries, cut it into two parts (they should not be equal).
- Take the larger one and insert the smaller one into it. Start assembling the cockerel by attaching the wings, tail, legs and face with all the details.
- Paint the product with pearlescent acrylic paints, changing colors and shades to make the rooster bright and colorful.
- To make it stand well and steadily, you can attach it to a stand and decorate the empty top colored eggs or other decor.
In order for the symbol of the New Year 2017 to be favorable to you, and for the Fire Rooster to protect you all your days, it is best to appease the cockerel with a craft made with your own hands. Such a unique handmade item will not only be an excellent gift for family, acquaintances or friends on New Year’s Eve, but will decorate your room and give it a special flavor.
The rooster is a difficult symbol; this poultry loves only everything natural, so that there is coziness and comfort everywhere, but at the same time it does not tolerate dullness. To make a craft with your own hands for the New Year 2017, you need to use your imagination and Creative skills. Below we have selected detailed master classes, about how to make a craft with your own hands, dedicated to the symbol of the coming 2017 - the Rooster. To do this, you can use pieces of multi-colored fabric or paper, threads and other materials. The ideas we offer are easy to implement and do not require specific skills, you only need desire and imagination. You can bring your ideas to life together with your children; creativity is great for development fine motor skills, and joint activities with your child will bring you even closer to each other.
If you are planning to make a craft with your own hands for the New Year 2017 with your children, then most of all they will like the rooster made from plasticine mass. To do this, you only need multi-colored plasticine or modeling dough.
First you need to make three balls of yellow plasticine, small, medium and large sizes- head, neck and body itself, now they need to be connected to each other, carefully smoothing out the boundaries. It is necessary to make two cuts on the sides of the body into which the wings of the rooster will be attached. A comb is formed from red plasticine, a beak is formed from orange, and eyes are formed from black plasticine.
To make a tail for a craft with your own hands, you can choose several colors at once, roll several sausages and flatten them, build a fan out of them and attach them to the body. Now the symbol of the new year 2017 needs to make wings; for this, red plasticine is suitable; from it you need to make two triangular or teardrop-shaped wings. Feathers can be formed with a modeling knife or a piece of plexiglass. It’s better to use the feathers themselves as wings; cut them out of colored paper.
Pillow as a gift
A wonderful gift for family and friends for the New Year 2017 will be a pillow with a picture of New Year's symbol- Rooster. This DIY craft will not leave anyone indifferent, and if you decide to make a pillow for yourself, it will give comfort and coziness to any room. A cute accessory will enliven the interior of a nursery, bedroom or kitchen; hens and cockerels will be able to fit into your favorite style. It is very easy to create such a New Year's miracle. The idea is to appliqué the image of a cockerel onto a ready-made pillow, however, if you have sewing skills, you can design the pillow or thought yourself.
First, you need to make a pattern of body parts from sheets of paper, then you need to attach the patterns to pieces of fabric and cut out the parts. Then all the parts are sewn onto the pillow base. Flowers, insects and any other decor that will help revive the finished picture will become a wonderful decoration for the symbol of 2017. In addition to the owner of the year, you can make several cute chickens with your own hands, making them from fabric, choosing bright combinations colors. Relatives and friends will appreciate such an unusual craft.
Paper cockerel
An excellent gift for the New Year can be a rooster or chicken made of paper. It's very easy to do and doesn't require any special creative skills.

The main thing is to prepare the necessary materials:
- scissors;
- several sheets of colored paper;
- glue;
- several paper boxes of various sizes.
First you need to cut off the top part of the box, make cuts along the fold lines up to half the height of the box itself. To form the wings, tail and head, you need to bend the cut points. The wings must be rounded using scissors. For the tail, make several cuts to the very end, give the head a triangle shape. To make the cockerel bright, you need to cover it with multi-colored paper.
Postcard with a cockerel
So nice to congratulate your beautiful family and friends on the New Year 2017 New Year's card with a hand-made image of a rooster. For this craft you need very little:
- scissors;
- paper;
- Double-sided tape.
And of course, a little imagination and desire.
Templates for the background and figures of the New Year symbol can be found on the Internet, printed on a color printer, and then cut out. If you have the skill of an artist, you can draw it yourself.
The color blue is suitable as a background for the craft; it’s good to add a few snowflakes to it; scrap paper with a New Year’s image already applied is also ideal for the background.
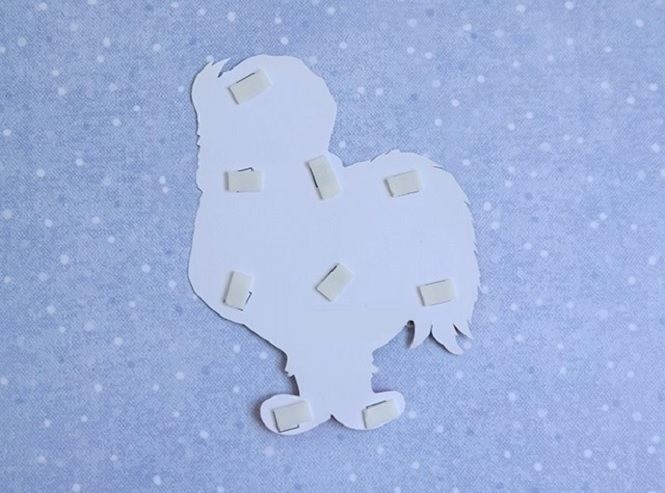
Next, we glue double-sided tape onto the inside of the cockerel figurine and attach it to the postcard to make a three-dimensional drawing; you need to cut out the same figurine from paper two more times and stick it on top of each other, clearly aligning the contours.

Then you can make an inscription wishing everyone a Happy New Year 2017! And inside the postcard you can write poetic congratulation. We think everyone who receives such an original craft will be very pleased. The ideas that you embody in your creativity always delight the soul and heart of a loved one!
Knitted gift
For those who know how to knit, an excellent solution would be to make a knitted potholder, which is also perfect as a hot stand. This DIY craft for the New Year 2017 will be an excellent decor for any kitchen and will add a special flavor to the interior.

For a knitted symbol you will need:
- remnants of thread in four colors (yellow, red, brown and white), both wool and cotton are suitable;
- four black buttons;
- medium thickness hook.
The tack is performed as follows:
- first you need to make a pattern of the future rooster on paper or fabric, draw its outline;
- then the body and head of the bird are knitted from brown threads;
- The shirtfront is knitted with white threads;
- red threads are suitable for the comb, and yellow threads for the beak.
You can knit a cockerel either as a whole or separately in parts, and then sew them together. Further new potholder steam well. The gift is ready!


Anti-stress cockerel toy
It would be a great idea to make a funny New Year's anti-stress toy with your own hands; many people simply adore things of this kind. Such a cockerel can not only be crushed, but placed on a shelf as a decoration, and it will delight the eye all day with its unusual appearance.

To do this, you will only need pieces of multi-colored fabric, it is better to take cheerful colors, a thread with a needle, and a special filler for anti-stress toys (you can also take regular cotton wool).
- cut a square out of fabric;
- from a red piece we make a comb and beak;
- sew the details onto the corner of the square;
- We place cotton wool or other material inside the resulting cavity;
- Next you need to sew the edges together so that you end up with a pyramid.
New and original toy ready, we are sure that all family and friends will like it.
Mother hens
Instead of a rooster, you can make chickens; children will definitely like such unusual New Year's toys. First, you need to cut out patterns for future birds from paper. Next, apply the parts to the fabric and cut out the finished parts, then sew them together, filling the inner cavity with cotton wool.
The beak, comb and eyes are made separately, then they are sewn to the finished toy.
You can decorate the chickens with different colored beads, rhinestones, or cut out flowers from colored paper and glue them to the body.
Heart shaped cockerel
A great idea would be a New Year's gift to your loved one in the form of a heart-rooster. To make a toy, you will need a piece of felt, from which you need to cut two pieces in the shape of a heart. Next, the figurine is filled with cotton wool, a tail, comb and beak are cut out of multi-colored fabric and sewn to the heart.

So that such an original cockerel can be hung, you can sew colored braid along the middle of the body. You can make colorful Christmas tree decorations in a similar way; for this you need to cut out small hearts. Such original jewelry They will always cheer you up and will be an excellent decoration for any home interior.
Button figures
Well, probably the most unusual thing will be a cockerel made of multi-colored buttons. You will need bright buttons of different sizes, rhinestones, glue and a thick sheet of cardboard. First you need to make a sketch of the future rooster on cardboard. Next, the image is made with buttons, and the gaps are filled with rhinestones. The finished painting can be placed in a frame.


Now you know that making a symbol for the coming year is very easy. The main thing you need for this is time, patience and a little imagination.
 How much fabric is needed for a dress: simple methods and basic calculation nuances
 Beautiful Christmas tree decorations made of plywood: we make decorations with our own hands using a jigsaw
 Manicure with acrylic paints at home