Do-it-yourself bird of happiness from fabric. How to make a bird from fabric with children
In Russia, children's toys were often at the same time amulets. One of such fun for kids was the bird of happiness. Fairy birds were made with their own hands from scrap materials (wood, straw, fabric, etc.) and hung over the cradle. It is not known whether happiness from this increased in a peasant family, but where they love children and try to make various toys for them with their own hands, it, of course, lives.
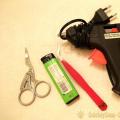
You will need:
- beautiful flap of fabric;
- any filler (cotton wool, rags, synthetic winterizer);
- red thread number 10.
Work order
- Cut a square out of pretty fabric. For the amulet, the fabric is laid to tear do it yourself. Fold the fabric diagonally and form the beak of the bird of happiness by wrapping even number of times with a thread. Make 3 knots by wrapping and sliding the spool under the thread, tightening and not tearing.

- Put some cotton wool right next to the knot and form a head with your own hands.

- Secure again with a few turns of thread and 3 knots. Do not break the thread.

- We make the wing of the bird of happiness. Divide the remaining fabric into three equal diagonals and tie the outer one closer to the head.

- Throw the thread over the neck of the bird of happiness over the other shoulder and make the second wing.

- Make your waist. On the back it should turn out "Velesov cross"... For this odd make the number of turns in one direction diagonally, and the same amount in the other.

- Pass a thread under the cross and hang the bird of happiness from the chandelier.


The photo shows how to make a bird by cutting out only two parts from any piece of fabric according to this pattern. Please note that the drawing shows the pattern of the tummy and half of the back. For the back, fold the fabric in half with your own hands. Then the parts must be cut out, retreating 5 mm at the seams and sewn.

This simple stuffed toy is very easy to make. It can be complicated by sewing on a large black beak, and you get a fun crow. For those who do not know how to make a bird fever, this pattern can also be a hint. All you need to do is sew a long beautiful tail, pin a small tuft and the toy is ready.

AngryBirds - City Crow
This toy - an angry crow appeared, like many others from the famous cartoon. Sewing AngryBirds is better from thin drape, felt or velor. It is necessary to cut parts of the bird from fabric that will not crumble. The photo shows a pattern without seam allowances.

You need to start sewing the crow from the body, collecting it with your own hands in 4 segments with a seam over the edge. Sew the beak separately. We fill it and the crow with any filler. Sew on all the details, glue the eyes and eyebrows. Everything, the crow is ready.

This handmade soft toy can be a convenient accessory as a sofa cushion. And replacing the small beak with a wide one and removing the scallop, you get a charming duck.
Both the rooster and the duck are sewn in the same way and very simply. Sew a square bag, then fold the top corners together and stitch perpendicular to the bottom. Stuff with filler and attach beak, comb, eyes, and wings.


You can make such an owl needle flower with your own hands from two small scraps of fabric, cutting them out, as shown in the photo. For the torso, you need to cut out the two shown parts. Sew the forehead, eyes and paws on one of them with your own hands, sew a bag, fill it with cotton and attach the wings.
Hello dear readers! This master class is dedicated to feathered creatures. Today we will learn how to make a bird from fabric with our own hands. With a small piece of cloth and thread, you can easily make a beautiful pigeon or even a firebird. Involve children in this activity - they will definitely like making small birds - small ones.
When you have many of these dolls, you can hang them in the garden or in the yard on a tree. This is how, in the old days, at sunset, winters attracted the sun and real migratory birds, which brought spring warmth with them.
Craft materials
For work, you will need pieces of thin fabric of any monochromatic or variegated color. It is not at all necessary to take a new fabric; old pieces are also suitable for crafts.
Prepare also some thread and cotton wool. You can take any thread - cotton, woolen. They can be in the tone of the fabric or, conversely, contrasting. It is desirable that the threads are soft and not very thin - it will be more convenient for children to work with them.
We lay out the material on the table and cut out a square 20 × 20 cm.It will turn out beautifully if the edges of the patch are fluffed up a little and made a fringe. You can cut out the square with serrated scissors to create a zigzag edge.

Fold the flap diagonally two times like an envelope and tie the inner corner with a thread - this will be the bird's future beak.

Roll up a tight ball with a diameter of about 1.5 cm from the cotton wool.Put it under the beak and tie it with a thread - you get a bird's head. You can immediately make a loop for hanging the toy.

Then we take another lump of cotton wool, give it an oval shape and put it under the head - this will be the body. After that, gently straighten the flap. It is desirable that all folds are evenly distributed.

We take a long thread, put it under the head and crosswise tie the back, and then the abdomen of the bird. We tie the ends under the tail and cut off.

The beak can be left white, or it can be painted with paint or felt-tip pen black or red. It turns out this is such a white dove.

You can make birds from colored shreds. Such dolls also look very cute.

Try making a bird out of fabric with your child. This activity develops fine motor skills and knot tying very well. And in conclusion, I want to recommend to all mothers one wonderful book-guide "Baby's first crafts" ... You can get it electronically and absolutely free. The book contains a lot of useful material for developing activities with kids from 1.5 to 5 years old. Agree, it is very convenient when the best instructions for lessons with children are collected in one place. I wish you a lot of ideas and advice from there.
Good luck in your work! Nadezhda Goryunova
The air already smells of spring! And the arrival of spring always causes a desire for change! Create yourself a spring mood with gentle Tilda birds. These cute creatures will decorate your home, and will also serve as a wonderful DIY Easter gift.
To make birds, we need:
- cotton fabric (you can take one color, or you can take two different ones - for the bird's body and wings)
- a small piece of dark fabric for the beak
- synthetic winterizer or other filler for toys
- three identical buttons
- ribbon or lace for hanging the toy
- acrylic paint for black fabric
- threads
- needle
- scissors
- washable marker or chalk
- wooden stick
- sewing machine (optional)

We draw or print the pattern of the future bird and cut it out.

Whether or not to make bird wings is up to you. It will look great in both.
The first thing to do is to cut a piece for the bird's beak. We fold it along, and then bend both corners, as in the photo:

You should get a beak like this:

We pass to the body of the bird. With a chalk or washable marker, transfer the pattern to the fabric folded in half. Insert the beak and secure it with a pin. We sew, leaving an unstitched place for turning out.

Cut out with allowances.

Please note that in this case, the two parts of the wings are completely sewn. For turning inside out, the author made a small slot on the back. In this case, the seam turns out to be neat, and then the cut will not be visible.
We turn out the body and wings of the bird, smooth it out. If you made a cut on the wings, then it must be treated with textile glue or PVA glue so that the fabric does not crumble.

We fill with synthetic winterizer (this is where a wooden stick comes in handy - it will help to evenly fill all corners of the bird with synthetic winterizer). We sew all the holes with a blind seam.

We sew the wings to the bird using two buttons.

With acrylic paint we draw eyes to the bird (instead of paint, you can use a pair of black beads), sew on the third button and a ribbon for hanging. The bird is ready!

Original master class (author - Diana Romankova)
Such a bird can be planted in a flower pot (instead of a ribbon, insert a wooden stick into the bird).

And a whole flock of these birds can be hung from the ceiling!

If you wish, you can sew textile houses for the birds.
Few people know that April 1 is celebrated not only with April Fool's Day, but also with International Bird Day. But this holiday is well known to teachers of preschool and school institutions.
By the middle spring month, teachers and their pupils begin to make crafts related to birds. For example, as before the cold and hungry season, numerous bird feeders appear on the trees, in the spring the guys try to provide their feathered friends with housing.

Of course, wood crafts that need to be planed, sawed and used with a dangerous tool to create them are not suitable for all ages. Kids who go to kindergarten are unlikely to cope with such a job.

You can celebrate the wonderful holiday of Bird Day by creating a bird craft. Feathered figurines are made from a wide variety of raw materials, using felt, woolen threads, colored paper, plastic bottles, autumn leaves and others, for which there is enough imagination.

Sometimes parents are faced with the problem of how to make a bird from the materials at hand. There was already information above that there are practically no restrictions. The step-by-step instructions for novice craftsmen presented on the site will suggest new ideas for creativity.


Master class on how to make a bird for the little ones
Even the little guys of Nosadov's age can master several ideas for original crafts.

You will need colored paper, paper bookmarks with an adhesive strip, glue stick, scissors, toothpicks or thin sticks, and plasticine or clay.

Make circles from colored paper (according to the required number of birds). Circles can be of different diameters. Fold each circle in half. Glue the bookmark strips on the inside.

Glue a triangle on the other edge - this will be the bird's beak. From the outside, stick the wings all from the same bookmark paper. Attach a toothpick or stick inside and stick it into a piece of plasticine. You can draw the bird's eyes.

For the next craft, you need white or colored paper, scissors and pencils.

Circle the palm of your hand (yours or your child's) on the paper. Use scissors to cut the shape along the outline. The thumb is the bird's head. The rest are tail and wings. Draw the beak and eyes. You can paint the torso. The bird is ready!


Another option for a bird with your own hands from scrap materials. Prepare cotton pads, wooden shashlik sticks, scissors, glue, ribbons for decoration, or pretty thread.

Glue two cotton pads on a wooden stick (the skewer should be inside). And just below, glue two more in the same way. You will get a little snowman.

Cut one cotton pad into two equal parts. Glue them to the lower discs on the stick - these are the wings. Cut out the eyes and beak from colored paper. Stick to the top discs. For beauty, you can tie a beautiful ribbon around the bird's "neck".

Owl made of paper
You will need toilet paper rolls, cardboard or heavy paper, colored paper, paints, scissors, and glue.

If there are no ready-made cylinders, glue them from scrap materials: paper or cardboard. Bend the top of the cylinder inward from one end and make sharp owl ears. The photo of the bird shows how to do this.


Cut out many circles with a diameter of up to 1 cm from colored paper. They should be the same size. Stick the circles on the cylinder.

Cut out the beak-triangle and stick to the appropriate place. Gather owl eyes from black and white circles and glue to the cylinder. The owl is ready!

Crafts of birds from threads
Let's talk about two ways to make a birdie out of threads with your own hands.

You will need yarn, cardboard, needles, scissors.

Make blanks from cardboard to create pompons: circles with a diameter of 5 and 2 cm, cut out circles with a diameter of 2 and 1 cm, respectively. Wrap the threads on the cardboard. The internal space must be completely filled.


Cut the threads along the edge, thread the thread, remove the pompom from the cardboard, and tighten the thread. Straighten the threads to create a fluffy ball. Make a smaller pompom as described above.


Connect the two pom poms. On the smaller one, which is the bird's head, sew on beaded eyes and fabric beak.

For the second method, you need three colors of yarn, scissors, and thin wire.

From one color of yarn, make a bundle of threads 13 cm long. From the other two bundles of 9 cm. Their thickness should be approximately the same.

Place one of the shorter ones in the middle of the longest skein. Bend over a long skein and tie at the base. Do the same with the short one. Place the third bundle under the knitted threads.

Roll a tight ball of cotton wool and place it under all the threads. Bring all ends together so that the ball is inside. Tie up the yarn with thread. Use scissors to trim the ends of the bird's tail.


Sew or glue on beaded eyes and a fabric beak such as felt. Make bird paws from thin wire and fasten them in the thread body.

Felt bird
Very cute crafts are made from fabric. Below is the procedure for creating a felt bird.
- Find it on the Internet or use the given bird pattern. Print and cut out your felt pattern.
- Sew on the wrong side, leaving a small hole.
- Stuff the figurine with cotton wool or printed material.
- Sew the hole carefully with a blind stitch.
- The eyes and beak can be painted or sewn on with beads and fabric.


Now in your arsenal of ideas there are several on how to create birds from scrap materials with your own hands. Maybe ready-made options will push you to new searches and creative achievements!

Do-it-yourself photo of birds


 DIY ribbon butterfly: master classes on making an original decor element in different techniques Kanzashi butterfly from satin ribbons step by step
 KS Hairdos - HDT Physics v1
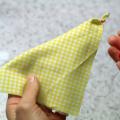 How to make a bird from fabric with children