Templates and diagrams for three-dimensional paper applique. Master class “Hedgehog Hedgehog template for applique from seeds to print
Autumn crafts from colored paper for kindergarten. Middle - senior group
Volumetric applique made of colored paper “Hedgehog” on the theme “Autumn” for middle and older children preschool age. Master class with step-by-step photos
Author of the work: Elya Matyushenkova, 4 years, 4 months, pupil of MADOU “Kindergarten No. 14 of general developmental type”, Syktyvkar, Komi Republic.Supervisor: Karakozova Mlada Vebertovna, teacher of the MADOU “Kindergarten No. 14 of a general developmental type”, Syktyvkar, Komi Republic.
Purpose: master class is intended for children 4-7 years old, their parents, teachers preschool education. The application is intended as a tool for NOD (writing short stories about a subject), a gift for friends, parents.
Target: teach how to make a three-dimensional applique from paper.
Tasks:
- develop the ability to create a subject image;
- develop the ability to fold paper like an accordion;
- develop the ability to use scissors;
- fix the names of the colors;
- develop interest in the application;
Preliminary work:
- looking at pictures of a hedgehog;
- making applique by tearing paper;
- rolling pieces of crepe paper into balls for subsequent appliqué.
- reading M. Prishvin “Hedgehog”, I. Sokolov-Mikitov “Autumn”, K. Chukovsky “Hedgehogs Laugh”, V. Rosina “Why does a hedgehog need thorns?”;
- didactic game"Who lives in the forest?".
Instead of a fur coat there are only needles,
Wolves are not afraid of him either.
A sharp ball, no legs visible,
His name, of course...(hedgehog)

For work we need materials:
- some red crepe paper;
- a sheet of green cardboard;
- colored paper(one sheet each: brown, black; a little red, yellow, orange);
Simple scissors;
- glue stick;
- a simple pencil;
- ruler;
- a small piece of black and purple (blue) plasticine.

Progress:
1. Measure out a 12x12 cm square on brown paper. Cut it out.

2. Bend diagonally. Draw your finger along the fold line from the middle to the edges.

3. Bend the corner of the resulting triangle upward, as shown in the photo.

4. Turn it over. Glue it onto a sheet of cardboard.

5. Measure out a 10x26 cm rectangle on a sheet of black paper.

6. Bend it like an accordion.

7. Cut off a corner of the paper from the resulting accordion. Open the accordion. Here's what happens:

8. Glue an accordion of paper onto the body by the edges (for children middle group adult help will be needed). The body with spines is ready.

9. Roll a small ball out of black plasticine and attach it to the nose, pressing it with your finger. Let's make an eye for the hedgehog: roll a piece of blue plasticine into a ball, stick it on the hedgehog's head, then a slightly smaller piece of black plasticine.

10. A hedgehog carries lingonberries on its thorns: roll up small lumps of red crepe paper and glue them onto the thorns.

11. The path is strewn with multi-colored leaves: make them using the tearing method and glue them to the path.
The hedgehog is ready!

Hedgehog, hedgehog, where are you going?
- I'm always in a hurry to get home,
I'll bring berries to the children,
And I’ll stock up on mushrooms!
View of the application from different sides:


Let's look again at the child's application, made according to the proposed master class:

View of the child's applique from different sides:


Application options:
1) You can make a hedgehog walking in the other direction (this option is presented at the child’s work).
2) You can make the two hedgehogs you meet on the path smaller in size.
3) A hedgehog can carry mushrooms on its spines.
4) Lingonberries can be made from red plasticine.
5) Make a nose and eyes out of paper.
6) Leaves can be cut out using a stencil or using ready-made stamps.
7) You can add (by tearing paper) a puddle, clouds, sun, grass.
After application you can read it to children fairy tale "Hedgehog and Autumn":
The hedgehog was awakened by Autumn. She hit him on the nose with a large raindrop. The hedgehog sneezed and turned on the other side. But the other side ended up in a small puddle. Autumn rain wet the roof of leaves. The hedgehog was upset. “So Autumn has come,” he thought. “Now it will rain day and night, wet, cold, brrr... I don’t even want to crawl out from under the leaves. What's the point? It’s wet here, even wetter there.” The hedgehog thought about Autumn all morning and was upset all morning. “I won’t go out today. And I won't tomorrow. What to do there? Everyone hid in their holes, everyone has their own business, no one cares about me anyway...” And the Hedgehog felt so sorry for himself from such thoughts that he even cried.
Suddenly something rustled outside and then fell. Very close. Then it rustled again. The hedgehog became curious, and he stuck his muzzle out from under the leaves. Next to his pile of leaves lay a large orange carrot. The hedgehog looked at the field behind the fence. Bunny was jumping across the field and looking for carrots that people had forgotten to dig up. “Thank you,” whispered the Hedgehog. Why shout if Bunny won’t hear anyway? The hedgehog admired the carrot. “So good, beautiful, like the sun in the evening.”
A light knock was heard from behind. Behind window glass Chinchilla sat and waved her paw to the Hedgehog. "Wow! - Hedgehog was surprised, “But she’s not wet and doesn’t look like a rat at all. Dry - it looks like a dandelion in spring.”
A yellow leaf fell from a tree onto Hedgehog. The hedgehog looked up and saw that the clouds had scattered and the sun came out. “Autumn smiles at me,” Hedgehog rejoiced. Then he remembered that yesterday the Big Rat told him about the hole under the porch, and he was completely amused: “It’s dry under the porch. And warm. I will live there." And the day no longer seemed so sad to the Hedgehog.
(Dubrovskaya Elena)
Lyubov Mishareva


This is how we filled it with cereal.


When the stencil has been completely filled hedgehog, we started cutting out the details of the eyes and nose.

We cut out leaves from colored paper.

We decorated the entire composition from leaves.


So they turned out great hedgehogs. In the evening, the children showed their work to their parents. Everyone really liked the children's work. Thank you for your attention.
Publications on the topic:
Drawing "Hedgehog". Master Class. All children love animals, as well as pretending to be them. The "Hedgehog" drawing is made using the "brushstroke" technique. Interesting.
Carrying out the “spring is coming to us” program, I decided to make a hedgehog herbalist together with the children. To do this, I sewed a bag out of gauze, giving it.
This is an exciting opportunity to try yourself as a true watchmaker and decorator. And to breathe life into your new ones.
The most amazing forest animal in the middle zone is, of course, the hedgehog. Almost every child, and even an adult, considers him “Semi-domestic”). If.
I present to your attention a small Master Class applications from autumn leaves. It's called " Autumn hedgehog", although according to the presentation it turned out.
Master class on the use of elements of Su-Jok therapy in speech therapy work “Hedgehog on a walk”“Hedgehog on a walk” Goal: - development of correct, full movements and certain positions of the articulatory organs necessary for.
Joint creativity with younger family members not only has a beneficial effect on their development, but also awakens a love of beauty.
I suggest not to put off this process and start having a pleasant time with DIY hedgehog applique creation.


A series of master classes with detailed information will come to the rescue in this matter. step by step description and photographs. All MKs have a low level of complexity, since they are designed for preschoolers and beginning handicrafts.
In the course of work, you will teach your child to master various techniques and use available tools and materials for creativity.
For the first craft you will need:
- scissors;
- PVA glue;
- pencil;
- black felt-tip pen;
- gray or brown cardboard;
- colored paper (black, white and pink).
As a result, you will end up with a punk hedgehog with an eroke, like in the picture, only in a different way color scheme.
You can do the same with a disposable paper plate. Follow photo instructions.
To complete the following application you will need colored paper, scissors, glue and cardboard of any color for the main background.
Video: 3D applique of a hedgehog made of colored paper
Photo examples:
Applique with a hedgehog for the little ones
This step-by-step tutorial tells you how to make a bright applique yourself from ready-made printed elements.
Low level of work complexity corresponds to age category children in kindergarten, so this craft can be implemented as in younger group, and in the middle group.

Making a hedgehog from palms
Continuing the topic of making a hedgehog from paper, I cannot help but mention the palm technique.
The principle of operation in this technique is the same as when working with templates, only children’s palms circled on paper act as thorns.


To work you will need:
- white, black and brown double-sided paper in two shades;
- background cardboard or whatman paper;
- pencil;
- black felt-tip pen;
- scissors;
- glue.
Fabric hedgehog applique
This instruction is more suitable for children in senior group or in preparatory group kindergarten. 
For the application you will need:
- cardboard for background;
- scissors;
- black colored paper;
- cotton fabric with print or plain;
- glue stick;
- chalk on fabric.
Video catalog:
We use natural materials
To create this application, leaves of any tree species are used; the yellowed leaves of maple, linden, and oak look most beautiful.
During the work you will need:
- scissors,
- cardboard,
- glue stick,
- colored paper;
- natural materials.
- Using any template suggested today, make the body of a hedgehog.
- Glue the body to the background, fill the space where the needles should be located with natural leaves. Design the face as you wish.
As a result, you should end up with such a wonderful leaf applique.


Using the same principle, you can make an applique using pencil shavings or sunflower seeds instead of leaves.


Ideas for work:
Video: Volumetric craft made from leaves “Hedgehog”
You can see how to make a three-dimensional applique of a hedgehog from leaves and plasticine in a detailed video tutorial at the following link:
In conclusion, I want to say: when doing group crafts on a topic set by a teacher, educator or parent, you will never get completely identical, carbon-copy works, since each child is individual and thinks differently. Yes, and everyone tries because of their talent, character and physical capabilities.
Blanks and templates for the “Hedgehog” applique


If your child likes to cut and glue panels from cardboard or multi-colored blanks, he will definitely like the “Hedgehog” applique made from colored paper. Offer to glue on the parts cut out from a printed or drawn template or make the elements yourself, for example, using the quilling technique or any other.
Materials and tools
To make a beautiful piece of colored paper for your child, prepare the following:
- base for crafts, such as colored cardboard;
- template with the image of a hedgehog (natural or cartoon);
- colored paper (regular for children's creativity or corrugated);
- scissors (possible with curly blades);
- glue.
If the work will be done Small child, all paper elements must be prepared by an adult. Older children can trace the outline using a given stencil and cut out the blanks themselves. Thus, you need to plan the activity according to the age of the child.
How to make a hedgehog applique using a template
The easiest option for children's creativity is gluing according to a pattern.

The sequence of joint creativity with the baby is as follows:
- Find a suitable picture on the Internet. It should be simple, but colorful, preferably specially designed for such work.
- Print the blank.
- Draw or print on the sheet where you will glue the parts.
- Cut out all the required blanks from the first sheet. The same can be easily done from sheets of colored paper if printing the template did not work out.
- Glue the elements sequentially onto the base. If the images were printed on thin paper, it is better to use a glue stick so that the paper does not get wet or deformed, and the colors do not accidentally spread.
The "Hedgehog" applique made of colored paper can be beautifully framed. If not wooden blank and glass (this is the best option for a flat panel), use an additional sheet of cardboard or paper of white, brown or other suitable color bigger size. Paste the completed work on top. If you don’t have the sheet you need, use any sheet that can be cut into strips. Glue them to the front or back of the sheet.
Application "Hedgehog in the autumn forest"
A very unusual panel can be easily achieved by creating a three-dimensional or relief effect.

Several options for manufacturing volumetric parts can be offered. For example, it is enough to cut out several circles from corrugated paper, stack them one on top of the other and, gluing them in the center and cutting fringe along the perimeter of all the blanks, glue them to the desired place on the base.
Applique "Hedgehog in autumn forest"It will look good using quilling elements.

In this way it is easy to assemble both the surface of the main character’s fur coat and to make the surroundings - trees, leaves, mushrooms. The work is done like this:
- Cut colored (preferably double-sided) paper into strips about 5 mm wide.
- Twist them into tight pieces using a toothpick (or a special tool). Leave the pieces tight or loosen them slightly. Glue the free end of the strip to the previous layer. Create the desired workpiece configuration.
- Do all the details.
- Stick them tightly to each other or place them at a distance.
How to make a volumetric applique
Another way to make an embossed hedgehog is this:

Corrugated paper applique
Another bright one autumn applique“Hedgehog” can be made from this material, pleasant to the touch and varied in color. The sequence of work is as follows:

Thus, the “Hedgehog” applique made of colored paper can be made using different blanks and even types of material. Choose the option that is easiest or most interesting for your child to work with.
Look how cute the Hedgehog applique is - the idea for it was brought from school, from a labor lesson. On a wave of inspiration, we made a couple more hedgehogs at home.
The paper Hedgehog applique is made with interest and enthusiasm - making needles for a hedgehog is very exciting and difficult, but how beautiful it turns out! The Hedgehog applique is not simple, but embossed! It looks very impressive - the children will rejoice at the results of your joint efforts!
And at the end of the article you are expected interesting surprises for those who tried, read and completed it to the end!

Needed:
- colored cardboard for the background - 1 sheet;
- colored paper: gray or black - for the “needles”, brown - for the body; multi-colored paper or cardboard for leaves - yellow, orange, red, green!
- PVA glue;
- scissors.
How to make a Hedgehog applique:
Take a sheet of black or gray A4 paper and cut it crosswise into two equal halves.

Now comes the most difficult part: we fold each half of the sheet like an accordion along its length - slowly, carefully, stripes about half a centimeter wide.

Ready? From one edge, at the bottom, between the stripes, carefully drip a little glue and press it so that they stick together. It turns out to be a “fan”.

You need to make 3 of these fans.
And then we glue them all together. So the “fur coat” for the hedgehog is ready!

Now we make the body of the hedgehog. We cut out a small square from brown paper, fold it diagonally, and bend one corner of the resulting triangle - like this. The result was a body with a muzzle.


Glue the body and “needles” onto a sheet of cardboard, draw or glue a nose and an eye for the hedgehog. Beauty!

Now let’s add bright touches to the applique: cut out and glue multi-colored leaves around the hedgehog and on its back. By the way, do you know why a hedgehog carries leaves, apples and pears into its nest (it doesn’t eat fruit)? Read the article about the Signs of Autumn!
And let’s not forget the fungus - the hedgehog needs to eat too!

So the Hedgehog paper applique is ready. And in the next publication I’ll tell you how to make a hedgehog from plasticine. Be with us!
Well, as a reward for those who worked hard on the application - a poem about a hedgehog and cartoons!
- Why are you so prickly, hedgehog?
- This is me just in case.
Do you know who my neighbors are?
Foxes, wolves and bears!
(1 read, 1 visit today)
 Lunar calendar of haircuts for February Favorable days for haircuts in February
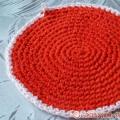 How to crochet a striped watermelon and a red watermelon slice How to crochet a baby handbag: connecting the flap and the back of the bag
 Do you want to be right or happy?