DIY carnival mask: simple ideas. DIY carnival mask for adults and children: MK with step-by-step photos and videos DIY theater mask template
You will need:
Scissors
Stationery knife
Thread (preferably elastic) or not very wide elastic
Pencils / markers, etc.
Hole punch, if desired

1. Prepare a sheet of heavy paper or cardboard and fold it in half.
2. Use a utility knife to cut out the holes for the eyes.

3. Make holes for thread or elastic using a hole punch or knife.
4. Decorate the mask to your liking. If it's an animal, you can draw a nose, mustache, ears, etc.

How to make a carnival mask

You will need:
Sample mask (can be found in specialty stores) or cut the mask out of cardboard.
Colorful feathers
Sequins
Super glue
Toothpick

1. Prepare a mask and think about how you want to decorate it.
2. To gently glue the rhinestones, use glue and a toothpick - dip it in the glue and apply to the mask. Glue rhinestones around the eye holes.

3. You can glue the rhinestones on the top of the eye hole, and apply glitter on the bottom. To do this, apply glue to the bottom and sprinkle glitter on it gently.

4. Also add colored feathers using glue. How many feathers, and where they will be placed, you choose yourself.

5. It remains to add an elastic band or tape to put on the mask and leave the glue to dry.

DIY cardboard mask

You will need:
Scissors
Leaves of different colors and sizes
Sticks, twigs, seeds, feathers, etc.

1. Cut the mask out of the cardboard
2. Glue the leaves as shown in the image (or choose your option) to make the mask look like an Indian attribute.
3. Start decorating the mask with various details according to your taste, the main thing is not to overdo it and do everything symmetrically.
How to make a mask out of paper. Decorate with paper roses.

You will need:
A simple papier-mâché or plastic mask (no pictures and patterns), bought in a store or you can cut it yourself from cardboard
Corrugated paper
Scissors
Feathers, optional

1. You need to cut about 25 strips corrugated paper... Their length can vary from 25 to 40 cm. Fold each strip in half.

2. To make a rose out of a paper strip, start twisting it as shown in the picture. As the paper curls, turn the strip 180 degrees. To keep the flower in place, you can fix some places with glue.

If you want to know what other flowers can be made from paper, check out our articles:
3. Start gluing the roses to the mask. Add glue to the bottom of each flower.

4. Optionally add decorative feathers.


You can try different colors and types of paper.
DIY masks for children. Animal noses.

You will need:
Egg carton
Brushes
Elastic
Thread and needle
Thick paper
Scissors

1. Take a container for eggs and cut out the parts with grooves - they will act as noses, which you need to decorate further.
2. To breathe through your nose, make several small holes in the workpiece - use a needle or a stud.

3. Start painting the cardboard nose in the colors of your favorite animal. Draw some details like nostrils, teeth, etc. Look in books or the Internet for what the animals look like for a better mask.
4. Prepare thick paper and cut antennae out of it. Glue them to the workpiece.
5. It remains to sew the elastic so that the nose can be put on.
New Year's masks for children

You will need:
Mask pattern
Fabric (purple in this example)
Lining fabric (thin fleece);
Lace (in this example, the color is black)
Thread and needle
Scissors
Safety pins
Velvet Ribbon
Decorations.

1. Prepare the base and lining fabrics and use a pattern to cut out the details of the mask.

2. If your lace has a seam on both sides, you need to cut the seam on one side.

3. Using pins, attach the lace on the sides of the mask (you need to do this from the wrong side), while making small folds.

4. Now you need to sew the lace to the main part and cut off the excess.


5. Insert velvet ribbon under the lace and secure with pins.

6. Sewing machine stitch the lining to the base piece and also the eye slots.
7. Decorate the mask to your liking, for example, you can add a small spider or a snowflake.

DIY masks (photo)


DIY Venetian masks


DIY carnival masks

You will need:
Thick paper
Colored feathers
Stationery knife
Simple pencil
Sequins, if desired
1. Place the cardboard on the table, place a thick sheet of paper under it.
Many parents on New Year's Eve are looking for information on the Internet for their children. Of course, it is easier to buy a ready-made accessory in the store, but it is much more interesting to make it yourself or with your child. This is a great opportunity to keep your baby busy, so that there is at least an hour or two of silence in the house. Young parents, take note of this trick.
How to make a beautiful paper mask with your own hands
Making a carnival mask out of paper, the child develops Creative skills, acquires useful skills. This article will show you how to make a paper mask yourself. Your attention is offered two options for carnival masks that will appeal to adults and children.
Black Raven Mask
It is not at all necessary to make the mask absolutely black, you can choose any colors you like. For example, instead of a raven, you can make a bird of paradise or a parrot. Combine colors to add variety to your look. In this example, we will consider a themed mask that will look good at a children's matinee or at a Halloween party. If you are wondering how to make a paper raven mask, keep reading this master class.
- Take heavy black paper or white, better cardboard. Bend it in half, make a layout for the future mask. Draw the desired shape, determine where the eyes will be. Also don't forget to draw the cut for the beak as it will be attached separately;

- Use scissors to cut the mask along the outline and inside. It is important to make the distance between the eyes not too large;

- Take heavy black paper and fold it in half as many times as you can. Cut feathers out of it;

- When all the feathers have been cut out, attach an elastic band to the seamy side of the mask to hold it around your face. Take a regular rubber band that is sold at your regular sewing store. Use a regular stationery stapler to attach it to the mask. Place the elastic on several staples;

- How to make a paper mask beak? You will need a sheet of thick black cardboard, fold it in half and draw one side of the beak on the fold of the paper. To accurately calculate the size of the beak, measure the length of the bridge of the nose on the mask. This will be its width. Leave a couple more centimeters on top so that the beak can be attached to the mask. You can experiment with its length;

- Cut out the beak with scissors, bend it well in half;

- Pay attention to the couple of centimeters you left for the beak. Make some cuts as shown below;

- Now glue the beak to the mask. Well glue its base with glue (specifically those cuts that you made in the previous step);

- Start decorating the mask with feathers. If some feathers do not have a line in the middle, bend it yourself so that they appear voluminous;

- The area around the eyes does not look very neat, so you need to additionally cut out a few feathers to mask it;

- Fold the mask in half if the base is white paper, then a white seam will be visible when worn. Paint over it with black marker;

- Now you know how to make a raven paper mask. The finished mask looks like this.

Gold mask for carnival
To create such an accessory, you will need a ready-made base mask, vegetable oil, pieces of white paper, paper napkins, PVA glue, white and gold paint (you can use another one if you wish). If you want to know how to make a paper mask using the papier-mâché technique, follow the photo tips.
- Lubricate the workpiece vegetable oil, then draw the desired shape of the future mask;

- Cut the album sheets into small pieces and glue them to the workpiece. Do not climb over the edges you intended;

- Repeat this step over and over until the mask has the desired thickness and shape. Grease each new layer generously with glue;

- Wait for the glue to dry before proceeding to decorate the mask. Now take paper napkins and cut them into small strips. Lubricate them with glue and twist into flagella. Place them on the mask in the order you like best. First apply the glue to the areas of the mask where the napkins will be glued;

- Let the mask dry completely. Now carefully remove it from the workpiece. Cut off the jagged edges with scissors;

- Next, start painting. First, cover the mask with white or a special primer, it will become a substrate for the gold paint;

- After the paint has completely dried, you can cover the mask golden color... Do it with a brush or foam sponge, depicting the effect of antiquity, which will look much more interesting.

- Now you know how to make an original carnival mask out of paper. The finished result looks like that.

As you can see, last way making masks is more difficult, because here you have to tinker for a couple of days. It is important that the mask has time to dry before each new gluing or painting. Do not rush things, otherwise the end result will not please you.
To make the mask dry faster, you can use a regular hair dryer (preferably cold air). Now you know how to make a paper mask, trying your hand at different techniques... There is nothing difficult in this, even a child can cope with each of these masks. Introduce your little ones to these creative lessons, so you can not only teach them something new, but also give them more of your time.
If you need a carnival mask for a festive outfit, and you did not find a suitable one in the store, do not worry, it is quite possible to make such an accessory with your own hands at home from scrap materials. The mask can be made from paper, cardboard, fabric, plaster, sculpting mass; and use rhinestones, sequins, sequins, beads, etc. as decorations. We bring to your attention the 4 most simple ideas creating a carnival mask with your own hands.

Carnival paper mask
This is the easiest and most economical way to create a carnival mask. The main element for creating a mask is - paper template.
Materials and tools:
- a template with an image of a carnival mask (can be found on the Internet and printed or drawn, see examples of templates at the end of the article),
- dense A4 sheet,
- cardboard,
- PVA glue,
- hole puncher,
- simple pencil,
- scissors,
- Scotch,
- elastic,
- acrylic paints (you can take ordinary gouache),
- decorations: rain, sequins, stickers, rhinestones.
How to do:
- Stick the template onto cardboard so that the mask does not deform in the future.
- Color in the mask. Paints are only useful if the image was printed in black and white ink. When buying paints, do not look closely at watercolors - it harms the quality of the paper, no matter how thick it is.
- After painting and drying the mask, cut it out along the contours.
- Use a hole punch to make holes for the elastic bands along the edges of the mask, and so that the mask does not break in these places during wearing, strengthen the surface around the holes with tape.
- Now thread the elastic through the holes and secure each end with a knot.
- Before doing this, try on the mask to adjust the length of the elastic.
- It remains only to decorate the mask with sparkles and so on.


The process of making a carnival mask from the mass is very long, but not difficult.
Materials and tools:
- white mass for modeling,
- paper,
- scissors,
- pattern,
- penknife,
- face layout,
- multicolored acrylic paints,
- sequins, rhinestones, beads.
How to do:
- First, cut the template out of the paper.
- Roll out the mass for modeling with a rolling pin into a thin cake (the thickness should not exceed four millimeters).
- Place the paper template on top of the rolled stock and cut along the outline with a sharp knife to make the same shape from the “dough”. Remember to cut holes in the sides for the elastic.
- Now very carefully lift the mask off the table and put it on the model of a human face (read how to make it). Leave it to harden for twelve hours, or better for a day.
- The mask should dry exclusively on its own, without the help of hair dryers and other steam heating, otherwise it will deform.
- When the mask is completely cured and dry, paint it. You can, of course, at your discretion, but it is better to give preference to the color of the bird, the year of which is coming.
- Additionally, you can decorate with convex patterns from the same mass for modeling, well, and decorations from the list.


Making a carnival mask using papier-mâché technique
The papier-mâché technique is also called waving. This is a very affordable method of making a carnival mask.
Materials and tools:
- round balloon,
- wide bowl for diluting the adhesive liquid,
- petrolatum,
- PVA glue,
- water,
- toilet paper or napkins (paper towels),
- any colored paints,
- stationery knife.
How to do:
- First, inflate the balloon to the size of your face for the mask.
- Tear the paper into small pieces.
- Dilute the glue with water in a 2: 1 ratio.
- If there is no PVA glue on hand, starch or flour can be an alternative.
- Spread Vaseline over the inflated balloon to prevent the paper from sticking to the rubber itself.
- Dip each piece of paper into the glue mixture and place it on the ball so that they intersect and cover each other.
- Cover the ball with four layers of paper.
- Leave the ball with the paper to dry completely.
- Check the dryness of the paper on the ball - pierce it with a needle.
- After that, pierce the ball that is under the paper.
- This is followed by a very crucial stage: you need to carefully cut the paper blank into two identical parts with a clerical knife. With the same knife, make holes for the eyes and for attaching the elastic on the sides. If you wish, you can punch holes for the nostrils and mouth. For adults, these holes are not fundamental, but if you are making a mask for a child, then you definitely need to make these additional holes so that he feels comfortable and breathes easier in the mask.
- If the mask has bumps or imperfections, sand it with sandpaper. It remains only to decorate the mask and you can dress up for the holiday.


This is the best option for making a mask in addition to a costume for children's matinee... If you are at least a little familiar with the cutting and sewing technique, it will not be difficult for you to sew a mask for your child using a template, of which there are a lot on the Internet. You can make such a mask either by hand or on a sewing machine.
Materials and tools:
- fleece,
- pattern,
- threads,
- elastic,
- scissors.
How to do:
- Cut out two identical mask parts from the base material.
- With a zigzag stitch, stitch the trim pieces to one of the mask pieces.
- Sew and turn out the two parts of the mask (just leave the holes for the elastic).
- Insert the elastic into the holes and sew the mask around the outer edge again. It remains to decorate the mask with various details.
Examples of templates for making a carnival mask with your own hands:


Good day! In this master class we will tell you how you can do it yourself make paper masks for a fun themed party with friends and family (eg Birthday, New Year).
To do this, we need a sheet of cardboard, preferably a colored one, a pencil, scissors and a glue stick or PVA.
Step 1. Draw a large oval on a sheet of thick cardboard - this will be the contour of the face, then draw big eyes and a big mouth (see photo below).
Step 2. We begin to cut the masks out of paper. At the beginning, cut out a large oval from a sheet of A4 cardboard along the contour of the face. Then, for convenience, fold the oval in half and cut off the mouth first (this way it will turn out to be symmetrical), and then the eyes separately. 
Step 3. After you have evenly cut your mouth and eyes, it should look like in the photo below (joyful and sad mask).


Turned out interesting masks made of paper, made by hand. You can make several such faces out of paper, bring them to some themed party (for example, theatrical, Venetian), distribute to friends and make original general photographs. Friends will appreciate your preparation.
Unusual paper head mask
Now we will tell you how to make very funny paper masks with your own hands that are worn on the head, suitable for anyone children's party... We need white and several colored sheets, scissors, a pencil and a long rubber band (thin).
Step 1. First, we take several A4 sheets of different colors, prepared in advance.


3. Then we take a sheet of paper of a different color and cut out two identical small ovals from it, we got the eyes for the future mask.

Step 4. After that, we glue the eyes with the help of PVA on the large oval cut out earlier. Glue very carefully, make sure that the glue is not visible, try to glue your eyes evenly, symmetrically to each other.

5. Then we cut out smaller ovals from white paper and glue them on the already glued eyes.


7. After that, we take small pieces of colored paper and cut out the eyebrows and nose from them with scissors.

8. Having cut out all the details, glue the eyebrows and nose with PVA glue.


10. A do-it-yourself paper mask is ready, but you can fantasize and embellish it, glue mischievous curls to the very top of your face, you get a man with curly hair. To do this, cut out wide strips from any color. Next, they need to be cut into several stripes, but do not cut them completely. Roll the strips of paper tightly over the pencil to create curls.

11. When the hairs are ready, they can be glued to the top of the head.

Step 12. Punch small holes in the eyes of the mask so you can see when you put it on your face. Then you need to attach the rubber bands around the edges.

The craft is ready! All children will love to play with their friends. You can fantasize with the shapes of the eyes, nose, smiling mouth. You can also use completely different colors, let there be several such masks for every taste.
Pirate masks for kids
Below we suggest ready-made masks pirates for children's parties. They need to be printed on a color printer and cut with your own hands along all the dashed lines. For these crafts, it is better to use thick paper (for example, cardboard).
Children will be delighted with these masks and will have a great time playing pirates with their friends.


DIY dragon masks
Below are ready-made dragon masks, children love to play with them. They only need to be printed on a color printer and cut with your own hands along all the indicated dashed lines. Bright dragon masks will appeal to your kids and their friends. It is better to use thick paper (such as cardboard).


Notice on the dragons' faces there are four small white dots, to the left and right of the eye. They are needed to fix the craft on the face. Carefully pierce the holes with scissors and thread the rubber bands through them. There is a more complicated method, for it you will need several strips. Glue them in a semicircle, initially measuring the circumference of the head. You should have a more comfortable design.
Video master class on how to make a mask out of paper
You have met such a scary face more than once in the Scream horror films and other comedy stories. This video master class will tell you how to make such a face without special skills. You will need two sheets, one white, the second black, and nothing else, everything is assembled without glue. Follow the assembly process closely and you will succeed.
Children's age: 7th year of life
The direction of the development of children, within the framework of which the work on the project is carried out: complex ( different types children's activities: cognitive-speech, visual, theatrical, modeling, manual labor).
Project participants: children, group educator, music director, parents.
Project type: informational and creative; group.
Form of carrying out: classes (frontal, subgroup, individual), independent activities of children, a play or theatrical show.
Duration: long-term (from February to April).
The goal is the result: creation of theatrical masks for a self-composed performance.
Stages of working with children on a project see Appendix 1.
Frontal lesson "Mask"
Software content:
To update the knowledge of children about the types of masks, their use in everyday life;
Develop associative representations and connections;
To improve through experimental activity, observation and the ability to analyze the results, the peculiarities of the interaction of substances and make assumptions;
Continue to develop the main mental processes - memory, attention, imaginative thinking through the coding of information into a mnemonic table (transformation of images into symbols);
Form the ability to express your emotional condition with the help of facial expressions;
Bring up moral qualities: compassion, empathy, desire to help.
Preliminary work: role-playing games "Hospital - surgical department", "Beauty salon - at the reception of a beautician", "Carnival".
Developing environment: balloon, letter, chest, masks: cosmetic, medical, theatrical, riot police, carnival (on a stick), New Year's, masks for outdoor games, a lined sheet for a mnemonic table, felt-tip pen, envelope, easel.
Items: syringe, wig, pistol, fan, Christmas tree toy, ball, tube of cream.
For experimental activities: plastic, cardboard, paper masks, easel, container with water.
Musical arrangement.
Course of the lesson
Children enter music hall, there is a sound of fanfare, a balloon flies in, there is a sheet of paper in it. The teacher invites the children to guess what this means:
What is it? What's in it?
The children examine and assume that there is a letter.
Where do you think it comes from? Why did you decide so?
Children express their assumptions.
How do we get it?
The ball bursts, a letter falls out.
"Hello my friends! Princess Mask writes to you. I had a grief - no one needs me, people have forgotten about me! You children will help me, and write a letter to them, tell all your friends that you cannot live without a mask! I'm sending you my prize, my theatrical surprise! "
Children look for a surprise and find a chest, take out various masks from it, name them and describe where they are used in everyday life.
What is this mask? Where is it used? Prove.
There is a bag with objects under the masks in the chest, children pour the object on the table (syringe, fan, ball, pistol, Christmas tree decoration, tube of cream, wig). The teacher proposes to determine which mask this or that object is suitable for.
Now let's find out which of these masks you've already used. To do this, each of you must, after my signal, come up and stand near the mask that he used to wear.
Most children are suitable for outdoor games.
Where did you have to use this mask?
The teacher listens to the answers of the children.
But now we can use this mask (for an outdoor game)? What game can we play?
An outdoor game is held, which will be named by children.
A fanfare sound is heard from the teacher's phone.
Guys, we received an SMS message:
“My dear friends! I worry again - a disaster has happened in the storage of masks, water is splashing there from everywhere! Will you help me again, in the SMS indicate what to save in advance, tell me: plastic, cardboard or paper masks? "
Children make assumptions about what will happen to masks made of different materials if water gets on them.
How do we know exactly what will happen to the masks when water gets on them?
Children offer to host the experience.
Everyone goes to the easel, on which cardboard, paper, plastic masks, etc. are prepared. there is a container with water nearby.
Princess Mask wrote that water was splashing in the vault of masks. Let's see what happens if we sprinkle water on the masks? What's going on with them?
Children describe the result (on paper - paint flowed, cardboard - absorbed, with plastic - glass water).
What happens if a large amount of water gets in?
Children alternately lower the masks into the container and describe the result.
So which masks should you save first?
The children answer, the teacher sends an SMS with the answer.
Guys, do you remember why we are talking about masks today? Do you think we already know enough about masks to write a letter? Let's try. But how? What can help us with this?
Children pay attention to the easel with the attached lined sheet for the mnemonic table.
Children alternately fill the cells with symbols.
What did we talk about today? Where are masks used? What are the different types of masks used for? What materials can masks be made of? What are they afraid of?
The children put the table in the beautifully signed envelope they prepared earlier.
So our letter is ready. I will definitely send it after work today.
Guys, do you think we did a good deed? What does a person feel when he does a good deed? Put on a mask now on your face with the feelings experienced by a person who has done a good deed.
Why did you wear these masks? Children's answers.
Now, put on a mask with the feelings that the person for whom they did a good deed is experiencing. Why did you wear this particular mask.
I think that Princess Mask, in gratitude for our help, will certainly invite us to her place, but this will not be today, but maybe at the next lesson.
Frontal lesson " Theatrical mask»
Software content:
Continue to acquaint children with the theatrical mask, the purpose of its use in the theater; show the dependence of the mask on the emotional image of the hero; to acquaint children with the concept of "theatrical mask", from which word the name comes;
Develop creative non-standard thinking, imagination through the game "Yes-no" (TRIZ);
To form the ability to work at a sufficiently high level of abstraction, to organize their own speech activity of a creative nature.
Express the chosen emotional state with the help of facial expressions, gestures and intonation;
Cultivate interest in overcoming obstacles.
Developing environment:
A bag with a theatrical mask, sheets of paper with painted masks (with different emotions), illustrations depicting various theatrical masks, carnivals, theatrical performances, letter, passes (according to the number of children), curtain, sheet of paper and cards for composing a fairy tale, notes, arrows.
Course of the lesson
The children enter the waiting room, where the teacher is waiting for them with a letter in his hands.
Children, today we received a letter. Who do you think it is from?
Children make assumptions.
The teacher reads the letter:
"Dear friends! Thank you very much for your help! I would love to meet you. Come to my workshop! The path to it lies through the Theater Country, it is long and difficult, but I believe that you can handle it! I look forward to seeing you! Your Princess Mask. "
Guys, would you like to go visit the Mask Princess? But how do we get to her? And where is the Theater Country located?
Children pay attention to the curtain. They enter and see Fox.
L. - Oh, hello! Who are you, where are you going?
The children explain to Lisa where they can go.
L. - Look what cunning, in order to get to the Princess Mask, you have to go through the Theater Country, and this is not easy. Maybe you have passes to get through?
The children answer that they have no passes.
L. - Well then, try to find them and then I will always let you pass without obstacles. Follow the arrows and find everything you need. Good luck!
Children go to the first arrow, where there is a sack with a theatrical mask in it, and next to it is a note: "You can't just look, you have to guess!"
The teacher conducts the game "Yes-no": children ask questions, the teacher answers "yes" or "no". Having guessed, the children take out a mask and a few passes.
Where is this mask used? For what?
Children walk along the illustrations, and the teacher gives them explanations for each.
The word "mask" comes from the Russian word "smear". In the beginning, this was the name for everything that was applied to the face (masks from plants for skin care or painted masks of the gods). Then theatrical masks appeared, they were used by actors to portray a hero. Now the word "mask" means "an overlay with cutouts for the eyes, hiding the face, sometimes with the image of a human face, the head of an animal or a hero from a fairy tale, cartoon."
Children move on to the next arrow, where they find sheets of paper with painted masks representing different emotional states. Nearby is a note: "Make all the masks come to life and say:" Hello, dear friends! "
Children choose drawings of masks, each pronounces a phrase with one or another intonation. Gaps are found under the note.
The children move to the third hand, which points to the easel. It contains a sheet of paper for recording a fairy tale, cards for composing a fairy tale and a note: "Compose a fairy tale, do not waste time!"
The cards are laid out on the table, the children come out to them in turn, draw out the cards, which they attach successively to a sheet of paper on the easel.
Sample questions: Once upon a time (who)? What was he like? (What could you do?) Went for a walk (travel) (where) ?; look for (what? whom?) Met an evil (whom?) What did this negative hero do (or knew how to do)? Our hero had a friend. Who? What was he like? How could he help the main character? What happened to the evil one? Where did our friends live? What did they do?
The children remove the compiled fairy tale algorithm from the easel, and the missing gaps appear under it.
Let's count, do we have enough passes for everyone?
Children count the gaps and count how many there are.
We have enough passes so we can go to the Masked Princess.
The teacher looks at his watch and says contritely:
For a long time already, today we will not have time, we need to return to Kindergarten for lunch. We will go to Princess Mask in the next lesson.
Children return to the curtain.
L. - Well, you got to the Princess Mask? Did you get the passes? Well then, you can get through at any time. I will be waiting for you! see you!
Children say goodbye and go out.
(clay crafting)
Software content:
Continue to improve the skills of working with clay, using water to smooth the surface, a stack to create an expressive image;
To cultivate accuracy in working with clay, a desire to create something new.
Equipment and materials: clay, containers with water, stacks, modeling boards, aprons, a diagram with a modeling sequence.
Course of the lesson
Hello, friends! I am very grateful for your help! Finally, you have come to my workshop, and I will show you how you can make a mask with your own hands.
Princess Mask (educator) explains the sequence of work using a diagram, shows how the base for the mask is made from clay.
Before work, we will warm up a little (finger gymnastics is carried out).
Let's decide who will make which mask. I know that you have made a fairy tale. I suggest you make masks for your fairy tale.
Well, we made the bases for the masks with you, now the clay needs to dry. It will take several days. Then I wait for you again in my workshop. Don't forget your passes. See you!
Practical lesson "In the workshop of the Princess of the Mask"
(papier-mâché) 2 lessons
Software content:
Continue to build papier-mâché skills using new material- cardboard cells and already familiar - paper;
To improve the technique of sculpting - molding (from cells);
Develop the ability to work according to the scheme;
Contribute to the further development of imagination, attention, memory, fine motor skills;
Raise interest in working with new material, accuracy in working with glue.
Equipment and materials: oilcloth, aprons, cells, paste, paper, cellophane bags.
Course of the lesson
Children enter the waiting room, where a fox meets them, checks their passes. Then they go through the curtain to the creative workshop to the Princess Mask.
Hello, friends! See what we got.
Children consider the basis for the mask, make an assumption about the course of further work.
Today you will get acquainted with new material. What it is?
Shows a cardboard box.
Children are called.
Without this cell, our masks will not work. How do you think we will continue to make masks with the cell? She's so tough, what can you do to make her soft?
Children make assumptions. The cell is dipped into the glue and watched what happens to it.
Yes, our cell has become very plastic, and we can glue our clay mask bases with cells.
Practical work of children, the teacher helps, explains, etc.
Now we will wait for them to dry and move on to the fun part - coloring.
A papier-mâché lesson with plain paper is carried out in a similar way.
Before the mask painting class, parents are invited to sandpaper the irregularities of the masks.
Practical lesson "In the workshop of the Princess of the Mask"
(painting masks)
Software content:
Continue to improve the ability to work with color, to select colors depending on the character and appearance of the hero;
Organize the use of previously obtained ZUN in painting (mixing paints, working with a brush, etc.);
Develop imagination, fantasy, eye, coordination, strength of movements;
Cultivate interest in creative activities.
Equipment and materials: gouache, brushes, palette, napkins, water containers, illustrations depicting various masks.
Course of the lesson
Children enter the waiting room, where a fox meets them, checks their passes. Then they go through the curtain to the creative workshop to the Princess Mask.
So we got to the most interesting part. Have you guessed what we are going to do today?
Listens to the assumptions of children.
Yes, today we will paint our masks. Pay attention to the illustrations of how the masks of certain characters should look like.
Tells the children what colors will be used for each mask, children repeat the color compatibility when mixing.
Practical work of children, the teacher helps, explains.
Are our masks ready? Can we put them on right now?
Children pay attention to the fact that the paints need to dry and fastenings must be made.
I will look forward to seeing them dry, you will make the bindings and you can put on your masks for the show, which I know you yourself have composed and are preparing to show. And I, in turn, will come to help you.
To conduct a theatrical performance, the educator must take into account the following points: production of invitation cards, posters, decorations; instruct parents to make costumes; choose children who will accompany the children to their places; select music together with the music director; finalize the script together with the children; hold rehearsals.
Picture 1

Figure 2

Figure 3
 How to make clothes for a cat with your own hands, detailed instructions
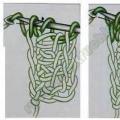 How to crochet loops, the beginning of knitting a set of loops - crochet for beginners Method of a set of crochet loops
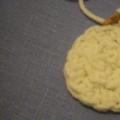 Crochet in a spiral Crochet spiral ball pattern