How to remove gel nails at home. How to remove gel polish from extended nails: a lot of dust from nothing
The nail extension procedure is considered harmful because it spoils their structure and thins. In fact, the cause of these consequences is the neglect of the process of removing layers of material. In order for the plates to remain healthy and beautiful, you need to know how to properly remove extended nails.
Each type of extension determines the specifics of the removal of extended nails. However, there are general recommendations that should be followed when removing acrylic, gel, and tips:
- The use of nail files made of glass and metal is completely impractical - they will deteriorate, and they will not cope with the task.
- When working with a file, a large amount of dust is generated, therefore, in order not to inhale it, it is more correct to use a mask.
- Trim the free edge of the plate carefully, not under the root.
How to remove extended nails: basic tools and tools
To remove your own nails, you must first shorten them. To do this, you will need either a catheter, or special wire cutters, or nail scissors.
For the procedure, you should also purchase a file with an abrasiveness of 80-100 grit. Below is an instruction on how to cut extended nails at home:
- The file must be taken with the thumb and middle finger, and pressure should be made with the index finger.
- The finger from which the layer of material is removed should be kept motionless - this way the cuticle will not get hurt.
- From time to time, you should stop and remove the resulting dust with a brush and wipe the plate with nail polish remover. When there is little material left, the file should be changed to a soft one - with an abrasiveness of 150-180 grit and the pressure should be reduced.
The time for cutting one nail can be up to 15 minutes. If you do the procedure faster, the plate will heat up.
The procedure for removing the gel coating requires the presence of a special liquid, foil and wand
Acrylic
To remove, you will need manicure tongs, they remove the free edge of the plate. Then you should cut off the top layer of acrylic. Then you need to follow the following steps:
Gel
To remove gel-extended nails at home is possible only by cutting. No acetone will help in this case, since the gel cannot be softened and does not dissolve.
To remove extended nails with gel or, you must first cut off the protruding free edge in the same way.
The gel cannot be removed with acetone, and the tips cannot be peeled off. To remove you will need:
- abrasiveness of 80-100 grit, it is with it that the main part of the gel is cut;
- a file with an abrasiveness of 150-180 grit;
- brush to remove the resulting dust;
You need to cut slowly in one direction and evenly, starting from the cuticle and to the free edge. From time to time, you should check how much the coating has been sawn off with a dust brush.
If you run a wet cotton pad over the plate, you can see where the plate borders on the gel.
Then you need to take a softer file and continue to work with it, the pressure on the plate should be reduced.
At the end of the procedure, the plate must be treated with a soft buff and softened with cream.
Biogel
You can remove extended nails with biogel using foil and acetone, which can be replaced with alcohol diluted with water, but it is better to use a special liquid for this purpose.
- It is necessary to cut small shapes from cotton pads so that the acetone does not irritate the skin.
- Remove as much gel as possible with a file. This will allow acetone to penetrate the gel faster, and the duration of the procedure will be significantly reduced.
- In order not to spoil the condition of the skin around the nail, you should lubricate it with hand cream.
- Cotton forms, soaked in acetone, must be attached to the plates and wrapped in foil. Wait 15 minutes, massaging the plates to improve the process of penetration of the liquid into the gel. Then it is necessary to remove the foil and remove the remains of the biogel with an orange stick.
Technique for removing extended nails with a device
To remove the nails with the device, you only need yourself. Together with the device, as a rule, there are several nozzles in the kit: from hard ones made of ceramics or metal to soft ones. The first nozzles remove most of the gel, and the second ones are used to process the plate near the cuticle, removing gel particles.
It is necessary to carefully cut the material, move gently and smoothly, while the elbows should rest on the table. Do not press on the plate, it may be damaged. Then you need to take the softest nozzle.
Features of professional tools
In stores there is a special tool for removing extended nails. The remover is produced by such brands as CND, OPI, Harmony, etc. They will provide reliable protection of the plates and cuticles from overdrying, and make the manicure removal procedure harmless.
Liquid for removing extended nails is used similarly to acetone. It is also applied to a cotton pad and secured with foil. However, it gently and gently removes the gel. Many of them contain vitamin E and oils that have a moisturizing effect, prevent the plate and cuticle from drying out, and prevent the appearance of white spots on the natural plate.
Nail care after removing the coating
After removing the gel, the plates need to be moistened, so they should be treated with any vegetable oil, or use a special oil product for nails.
Be sure to give the plates a "rest" so that they recover. You can apply a transparent healing varnish with vitamins on them for several days.
Thus, you can remove extended nails at home. For this, you do not need to have certain skills and special tools.
When it is not possible to remove extended nails in the salon, you can perform this procedure at home. It is not worth postponing it: manicure masters do not advise wearing such a coating for more than three weeks, since natural plates have an additional load that can lead to damage.
When removing the coating, it is important to take into account some of the nuances in order to carry out the procedure quickly and without harm to the nails, which are easily damaged by incorrect actions.
- 1. Special liquid for softening the material. Acrylic remover is often used to remove acrylic. But you can take nail polish remover, which contains acetone.
- 2. Hairdressing foil (can be replaced with regular baking foil). It must immediately be cut into squares of the same size - a total of 10 pieces will be required.
- 3. Cotton swabs. They also need 10.
- 4. Rough file.
- cotton pads;
- files with abrasiveness of 180 * 240, 150 * 180 and 80 * 100;
- acetone.
- 1. You need to take a file 80 * 100, remove the surface of the nail with horizontal movements. The resulting dust must be removed in a timely manner so as not to accidentally cut off the natural nail. From time to time, the plate must be wiped with a disk dipped in acetone.
- 2. Then you need to take a file 150 * 180, in which the coating is softer and finer. The artificial layer should be slowly ground down, gradually approaching the natural plates. No need to try to cut the coating clean. Masters usually leave a gap in the gel, which grows back over time and is cut off without problems.
- 3. The plates must be polished with a file 180*240. Then dip your hands in warm water for twenty minutes, apply oil or cream to the cuticle.
Show all
Even in the salon, the procedure for removing the coating lasts about an hour. Therefore, if you are going to remove extended nails at home, you need to be patient. You should not rush, it is important to ensure that actions do not cause pain.
In no case should you tear off artificial nails. Many people think that the tips will easily move away from the plate if you just pick them up tightly. But this method will not work if the task is to remove the coating without harming the "native" nails. And if you try to tear off the tips, they can really peel off, but only together with the top layer of the nail.
For each type of extension technique: acrylic and gel, a specific method of removing the coating is used.
Acrylic is usually removed with a special solution, and the gel is removed with files or a special apparatus.
Training
Preparation for the removal of both types of coating is the same.
It is necessary to cut off the edges of the tips with nail scissors or tongs, then it will be more convenient to remove them. You should not rush, the artificial plate is very hard, and you need to adapt.
You should act carefully so as not to get hurt on the edges of the cut tips. The craftsmen in the cabin usually have a boat at their disposal - a special tip cutter. For home use, you can buy it at a specialized nail art store.

Acrylic nail removal procedure
When the artificial edge of the nail is removed, you can start filing off the top coat (shiny). Otherwise, the tool will not be able to act on acrylic. After that, it is required to moisten the swabs in acetone or purchased special liquid, attach to each plate and securely fix with foil, avoiding gaps. This must be done so that the liquid does not evaporate quickly.

Removal of acrylic coating
The tool completely softens acrylic in fifty minutes, after which the material looks like jelly. You need to act immediately - you should pick up the material with a sharp object (for example, an orange stick or a pusher). When exposed to air, acrylic hardens again. Residues should be removed with a damp cotton pad.

gel nail removal procedure
Gel polish is particularly durable, and ordinary acetone will not turn this material into a jelly-like mass. You will have to cut it off, otherwise it will not work to remove the coating. The master on one nail takes an average of five to ten minutes. A beginner at home will need more time.

Removing the gel with a file
You will need:
Masters often use a special grinder, but it is quite expensive, so it is not always advisable to buy and use such a machine at home. You can use regular nail files. You should choose a plastic or wooden version with a special coating; it is better to refuse glass and metal.
Sequencing:
You have to work with gel longer than with acrylic, but if you wish, you can learn how to remove such a coating yourself.
Any woman ever, and even increased her nails, of different shapes and sizes. Of course, at first it even looks very attractive, especially if the hand of a real master has touched the creation of such an outstanding masterpiece. But there always comes that unpleasant moment when it is better to remove the faded beauty.
Usually the removal takes place in a nail salon or beauty parlor and is done by a person who specializes in this. If you do not have time or a limited budget, then you can remove extended nails at home. And how to do it correctly will tell the article.
How to prepare extended nails for removal?
To be honest, the process of freeing your nail from the extended one is quite long and boring. To bring a little positivity to the action, you need to turn on the radio with funny songs or your favorite songs.
When the music is turned on, time is freed, and the instruments are laid out, it is worth remembering what our extended nails are made of: acrylic, gel or biogel?
If consciousness has not yet prompted the answer, then you can not worry yet, because the beginning is the same in all cases.
Armed with tweezers, a boat, special scissors or nippers, you should carefully remove the edges of fake nails.
It is important to remember that the more accurately the special operation is carried out, the more likely it is to see your native nail safe and sound. It must not be overlooked that the edge of the artificial nail is very sharp and it is easy for them to injure a beautiful finger.
Once the process is complete, the most exciting part begins, which is the removal of the remaining beauty from the plates of natural nails. This is where the building material is important.
The master is able to remove such nails very quickly, he also has two free hands. And at home, you won’t have to wait for quick results, because nails made from gel do not soften or dissolve, but only cut off.
Without professional tools, it sometimes takes all day to free your own nails from the insidious ways of the gel.
How does a specialist work? Very simple. Removing an extended nail from one finger takes 5 or 10 minutes from the master. And, if you use a magic machine, then even faster.
But in this case, breaks are required to allow the hot nail to rest and cool. After machine intervention, a nail file is taken, which removes the remains of the gel.
Before embarking on an important task, you need to seriously consider the choice of tools. This is especially true for the selection of nail files. Glass and metal with notches are immediately excluded.
They will simply simply deteriorate until they reach the source of all troubles. But a wide nail file with an abrasiveness of 80/100 will perfectly cope with the mission assigned to it.

So, the choice is made, and now you can do the implementation of the plan. First you need to shorten the free edges, as in the case of acrylic.
The whole cutting process depends on this. The smaller the area, the less hassle. The main thing is not to overdo it and not accidentally hurt your nail.
In the process of all work, a lot of dust will be released, it must be cleaned with a brush to keep everything under control. A cotton swab dipped in acetone will also help. With its help, the border between your own nail and the gel will become visible.
By pressing, you can also determine where the gel is (it is tougher), and where the nail is.
When the gel layer remains quite a bit, the nail file boldly changes to another - 150/180 grit. At the same time, zeal and pressure should be reduced.
The outgoing gel does not need to be completely cut off with scales. A thin layer of such a coating will protect and strengthen the nails.
Then they are waiting for polishing with a buff, varnishing and abundant application of a cream with the effect of moisturizing and nourishing the skin.
To get rid of acrylic you will need:
- 1.5 or 2 hours of free time;
- acrylic remover - Acrilik Remover. If this is not available, then you can use the usual liquid, but with acetone. Without it, the desired result is unlikely to be obtained. It is better to purchase this important solution in a specialized store and it is desirable that the manufacturer of the material for extended nails and liquid be the same;
- 10 rectangular pieces of aluminum foil, 12x7 ml.
- cotton pads, divided into 2 or even 4 parts, which will cover the nails completely;
- , which has a coarse coating.

Description of a long and interesting process - removing acrylic nails at home
The first step is to provide protection for expressive eyes. Acrylic artificial nails have very sharp edges, making it easy to get hurt.
In no case should you remove the acrylic edge of the nails with a nail file. Useless efforts can cause injury to a natural nail.
And tearing off acrylic is not at all humane in relation to your beloved). No one wants to be alone with the terrible consequences of such barbarism?
When the edges are neatly removed, the nail file comes into its own to overcome the finishing stage - to cut off the finishing gel, which just gives a unique shine.
This is a very responsible task for such a small instrument. At first, she will simply slide over the surface without clinging to it at all, but this is an optical illusion. Do not stop victorious action.
After hard work, the layer will finally be removed and now it's time to put the prepared cotton pads into action. To begin with, they should be moistened in a liquid, and then applied to poor, tormented nails.
If it is limited only to this, then the liquid will instantly evaporate, so that this does not happen, you need to cover the nails with previously prepared pieces of foil, and tightly, otherwise the air will decide to look in on a visit to the solution and all efforts will go down the drain.

Equipped according to all the rules of the nails, it is worth giving time for a break of about 35 or 40 minutes. The harmful material will soften and become like jelly. No need to try it, it will not cause delight, unlike a culinary masterpiece.
This same mass is well removed with a sharp tool: plastic or metal, and at the same time, it will not damage the real nail at all. You just have to act very quickly, otherwise the acrylic will harden again.
Remove the remnants with a cotton swab, not dry, but moistened with the same liquid. After done, wash the hands with fragrant soap and generously grease with cream for nutrition and moisturizing.
The procedure for removing such a gel is similar, like two drops of water with an acrylic procedure. Only the liquid should be selected specifically for the biogel. Do not be afraid, it is sold almost everywhere, and the assortment, name and price will please any lady.

Artificial nails are very beautiful, bright and saturated with all sorts of patterns, rhinestones and sparkles, but it is very important to carefully familiarize yourself with the process of their removal before the next extension process.
How to remove extended nails - video
The nail extension procedure is considered harmful because it spoils their structure and thins. In fact, the cause of these consequences is the neglect of the process of removing layers of material. In order for the plates to remain healthy and beautiful, you need to know how to properly remove extended nails.
Each type of extension determines the specifics of the removal of extended nails. However, there are general recommendations that should be followed when removing acrylic, gel, and tips:
- The use of nail files made of glass and metal is completely impractical - they will deteriorate, and they will not cope with the task.
- When working with a file, a large amount of dust is generated, therefore, in order not to inhale it, it is more correct to use a mask.
- Trim the free edge of the plate carefully, not under the root.
How to remove extended nails: basic tools and tools
To remove your own nails, you must first shorten them. To do this, you will need either a catheter, or special wire cutters, or nail scissors.
For the procedure, you should also purchase a file with an abrasiveness of 80-100 grit. Below is an instruction on how to cut extended nails at home:
- The file must be taken with the thumb and middle finger, and pressure should be made with the index finger.
- The finger from which the layer of material is removed should be kept motionless - this way the cuticle will not get hurt.
- From time to time, you should stop and remove the resulting dust with a brush and wipe the plate with nail polish remover. When there is little material left, the file should be changed to a soft one - with an abrasiveness of 150-180 grit and the pressure should be reduced.
The time for cutting one nail can be up to 15 minutes. If you do the procedure faster, the plate will heat up.
The procedure for removing the gel coating requires the presence of a special liquid, foil and wand
Acrylic
To remove, you will need manicure tongs, they remove the free edge of the plate. Then you should cut off the top layer of acrylic. Then you need to follow the following steps:
Gel
To remove gel-extended nails at home is possible only by cutting. No acetone will help in this case, since the gel cannot be softened and does not dissolve.
To remove extended nails with gel or, you must first cut off the protruding free edge in the same way.
The gel cannot be removed with acetone, and the tips cannot be peeled off. To remove you will need:
- abrasiveness of 80-100 grit, it is with it that the main part of the gel is cut;
- a file with an abrasiveness of 150-180 grit;
- brush to remove the resulting dust;
You need to cut slowly in one direction and evenly, starting from the cuticle and to the free edge. From time to time, you should check how much the coating has been sawn off with a dust brush.
If you run a wet cotton pad over the plate, you can see where the plate borders on the gel.
Then you need to take a softer file and continue to work with it, the pressure on the plate should be reduced.
At the end of the procedure, the plate must be treated with a soft buff and softened with cream.
Biogel
You can remove extended nails with biogel using foil and acetone, which can be replaced with alcohol diluted with water, but it is better to use a special liquid for this purpose.
- It is necessary to cut small shapes from cotton pads so that the acetone does not irritate the skin.
- Remove as much gel as possible with a file. This will allow acetone to penetrate the gel faster, and the duration of the procedure will be significantly reduced.
- In order not to spoil the condition of the skin around the nail, you should lubricate it with hand cream.
- Cotton forms, soaked in acetone, must be attached to the plates and wrapped in foil. Wait 15 minutes, massaging the plates to improve the process of penetration of the liquid into the gel. Then it is necessary to remove the foil and remove the remains of the biogel with an orange stick.
Technique for removing extended nails with a device
To remove the nails with the device, you only need yourself. Together with the device, as a rule, there are several nozzles in the kit: from hard ones made of ceramics or metal to soft ones. The first nozzles remove most of the gel, and the second ones are used to process the plate near the cuticle, removing gel particles.
It is necessary to carefully cut the material, move gently and smoothly, while the elbows should rest on the table. Do not press on the plate, it may be damaged. Then you need to take the softest nozzle.
Features of professional tools
In stores there is a special tool for removing extended nails. The remover is produced by such brands as CND, OPI, Harmony, etc. They will provide reliable protection of the plates and cuticles from overdrying, and make the manicure removal procedure harmless.
Liquid for removing extended nails is used similarly to acetone. It is also applied to a cotton pad and secured with foil. However, it gently and gently removes the gel. Many of them contain vitamin E and oils that have a moisturizing effect, prevent the plate and cuticle from drying out, and prevent the appearance of white spots on the natural plate.
Nail care after removing the coating
After removing the gel, the plates need to be moistened, so they should be treated with any vegetable oil, or use a special oil product for nails.
Be sure to give the plates a "rest" so that they recover. You can apply a transparent healing varnish with vitamins on them for several days.
Thus, you can remove extended nails at home. For this, you do not need to have certain skills and special tools.
Marina Ignatieva
Reading time: 9 minutes
A A
When it comes time to remove the nails after extension, many girls resort to the services of professionals. But if you do not have time to visit beauty salons, you can do it at home.
Learn how to remove nails correctly at home without damaging your natural one. Watch the video, how the masters remove extended nails.
These tips will help you remove extended nails without the help of professionals, preserving the beauty and health of natural nails.
Tools and tools for removing gel nails
It is very difficult to remove, for this you must have enough time, special materials and tools.
To remove gel nails, you will need

How to remove gel nails - detailed instructions

Video instruction: How to properly remove gel nails
What products and tools are needed to remove acrylic nails?
To remove acrylic nails, you will need:

Video instruction: How to remove acrylic nails correctly
Nails after removing extensions - care and restoration
Even if you carefully and carefully removed the extended nails, they still need care and restoration. Various procedures and baths will come to your aid.
- hot manicure
With the help of hot manicure, you can restore damaged nails after extension. Once in the nutritious hot composition, the nail becomes permeable, which allows it to be enriched with essential vitamins and minerals. The composition will quickly penetrate into the nail, restoring it. - Paraffin baths
Such baths nourish the nail well, restoring the water balance. This procedure is recommended to be performed immediately after removing the extended nails. After that, paraffin baths are recommended to be used every 2 to 3 weeks.
During the paraffin baths, first the hands are cleaned and lubricated with a special cream. After that, hands are lowered into cosmetic paraffin heated to a certain temperature. After the bath, hands are wrapped in cellophane and put on warm mittens. After 20 minutes, the paraffin is removed and a nourishing cream is applied. Paraffin baths not only strengthen and restore nails, but also nourish the skin of the hands well. - Biogel
If after building your nails are stratified, it will be effective to seal them in biogel. After nail extension, the free edge of natural nails becomes soft, which can be strengthened with biogel. Biogel has a flexible structure, which after application creates the effect of a natural nail. Biogel covers the entire nail with a thin layer, sealing the free edge. When natural nails grow back, biogel is polished so that the border between natural and artificial nails is not visible.
Biogel protects the natural nail from mechanical damage, scratches and cracks. - Massage
To strengthen the nails, it is recommended to massage the nail plate using a special solution. In circular motions, it is necessary to rub the vitamin solution or cream into the nails every evening. It is better to trim the free edge of the nail, as it is damaged anyway.
At first, it is better not to cover your nails with decorative nail polishes, make an exception only for medical varnishes. Avoid getting acetone, formaldehyde and other aggressive liquids on the nail plate. - Masks and baths
Experts recommend regularly making nail masks after extensions that contain lemon juice, sea buckthorn oil, sea salt, essential oils, vitamins A and E. Rubbing lemon juice into the nail helps whiten it and prevents the appearance of yellowness on the nails. Baths of sea salt will help strengthen nails. Sea buckthorn oil perfectly restores the structure of nails, which is necessary for damaged nails. - Rubbing essential oils (pine, bergamot, chamomile, etc.) also perfectly restores and nourishes nails, preventing their delamination.
-
Don't forget that beauty starts from within. For better nail growth, include more calcium, selenium, silicon, and vitamins in your diet. In everyday life, protect your nails from the aggressive effects of the environment. Be sure to wear gloves when washing dishes, and apply a protective coating to your nails when bathing.
We hope that our tips will help you to remove extended nails at home and restore their health after being removed
.
Good luck!
 How to get rid of the smell of sweat in shoes
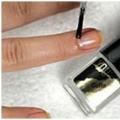 Hardware manicure training for beginners
 How to use castor oil for hair?