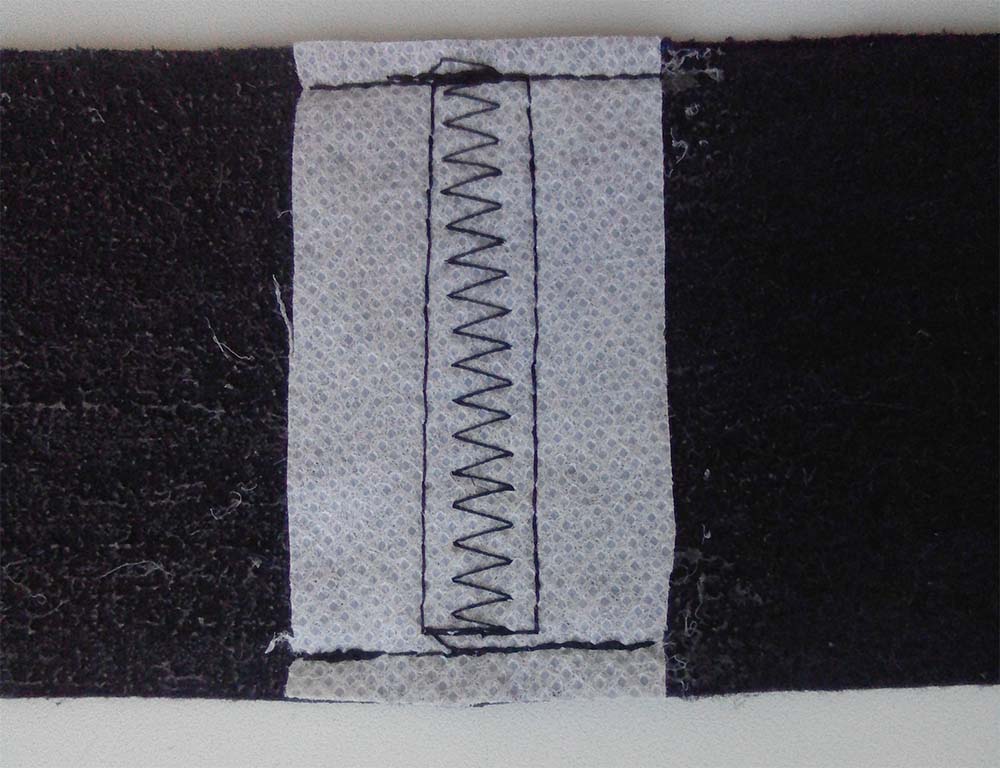
Children's vest gnome pattern. Gnomes and Gnomes
II European games. "Our Olympics". Belarus will host the second European Games
European Games 2019 is the second edition of the European Regional Games, which will be held in Minsk from 21 to 30 June 2019. Hundreds of athletes will take part in the competition. They will compete for 198 sets of awards in 15 sports. Among...
How to speed up your metabolism for weight loss?
Controlling the Fat Burning Process Aurantium extract accelerates the metabolism and the fat burning process, while the Coleus root extract provides energy for the breakdown of fat cells Appetite control Herbe mate leaf extract gives a natural ...
What if I'm afraid to fight
Bodybuilding for health
Sport has a positive effect on the body. But in training, you need to feel the measure. Professional bodybuilders have ideal external parameters, but internal organs work intermittently and there are many diseases. Let's take a look at how bodybuilding ...
-
And today the titled fighters - David Radeff and Alexey Fedoseev - spoke about their mood before the fights The Big tournament according to the version "Draka" will be held tomorrow in Blagoveshchensk. In addition to several rating fights of representatives of different combat ...
There will be a fight tomorrow - Amur men's magazine
It's okay to be afraid of a fight. A person has an instinct for self-preservation, which makes men and women avoid dangerous situations. Reasonable and educated members of society try to solve problems in peaceful ways. But several...
The "cheerful gnome" costume is a versatile version of the New Year's carnival outfit. With the right pattern, it's easy to create a New Year's outfit for a boy, boyfriend, or even a little lady.
Children's gnome costume for a boy for the New Year
To sew a gnome shirt, you need to take any shirt from the wardrobe as a sample, attach it to the fabric, circle it, adding at least seven centimeters to each side, except for the bottom. It will need to be lengthened by about fifteen centimeters. Be sure to make a large neckline so that you can easily put the thing over your head.
A suitable decor is bright patches and wavy tape covering the edges. The best fabric options for this shirt are lightweight and stretch. It is desirable to choose a color bright or light.
It's easy to sew a beautiful vest. This will require a dense dark material and thick braid. Instead of a pattern, we take a regular shirt, apply it to a dark fabric, circle everything except the sleeves, adding five centimeters. Next, shorten the bottom by about ten centimeters and cut out the neckline.
There should be two such parts - the first will be the back, and the second should be cut in half to create the front. Next, you need to sew three parts. After that, we make four holes along the edges of the front part at the same level and thread the braid through them. The tips can be left in free fall or tied with a bow.
For pantaloons, you need satin fabric of any dark or bright color. Instead of a pattern for a sample, you can take sweatpants. We outline them, adding centimeters for the width, and shorten them so that the pantaloons are just below the knees. You should cut two such parts and sew, remembering to insert three elastic bands - one on top and two on the ends of the legs.
Well, what a dwarf without a bright cap! To begin with, we measure the head with a thread. Fold it in half, apply it to the fabric, add a couple of centimeters and get the base of the headdress. We draw a triangle with this base on the fabric, create another such detail, sew both triangles and insert an elastic band into the base.
DIY Christmas gnome costume for an adult guy
Why not put on the outfit of a cheerful gnome for the New Year's carnival, especially if your companion is actively considering a Snow White costume as an option ?!
It will be easier to take a ready-made shirt in a light or bright color. It is desirable that it is not classical. If the sleeves are long, you can roll them up.

The vest is simply sewn from dark fabric, making only three parts: the back in the form of a rectangle with a neckline and grooves for the sleeves and two front parts that can be obtained by cutting a part identical to the back in half. Decorations in the form of very large buttons on one side of the vest will look spectacular.
It is easy to sew a cap, but there is the easiest way to get a suitable hat - buy a Santa Claus hat in the store. If you managed to find only a red one with a white edging and a pompom and you do not want to compete with Santa Claus at the holiday, cut off the white fur edging, buy a soft fabric of a different color, cut a strip out of it and sew on a hat.
With a pompom, everything is simple - cut a wide ring of paper with a diameter of ten centimeters, wrap a woolen thread around it, cut along the edges and collect the resulting threads with a thin braid into a pompom.

You can make gnome pants using any bright fabric and sweatpants. We circle the pants, adding five centimeters, cut out two such parts, cut each in half lengthwise, sew and insert elastic bands into the ends of the legs and into the base.
Children's New Year's gnome costume for a girl
A young lady can look lovely in this extraordinary outfit if you create it correctly.
Of course, a white short-sleeved blouse can be sewn, but don't worry. Choosing such a thing in the wardrobe or buying it in a children's clothing store is a suitable and simple option.

The process of making a vest and a cap can be seen in the instructions for creating a suit for a boy and a guy. Here, only the decor and color schemes in a suit for a girl should be different. Suitable colors: blue, red, blue, burgundy, orange, emerald and other rich and bright colors. As a decor, it is worth using sparkling tinsel, ribbons and lace braid.
The skirt is best made of floral fabric or bright polka dot fabric. We measure the waist with an elastic band, tie it and sew a rectangle cut from a suitable fabric to it. If the top seam is not very beautiful, you can hide it with a thick tape of contrasting fabric in the form of a belt.
This craft can be a charming interior decoration, it can be filled with sweets to surprise the kids. Great idea for the New Year. And you can also make such shoes that kids can wear on various costumed matinees to the costume of a gnome and other fairy-tale characters. In this article, we will instruct you on how to sew shoes for a gnome yourself with a selection of step-by-step patterns attached to each option.
Learn to create shoes for a gnome with patterns for gifts
We will need:
- pattern;
- thick papers;
- a pen;
- scissors;
- thick felt fabric in red, white and pink colors for New Year's mood;
- basting needles;
- red floss threads;
- shiny red ribbon.
Sequencing:
1) The pattern is shown below. You can change the parameters and scale of the parts as you like, and then print and cut. In the image below, we see the top of the shoe at the top, the side detail in the middle, and the sole pattern at the bottom.
2) We outline paper parts on thick paper and cut along the contour. We attach cardboard patterns with pins to the fabrics of the desired colors. The tongue will be white, the barrel (we will need two such details) will be red, and the bottom will be pink. We draw with a pen around the perimeter of the cardboard and cut along the contour without adding for the seams.

3) Sew together the two side pieces in the heel area, make a neat chain stitch, as in the photo below.
4) We grind the resulting turn with the fabric of the foot and also make a chain stitch.
5) Now you need to carefully sew the upper part between the sides. We fasten the parts with pins so that it is easier to grind, and the fabric does not slip away. As the seam is laid, we sequentially remove the pins. The result is a slipper.
6) Now you need to complement it with a satin bow, which will create the impression of a fabulous believability. We tie a bow from our ribbon and sew on the top of the tongue.

Such a shoe can also be trimmed with thread pom-poms in one of the shoe colors. They are attached closer to the nose of the shoe. In this version, the bow would be superfluous. The choice is yours.
Now you can put sweets, fruits and small souvenirs into the gnome's shoe. We place everything so that it fits more into the inner space, but at the same time so that the shape does not bend. This is how we made a holiday souvenir with our own hands. It can be placed on a shelf or under a Christmas tree.
Trying to sew shoes for a suit with our own hands
We will now tell you how to sew such gnome shoes so that children can wear them for the holidays. In this example, we will consider the shoe model as in the photo above. We will need thick socks for children, it is better that the lower part has a special gel coating that prevents slipping. If there are no such, then ordinary warm ones will do. You just need to insert insoles into them so that the cold does not go from the floor, and hem them to the sole so that they do not slide out.

Below is a sketch of the pattern. You need to draw yourself according to this example, but according to individual measurements. The top of the boot should extend upward, allowing the foot to slide in easily. It is even worth making the bootleg wider and higher than in the picture. And don't forget the allowances.
Sew together two identical details in the area of \u200b\u200bthe bootleg and toe, without touching the top, where the leg will pass, and the sole area. Now we put the sock in there and grind the sole to the two previously connected sides, as seen below. Now we push a synthetic winterizer between the toe and the boot to create volume and shape. The main thing is not to overdo it so that it is comfortable for the child to thread the leg.
At the bootleg in the upper part we make an elastic assembly. It is not associated with the toe and can be of any height. And if you sew a sock to the bootleg, it will become wrinkled, as in the model below.

Our gnome shoe is ready. You can decorate it at your discretion.
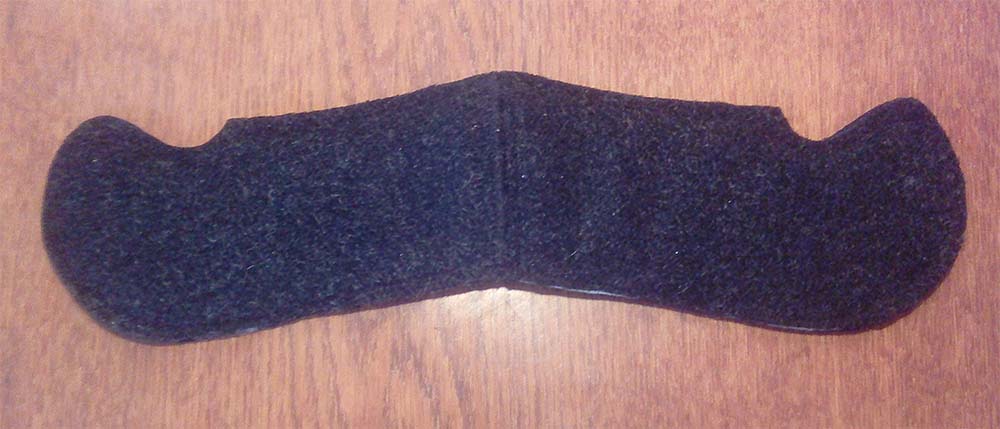
Very simple shoes like socks. They are made from fleece fabric. In the image of the pattern, we see a detail from above that covers the heel, foot and bottom of the curved cape. Next comes the top of the front. The side is located at the bottom, you will need two such parts for one shoe.

To make a pattern according to the desired measurement, draw along the perimeter of the sole and increase from the sides by 1 cm. Place the parts of the back and the long tapered toe equal 14cm. We make the part of the top 7 cm in width, we assume in length 26 cm, of which the narrow part extends 11 cm.
For the sides, for example, you also need to put children's shoes and draw a perimeter, adding 1-1.5 cm for allowances. On the narrowed, raised nose, we allocate an additional 14 cm. The height of the backs is 13cm. It is necessary to sew a boot, starting from the area of \u200b\u200bthe cape. An elastic band must be sewn into the top of the bootleg. We fill the protruding nose with synthetic material, padding polyester or padding.
It's so easy to sew your own footwear for a gnome costume.
Related videos
The New Year holidays are over and now there is time to show Alyoshin his New Year costume.
Last year Alyosha was a cockerel, and this year he was a dwarf. I sewed both suits myself.
For the gnome costume for the new year, I used the following materials:
- burgundy velor
- white faux fur with short pile (white fleece, as I wanted, was not available)
- fur pom-pom from Irishka's winter jacket
- burgundy and white threads
- two buttons
- cord for strings (I forgot the correct name)
- elastic bands (width 0.5cm at the bottom of the pants, width 2cm at the waist)
- scissors
How to make a cap for a gnome costume
Really very simple. 🙂 As I did.
I folded the fabric in half, measured the length of the cap along the fold of 50 cm, measured 27 cm away from the fold on one edge and connected the dots. Round one corner. It turned out such a triangle.
The measured side of 27 cm is half the circumference of the child's head + 2 cm seam allowance. For example, Lesha's head circumference is 52cm + 2cm seam allowance \u003d 54cm / 2 \u003d 27cm.
Then she folded the fabric right side in, and sewed along the long side of the resulting triangle. When trying on, the cap was tightly put on the head.
Therefore, if you need the cap to sit freely, then add more centimeters to the circumference of the head.
She cut off a strip of white faux fur with a short pile, 10cm wide and 54cm long (along the head circumference with seam allowances). I sewed it.
The first. Sew a strip of fur to the edge of the hood with the seam allowance on the outside. Fold it up to close the seam and sew again. Then the width of the strip can be taken even less.
Second. How I did it. I sewed the fur to the edge of the cap with the seam allowance inward, folded the strip of fur in half, hid the edge to the seam allowance and stitched it. So I closed the seam and increased the length of the cap by 4cm ((10cm - 2cm for the allowance) / 2 (folded in half) \u003d 4cm).
And on the top of the cap I sewed a fur pom-pom from Irishka's winter jacket. After the holiday, I returned it to its place. 🙂
How to sew gnome pants
Since I have problems with sewing, I made the sewing patterns, circling Alyosha's elongated shorts. The length of the shorts I got was 50cm.
First I sewed each leg separately, and then put one inside the other and sewed the middle of the pants.
I turned up the bottom and stitched it, leaving a small hole for inserting the elastic.
Initially, the belt was made narrow, and the pants got a low rise. In principle, and so it looked fine, but it did not suit me. Therefore, I sewn another wide strip, sewed it in the middle, and inserted an elastic band into the upper part.
It turned out to be such a triple wide belt.
How to sew a vest for a gnome
The pattern was made according to Alyosha's vest from a two-piece suit.
Sewed three details. She cut off a 7cm wide strip of white faux fur. I sewed it along the edge of the vest, as well as on the cap (in the second way).
Then she sewed two buttons and loops for them from a thin cord.
The vest is also ready.
I did not begin to make a beard, for me it is such an extra detail for a child, which will only interfere with him. For the sake of convenience, she refused from any shoes for the gnome.
And here is the New Year's costume of the gnome on Alyosha. Fitting at home.
White socks and gym shoes for the matinee itself. I could have taken the colored striped knee-highs from the rooster costume, but I decided not to distract my eyes from the costume itself. 🙂
Did you like our gnome costume for the new year? Click on the social media buttons! It costs you nothing, but I am pleased. 🙂
Gnome costume for New Year
Gnome costume for the New Year for a 4 year old boy. How to sew with your own hands.
Source: belyekorabliki.ru
You can't forbid sewing beautifully!
Elena Krasovskaya
You can't forbid sewing beautifully!
A beginner's guide
Learn to sew online with Elena Krasovskaya
Suit "Gnome". Participant # 12
The closer the New Year's costume contest comes to an end, the hotter it gets!
This is always the case by the end of the competition, everyone is trying to be in time. Here is the next participant sent an application for her competitive work quite recently and was in time!
I present to you today mother Christina and wonderful Gnome Vitaly.
Christina not only sewed a beautiful Gnome costume for her son, but also beautifully designed her story, even with a poem.
I give the floor to the participant:
"… Hello.
My name is Christina. I really like your site. I recently decided to learn to sew ... bought a sewing machine ... so your advice helps me a lot in mastering the sewing craft!
I have a wonderful son Vitaly, for whom I sewed a New Year's costume GNOMIK! We want to participate in the New Year's costume competition!
Happy New Year!…"
Costume GNOMIK
I'm a good New Year's gnome
I bring good luck to the house!
I give you happiness
After all, I love you all!
At the little gnome,
There are jokes!
The costume consists of a vest, pants, hats, belt, socks that are worn over sandals. A turtleneck or T-shirt is worn under the vest.
Vest... The fabric is fleece. I didn't have a pattern, so I attached a turtleneck, added 2 cm on the sides, 10 cm in length, and 6 cm (in width) on the front of the product for the smell. Cut out the neckline. The armhole, the neckline and the bottom of the vest were sheathed with padding polyester.
Pants. The fabric is fleece. I cut out according to the existing trousers, for allowances - 2 cm each (so that the trousers were wide), for a length - 4 cm. I inserted elastic bands into the belt and bottom of the trousers.
Belt. Made from a wide black rubber band and a plastic plaque.
On the tip of the cap I sewed a ball made of padding polyester.
Socks. The fabric is fleece. Consist of 4 parts: top, bottom 2 side. For the lower part, I circled the sole of the shoe, adding 1 cm on the sides, and 14 cm from the heel and toe. I narrowed the toe. The upper part is 7 cm wide, 26 cm long, of which the narrowed part is 11 cm.For the sidewalls, I circled the shoes, adding 1-1.5 cm to the allowances and 14 cm to the narrow curved nose.The height of the sidewalls (from the heel side) 13 cm . Connect products should start from the bow. I inserted an elastic band into the upper part of the product. The nose part was filled with synthetic pillow filling.
Christina, thank you very much for your participation, for the excellent use of the master class from my resource (doubly pleasant) and the cheerful mood that invariably appears when you look at your son Vitalik in the "Gnome" costume!
You can't forbid sewing beautifully!
You can't forbid sewing beautifully! Elena Krasovskaya You cannot forbid sewing beautifully! A Beginner's Guide Learn to sew online with Elena Krasovskaya The Gnome Costume. Participant # 12 The closer
Source: shjem-krasivo.ru
How to make a children's gnome costume for the New Year?
The gnome is a symbol of material well-being!
Good day or another time of day, friends and readers of my blog, Tatiana Sukhikh is with you! You can congratulate me: my nephew is 1 year old! I became an aunt for the first time! And although the topic of my article: how to make a children's gnome costume with your own hands for the new year is not connected with one-year-old children, the search for a gift for a niece under a Christmas tree helped in writing this text. I found a great children's gnome costume for the New Year for kids from a year old - what you need for the first photo shoot!
I will give a certificate for shooting and a cute gnome or tiny Santa costume. The clothes are made in the form of a man jumpsuit and a hat. Do you think I came up with a good idea? Although the baby does not need all these gifts now, he only cares about his mother and bright toys, but what a memory there will be!
You've probably seen amazing staged photos with babies on the Internet? Photographers create real stories with little children, dressing them in different costumes and creating funny compositions around them.
I found a seemingly good example of how to make a gnome costume with my own hands, but the catch is that I don't particularly like sewing, and, as it turned out, there is nobody else. As always, I'm extreme ...
So, the easiest way to build an outfit for a gnome.
If there is time and you do not want to "sew up" with this problem, you can buy some attributes that will help to bring to life a children's gnome costume: leggings or striped tights, Santa Claus's beard with an elastic band, a cap. At home, you will have to pick up short pants, a vest and sheathe the whole thing with rain.
But I do not plan to buy anything, it is not so much I earn, unfortunately ...
We'll have to figure out how to quickly make a decent children's gnome costume at low cost. As I said, I have a son of 10 years old, and, accordingly, there is his clothes, which have become too small for him. From it I will make an outfit. It is not necessary to strive to make all the details of the suit in the same color. Use what is at hand. You have to sew during quiet hours, but what to do?
How to sew a cap?
style \u003d ”display: block”
data-ad-client \u003d ”ca-pub-8500929059585348 ″
data-ad-slot \u003d ”5932752765 ″
data-ad-format \u003d ”auto”\u003e
We take an old sweater, golf, etc. and cut off the sleeve. The widest honor of the sleeves is tucked up, sheathed in rain and worn over the head. We collect the end of the sleeve on a thread and sew it up. We make a pompom and sew to the top of the cap. You can make a pompom like this: cut a circle out of fabric, sew a needle around the circumference with a seam forward. Put a cotton ball in the center and tighten the thread. It turned out to be a ball. We sew it on the end of the cap.
If you are sewing from a piece of fabric, then simply cut out an isosceles triangle, the base of which is equal to the circumference of the child's head. We sew a seam and decorate it with rain. Some mothers advise filling the hood with cotton, but I didn't have that much at home. By the way, I spied on the manufacture of the cap on the portal for women.
How to make a vest for a gnome?
Cut off the second sleeve from the same sweater, cut the front part in the middle. Cut off the bottom in a semicircle. We cover everything with rain. I met another option: we take a long plain T-shirt, cut the bottom with large teeth, make a ragged edge, and make out the bottom of the sleeves in the same way. This will be the vest. We put on the vest over a regular golf and tie it with a wide belt. If you have a belt with a buckle - great. If not, we cut out the buckle from the golden cardboard and fasten it to the belt. The same buckles can be attached to boots.
Any trousers for a fairy-tale character will do. You can decorate them with contrasting patches and rain. I found the idea when a vest is sewn from the bottom of old trousers, and the top turns into breeches.
To make a believable children's fairy gnome costume, you need a beard. Fortunately, the castellan will give me this detail of the costume, but there are options for independent creativity. They take an elastic band and fasten with a knot long pieces of white thick threads for knitting. You need to make it thick, then comb. Sew the elastic to the cap so that the beard does not slip.
If you also make a children's carnival costume of a little gnome with your own hands, do not forget about leggings or striped tights. This detail will add color to the image. There is a time, but there are no suitable tights? Sew the stripes directly onto your tights!
Usually gnomes walk with knots on long sticks - nothing could be easier. We take a scarf, put a hat, scarf, any light object in the middle and tie the ends of the scarf with a knot.
The gnome's shoes are the most difficult thing, it is for the craftswomen. Needlewomen advise to sheathe Czech shoes with a fabric cut in the form of a pointed boat. It is necessary to stuff the noses of the shoes with cotton wool and fix them in the bent position with imperceptible stitches.
For mere mortals like me, these manipulations are something beyond. Therefore, I confine myself to buckles from golden cardboard on ordinary shoes.
As you have seen, making a fairy gnome costume yourself is not difficult.
Best regards, Tatiana Sukhikh, stay healthy and see you!
What foods and meals can help soothe headaches after the holidays
Good day, dear blog visitors. I, Tatiana Sukhikh again s.
Apartment decoration, table setting for the New Year
Hello dear readers of my blog. I, Tatiana Sukhikh, offer interesting ones.
What New Year gifts are given in different countries?
Good day. I, Tatiana Sukhikh, want to offer a lot of interesting things about.
New Year and interesting New Year's signs from different states
Good afternoon, dear friends, Tatiana Sukhikh is with you. When it comes.
How to make a children's gnome costume for the New Year?
Do-it-yourself children's carnival costume of a gnome, do not forget about leggings or striped tights. This detail will add color to the image.
Source: metodbv.ru
Do-it-yourself gnome costume for a boy: simple and complex images. DIY beautiful gnome costumes for boys
Any event in kindergarten or school is accompanied by a children's costume concert for their parents. The job of creating the image falls on the shoulders of the parents. Don't worry, in fact, all the costumes can be made by yourself.
Today's master class is devoted to the story of how to sew a gnome costume for a boy with your own hands.
Do-it-yourself gnome costume for a boy: blouse or vest
In order to look like a gnome, you need to be dressed like a gnome. The main attributes when creating a gnome costume for a boy with your own hands are: a cap, jacket or vest, pants or shorts and shoes. You can also complement the image with leggings if you put on shorts, a beard and a wide belt on the jacket.
Decide on the color scheme of the entire suit. If the jacket will match the color of the pants, then the cap must be of a different color, and if the jacket does not match the color with the pants, then the cap must be combined with the pants. It's nice to look not only at the costume, but also to note the taste preferences of the one who chose and completed the fabrics of the entire image as a whole.
The gnome's blouse is usually wrap-around and always with buttons and a large belt
In order to sew a jacket, you will need fabric of one or two colors, thread, tape measure, large buttons.
Stage 1
Take measurements for the child and transfer them to the fabric using these patterns.
If it is difficult for you, and you are confused with measurements, then you can make it easier: put on the table the fabric from which you will sew a blouse and attach to it any purchased jacket for your child, which is just the size for him. Circle a contour from it, and the patterns are ready.
You can mentally divide the jacket into sleeves, front and back body parts. Do not forget that with this method, for each part you need to cut the fabric already folded in half, or, if the parts are from one layer of fabric, in its mirror image.
Stage 2
If you want to see on the child not a jacket, but a vest, then do not sew on the sleeves. The body pattern remains the same. Details are sewn together from the inside. The cut edges are processed on an overlock, then folded in one or two layers and stitched.
Stage 3
For decoration, you can sew a visor on the shoulder of a vest in a different color. To do this, take the desired fabric, cut a 10 × 15 cm rectangle out of it and fold it in half. Sew it to the inside of the fabric with a cut edge so that the folded edge hangs over the child's shoulder. Hide all edges in the seam so that the sections are not visible.
Stage 4
Sew on large buttons on the chest. Tie a belt over your stomach.
DIY gnome costume for a boy: shorts or pants
Now sew pants or shorts. If you want to sew shorts, then the suit can be complemented with striped golfs - leggings.
Stage 1
Measure your child's waist and leg height from hip to bottom and groin to bottom. Divide the waist circumference in half as the fabric will be cut and stitched when folded.
Stage 2
Fold the fabric in four layers and transfer the dimensions to the drawing. Make a pattern according to this scheme.
The diagram shows that the pattern is applied to the fabric folded in 4 layers. Next, you have two details. Sew them together along the side top seams. Next, twist the product so that the seams pass in the middle, and the two parts lie on the sides folded in half.
Stage 3
Sew long cuts in the half-folded pieces together. This will be the seam between your legs.
Stage 4
Fold over and sew the remaining cuts at the waist and legs. In the folded fabric, you can sew or insert an elastic band that will hold the pants at the waist and tighten at the ankle. If the leg is much wider than the leg, then the elastic, pulling the lower part, will emphasize the splendor of the suit.
If you decide to sew shorts, then they are made according to the same pattern, only shorter in leg length.
DIY gnome costume for boy: cap
It is very easy to make such a cap. You only need two parts: a cone with a rounded bottom and a rectangle. The width of the rectangle is 20-22 cm, the length is equal to the length of the head circumference.
Stage 1
Measure your head circumference with a tape measure. Transfer the resulting measurements to the fabric. You can choose the length or height of the hood at your discretion. If you make it very long, then the tip can be tied into a knot, as shown in the picture.
Stage 2
Cut and sew the resulting parts together. The crown for the cap can be of different shapes and colors. The contrasting crown looks beautiful and emphasizes the headpiece.
One of the decoration options can be teeth made on it. In this case, sew it on from one flat edge, and turn the other out.
It can also be made two-layer, which will give it additional rigidity.
DIY gnome costume for a boy: shoes
Shoes are also an important attribute in a suit. The gnome will turn out not at all fabulous or complete without beautiful shoes with curved noses and bells at the end. You can make them in several ways according to the pattern.
For boots, you need colored felt or thick fabric and thick, strong thread. You can use multiple fabric colors and make the sole in one color and the edges in another. You can also make shoes with one color on the inside and another on the outside. When you put them on your feet and turn out the edges, it will look interesting.
Option 1
For this type of boots, you will need to make the following pattern and cut out the details.
Stage 1
Be sure to measure the length of the baby's foot and the height of the instep from heel to ankle and transfer the measurements to the fabric. This is important, because if the baby is not comfortable in these shoes, then he will not feel the joy of the holiday.
Stage 2
Pattern on the fabric using the pattern shown above. Cut and sew the resulting parts together. Detail A in the picture is the top of the boot, and detail C is the lower or sole.
If you want, you can sew the details with a sewing machine, or you can sew with your hands. As a rule, the work is done by hand with a buttonhole stitch, because it does not require much time and effort.
The buttonhole stitch looks like this and is sewn by hand using a regular needle and thread. It is used to process cut edges of fabric or paper.
Stage 3
Decorate the shoes with bells or booms that are sewn onto the sharp ends of the noses. You can also sew a satin ribbon bow to the boot tongue.
Option 2
This image shows the pattern and the final result. You can, as with the first option, use several colors and types of fabrics.
Stage 1
Measure your child's foot size and height.
Stage 2
Draw measurements on the fabric and cut out. Sew them together by hand or with a sewing machine. Decorate with bombs, bells and bows as desired.
- For a child to grow strong and agile, he needs this
- How to look 10 years younger than your age
- How to get rid of mimic wrinkles
- How to permanently remove cellulite
- How to lose weight quickly without dieting and fitness
Do-it-yourself gnome costume for a boy: simple and complex images
Any event in kindergarten or school is accompanied by a children's costume concert for their parents. The work of creating the image falls on the shoulders
We sew a gnome costume for a boy with our own hands

Children's New Year's Eve parties are not complete without costumes of fairy-tale characters. Not everyone can afford to buy a suit. Moreover, the child is growing rapidly and it will most likely be an outfit only for one time.
If you have a sewing machine and at least some basic sewing skills, you can sew a New Year's costume with your own hands. You don't even have to buy new fabric and other finishing materials for this. We offer an idea of \u200b\u200ba gnome's costumes for a boy from what may be gathering dust in closets without doing anything. They are not sewn according to all the rules of "cutting and sewing", so this is by no means teaching material, but just an example of how every inexperienced seamstress can make a costume for her child for the New Year.
The first version of a gnome costume for a boy
Blouse
To make a pattern, you can take a child's thing as a basis. For example, a turtleneck. We add a few centimeters on the sides, depending on how wide we want to make the jacket. Set aside the desired length. We make a round neckline. Not very deep, but enough for a head to go through. We draw armholes as in the photo.

It also shows the pattern of the collar and parts that are sewn to the armholes.
Sew shoulder and side seams. Here, faux fur on the front and knitwear on the back were used for stitched details to the armholes. Fold the fur and knitwear face to face and sew along one long and two sides. We turn it right out and stretch it along the edge, putting the part with the knitwear up, watching the pile of the fur and straightening it if necessary. We sweep the finished parts with armholes and sew. The edges of the strip should match at the side seam.


The collar also consists of fur on the front and jersey on the back. We sew the details, leaving the side unstitched, with which the collar will be sewn to the neck. We turn it right out, stretch it along the edge, putting the part with the fur down. Sewing in a collar. Cut out a strip from the same jersey and make a hemline with it.

Since jersey is used to trim the hem, it can be cut straight. If you use a non-stretch fabric, then you will need to cut along the bias.
We make pom-poms from black fur: two for the jacket and one for the cap. For this we draw circles. It is convenient to use a cream jar or a small glass, and circle it with a sharpened bar of soap. Cut the circles with a sharp blade.

We pinch off equal pieces of cotton wool. They should not be too large, but such that the pompom is softly stuffed and the cotton wool allows the edges to be sewn without strong tension. With small stitches, we manually go along the edge of the circle, insert cotton wool and tighten the thread. Sew a few more stitches to secure the edges together. We leave the needles and threads on the pom-poms.


We sew them to the jacket. It is better to do this together with small buttons on the wrong side. And it looks neater, and the fabric will not break.


Instead of fur pom-poms, you can sew on large wooden buttons. And replace the fur on the collar and armholes with wool or felt, and at the end of the cap make a tassel from the same material cut into thin strips.
Pants
Using any of the child's pants, we make such a pattern.

Cut out 2 parts, put them together with the front sides inward. Sew the middle seams and then the step seam. Cut out a strip for a belt from jersey (here is black stretch velvet). Its length should be less than the circumference of the top of the trousers. We will insert the elastic, therefore, having measured its width, we multiply the resulting number by 2 and add 2 cm to the seam - we get the width of the strip. Sew the edges of this part together, fold it in half along the length and attach it to the top of the pants with its slight tension, laying a line 1 cm from the edge. We leave an unstitched gap. We insert the elastic band, sew its ends, hide it inside and cover the seam to the end. The elastic should fit exactly inside, so it is important to correctly calculate the width of the strip. As a result, wide pants are gently gathered at the waist. We also make the cuffs from below, but cut the rectangles wider and do not insert the elastic.

Cap
We measure the circumference of the head and determine the length of the cap.
Here the circumference is 50 cm and the length of the cap is 45 cm.

Fold the fabric in half with the right side inward. Along the fold, lay off the length of the cap, put marks ("a" and "b" in the photo). From point "a" draw a perpendicular line about 3 cm long (point "b" in the photo). From point "b" draw a perpendicular line and set aside half the girth of the head, plus 2 cm for a free fit, plus 1 cm for a seam allowance, plus 3 cm. From point "c" draw a line equal to the length of the cap (point "d") ... We connect point "b" with point "g" with a smooth arched line. Cut out. It is better to immediately check on the child's head if the part is too wide or too narrow. If everything is correct, we put it on the fabric with the front sides together, circle and cut out. Blue jersey is used for the inner part of the cap. It is softer, thinner and more pleasant.
The gnome's hat will keep its shape slightly. To do this, we use just such a zig-zag cotton wool. It is unrolled from the roll in a thin strip, which is very convenient.


We lay out the strips of cotton wool slightly overlapping. Place the outer part of the cap and apply it. Sew close to the edge around the perimeter. Cut off the cotton wool around the edges.


Put the inner part face up to the side with cotton wool, sweep it off. We sew close to the edge along the entire perimeter and immediately begin to shade with straight lines (perpendicular to the bottom of the cap) at an equal distance from each other. We do not interrupt the line: we finish to the edge, turn it, sew the required distance on the side and again a straight line down and so on. You need to stitch on the front part. The fabric will be a little steamed, it's okay, you just need to make sure that it is even.


Fold the cap right side in and sew the side seam and top 0.5 mm from the edge. We turn it out, straighten the tip. Take the pom-pom and sew to the top so that it holds tight.

Cut out a strip of jersey 3 cm longer than the circumference of the bottom of the cap. We measure the width of the elastic, multiply by two and add 2 cm per seam - this is the width of the strip.

Sew together the edges of this piping from the inside out. Fold in half and attach to the cap, applying a strip to the front side. When sewing, you need to stretch the cap a little, because the strip is longer. Thanks to this, the cap will fit the head tightly, and on the forehead - freely, without pressing the ears.

The figure shows the simplest option.

We cut out one piece of wool (we determine the length by the girth of the abdomen, adding a few centimeters to the free end), make a hole according to the mark, insert the buckle tongue, wrap the end on the wrong side and fix it. Sew the edges of the belt loops, turn them inside out and put them on the strap. The tip can be made straight. And it is better to take a plastic buckle, since it is lighter and the strap will not sag.
Shoes
For them, the pattern is.

- foot width
- foot length
- girth of the foot at the highest point divided by 2
- ankle girth divided by 2
The girth of the foot is measured as follows: put your foot on the floor and measure with a measuring tape (in an arc along the leg) from the floor from one side to the floor from the other.
We add a few centimeters to the obtained measurements, because the gnome's shoes are voluminous. The tongue, toe and tip of the sole are freely modeled. For the base, the soles can be placed on a sheet of child's shoes and circled. A mistake was made here and the width of the tongue was not taken into account. Therefore, the shoes turned out to be huge.
When constructing the side part, divide the width of the tongue by 2 and subtract the result from lines 3 and 4.
Faux leather was used as the material and a yoga mat for the seal. You can use wool or felt. And to give volume - cotton wool. Or even dispense with the gasket.


We cut out the details. If the material allows, we make the sidewalls in one piece, if not, the upper part is cut out separately.
Sew the sidewalls together. Non-woven fabric is used here for strengthening (not ironing), and the edges are grinded in a zigzag.

In the same way, we sew the halves of the cuffs, if the parts are not one-piece.

We sew the upper parts to the main ones.


We put on the second parts of the top, sew on and zigzag along the sides and top sides.


Then you can stitch it over the face again with a thread of a contrasting color.

Put the assembled front part on the fabric (here velvet-stretch), draw around the contour, excluding the top.

We make an allowance as in the photo. You need 2 details.

Sew on the lining as shown in the photo.

The sealing material was glued with transparent Moment Crystal glue. It should be applied over the entire surface in a very thin layer. First, on one side and attach to the faux leather part, then on the other side, apply the velvet part. Press down, for example with a stack of books. However, this step can be skipped. Moreover, then in some places the skin leaves, so this method is not very good. And the glue can even show through the fabric and get a hard stain.


For a bow we sew a strip.

For the sole and the tongues, we also cut out paired parts and put everything together.

In the middle of the main part we sew a strip for a bow.

We sew the sole with the main part by hand with an overcast seam. We start with the spout, slightly stepping back from the edge. We also finish the seam before reaching the end.


Sew on the tongue. We mark the middle point on it, combine it with the nose and start sewing.


Slightly pulling the strip for the bow, mark the line where to sew. We remove from the shoe and sew along the mark.


We form a bow, determining the length of its ends.

We line it obliquely.

Now you need to sew the middle together - seam to seam.


The bow turned out to be too big and falling off.
Tip: To accurately determine the desired length of the stitched strip, use a measuring tape. Tie it on the shoe with a bow and see how many centimeters it took.


Let's make it like this: fold the parts as in the photo and sew together.


Of course, the bow was too tricky. You can do it easier. For example, make it separately by sewing a rectangle, lightly stuffing it with cotton wool and collecting it in the middle. Then sew to the shoe. If you use felt or wool for a shoe, then you can pull it up the leg with the help of an elastic band, and a wide ribbon is quite suitable for a bow or a buckle instead.
Tightly pull the bow in the middle with a piece of elastic, sew its ends.


Sew the bow to the top of the tongue, slightly stepping back from the edge.


We make 2 pom-poms and sew one on each spout so that they sit firmly in place.


These are the shoes of a gnome.


And the general image.

The second version of the gnome costume for a boy
Since the costumes are for the brothers, it was decided that they would not be very different. The main fabric is the same (by the way, this is an old curtain). Only for decoration a different color is used. And other shoes.
Blouse
We take some thing as a basis. Here the jumpsuit, and since it is tight-fitting and already small, we add quite a lot (fold on top of the fabric). Sew on the sides.

Cut out a strip from the jersey around the circumference of the jacket, sew the ends and iron the edges to the middle.

Apply to the edge of the jacket, then sew close to the edge. It is important here that the seam runs smoothly from the face and inside out and does not go over the edge. You can put a decorative stitch on top.


The neck can be made deep enough for the head to slide freely. Otherwise, you need to make a fastener. To do this, on the back part (or front) in the middle, we make a perpendicular cut.

More neat here would be a facing, but if there is not enough fabric, we will also process the neckline with a strip of knitwear. We adjust it from the inside out to the end of the cut.


Sew the edges and finish the line.


Now we make a buttonhole. We fold the thread in several layers, thread it into a needle, tie a knot, pierce the edge on the corner from the inside out, bringing it out.

We crochet a chain of air loops of the required length.


Now we insert the needle inside. We make a couple of stitches near the base of the loop, fasten and cut the thread. We turn up the edging, outline, sew.


It is also finished here with decorative stitching.
Iron, pressing the rounding on the cut at the bottom. Sew on the button. The clasp is in the form of a drop.


We cut out 2 parts from the same jersey (their length is calculated according to the circumference of the place on the sleeve where we will adjust) for the drawstring on the sleeves. Iron the edges towards the middle.

We turn the ends and it is more convenient to sew them manually.

For the tie, take a thin ribbon, cut off the desired length and string a bead on one end, securing it with a knot from the bottom.

Sew on the drawstring, stepping back from the edge of the sleeve. We put on the ribbon. We string the second bead. We tie a bow.


Panties
Cut out along the bottom of the child's overalls. We add as much as necessary.


Sew the middle (back and front) seams, then step.

Iron the edges.


Since the pants are wide, and they need to be planted on the stomach, we make a fold or tucks on the sides. You can make them with an elastic band. But then, when cutting, do not forget to add to the fold.


A fairly wide strip of jersey is used here, which is shorter in length. The elastic was not inserted inside. The strip is cut out so long that it fits snugly around the belly, but does not press.

We sew the edges of the legs. At some distance from the bottom we sew a drawstring and insert a ribbon with beads at the ends. We tie the bows.

Vest
We cut it like this.


All parts are sewn with an overlap seam, so we make allowances of 0.5 cm, and on the sides and shoulders - 1 cm. Allowances do not need to be made along the armhole, neckline, bottom and on the opposite edges of the front. But if you sew from wool or felt. Bulk material will need to be processed.
It is convenient to mark the seam line and apply the part along it. We sew on the front side.


First, we collect the back and front, then sew on the sides and shoulders.


It can be beautifully stitched with a contrasting thread, for example, in the color of the main fabric of the suit.

We outline the places for the buttons.

Fold the thread in several layers, thread it into the needle, fold it in half, tie a knot. We pierce the fabric, hide the knot with several stitches.

Crochet a chain of air loops.

We carefully sew the base of the loop, hide the thread, cut it off.

We tighten the buttons into jersey. Cut out circles with a diameter larger than the buttons. If the fabric is thin, you can make a double layer so that the button itself does not show through.

We put the button on the wrong side of the circle, tighten and randomly sew the ends. Stitch around the perimeter to help tighten the circle. We do not cut the threads with a needle.

Sew on one button.

Then the second, closing the base of the loop.


Cut out 2 strips for the belt and a belt loop along the width of the buckle. We determine the length by the girth of the abdomen, adding the desired length of the free edge.

Fold the stripes together face to face. In the middle at the end we mark the place for the tongue, stepping back from the edge. Above and below this gap, we lay lines.

We pass the strip into the buckle, insert the tongue into the hole, fold the parts of the belt and, without tucking the edges, sew along the perimeter. Sew the ends of the belt loops, turn them out and put them on the strap. We mark the place for the holes.

We cut out small holes (it is convenient to do this with a ripper) and sew them manually along the edge.


Cap
Cut out and lay with cotton wool.


The same fabric is used for the inside.
We sew and turn it out.


We cut 2 stripes across the width of the cap. The wool used here is the same as for the vest.

Fold together face to face and sew along one edge. We cut the allowance at the ends.

We iron the seam. The resulting expanded detail is applied to the jersey. Cut out the inner part from the jersey as in the photo.

Sew the ends of the knitted part and the remaining ends of the front part. Putting it together. We put the knitted strip face up, on its edge we put a strip of wool face up. Sew close to the edge.

This is what the wrong side looks like.

Now we turn it out. On the woolen part, we have a knitted one. So we put it under the sewing machine foot. Tuck the edge of the knit exactly over the edge of the wool and lay the line. We make sure that the jersey under the foot does not move too much forward.


We collect the strip with the cap. We put it on the edge of the cap with the woolen part outward with a sufficient allowance. We fix it in 4 points at an equal distance. We sew along the perimeter.


Slippers
We make a pattern.

It is better to check the result on paper: sew a shoe out of it and, if necessary, correct the discrepancy between the length of the sidewalls and the sole.

We cut out the details. Here the shoes themselves are completely made of wool, and a synthetic winterizer was used for the padding.


We collect such "sandwiches" and cut them close to the edge. We even out the edges if necessary.


Sew the sidewalls of the shoes together edge to edge.

Sew the top by hand with an overcast seam.

Cut out rectangles for the top. We sew the ends of each. We trim the upper edges with a line.

Place it on the top edge of the shoe and sew it by hand. First with small straight stitches, then overcast.

Sew in the sole with an overcast seam, starting from the nose.

We make 2 pom-poms from fur and sew on the noses.

Done! They turned out soft and cute.


And the general view.


You might say that it doesn't quite look like gnomes. Yes, white fur is associated more with Santa Claus or Snow Maiden. But we gave all the recommendations. No beard? And who said that these cannot be the children of the gnomes who have not yet grown her?
 House for the investor I want to go to the house of the Russian Federation kids club
 Social adaptation of parents
 Children's Development Center "Treasure Island" is a modern private kindergarten and kids club Treasure Island private kindergarten