Christmas garland (48 DIY crafts). Garland for a summer terrace How to make a garland of cardboard with your own hands
Garlands can be used to decorate a house and a garden all year round - a little so quickly and certainly creates a romantic mood and a magical atmosphere. Fortunately, today it’s easier to add decorative light to a house than during our childhood: now the garlands consist of safe diode bulbs and can be powered by batteries.
Safe bulbs can be decorated with a special kit (IKEA also sells jewelry for them besides “naked” garlands), but it’s much more fun to do it yourself, taking into account the peculiarities of the interior and your own taste.
The summer garland should be bright and look good not only at night, but also in the light of a long day. We decided to decorate it with paper octahedrons - and share our experience with you.
We needed: LED garland (for example, “Serdal” from IKEA), thick colored paper, scissors, a ruler, a hole punch, a pin, a button-clove, a knitting needle.
1. We print out the octahedron pattern.
We did not find a suitable colored paper in the sets, so we chose Canson with a density of 120 g / m 2 (you can buy it at art stores at about 15 rubles per sheet). This paper is stained in bulk and has a uniform structure, that is, it will look good, illuminated from the inside. In addition, Canson has a wide selection of shades, the beauty of which cannot be compared with the standard colors of paper for children's crafts.
Flashlight schemes can be downloaded (for large) and (for small)
2. We press the fold lines.
To carefully fold the lanterns, it was necessary to push the fold lines along the line. At first we used a regular pencil, but the stylus particles smeared and smeared a flashlight, so we found a thin needle.
3. We do perforation
On paper for lanterns, it is better to make small holes, so the garland will look more openwork, give more light and cast beautiful shadows. The easiest way is to make a perforation with a clerical button, a nail, putting paper on a carpet without lint, a sofa or a piece of felt. First, we punctured the paper with chaotic rapid movements, then added holes where necessary. It is better to pierce a blank that has not yet been cut - so the sheet does not wrinkle around the edges. It is important that the paper lies face up: the surface of the flashlights must remain smooth.
The puncher is not very suitable for making decorative holes (if only because small bulbs will strive to stick out through them), but we still used it for blue flashlights.


4. Cut the workpiece.
There should be room for wires in the corners of future flashlights. We cut holes with a hole punch, but you can get by with scissors.

5. Glue the flashlights.
The first few flashlights we glued, immediately putting on a garland. Then it turned out that two pairs of sides can be joined in advance, and only the rest can be glued together on weight. it turned out to be important to use fast-setting glue. The pencil came up quite well.


6. Light the garland!
The garland turned out magic! The yellow and orange paper on the lumen turned out to be very bright, and the lanterns resembled the fabulous luminous flowers of the physalis. But through the blue paper the weak light of the diode bulbs did not penetrate, so that although they looked good, they were lost against the background of brighter neighbors; next time for such a garland we would take only light sheets. Another important thing to do: it’s best to print the circuit in toner save mode, because black lines will shine through the paper


A child is a joyful and expected day for the whole family. Kids are waiting for a fairy tale, and parents are trying to make this day unforgettable.
You can arrange a festive atmosphere by decorating the venue of the event. Make it easy and simple, in this article a huge number of examples of festive decor for children's parties will be considered.
Craft a garland for a child’s birthday with their own hands is a pleasant and interesting activity. Parents will be happy watching the children react to their labors. Below are instructions and tips for the birthday of a child with their own hands.
Create a fairy tale atmosphere
A garland is the easiest and multivariate way to decorate a room for a holiday. It can be made quickly and easily. If there is enough time, it is worth making more complex and spectacular decoration options.
You can craft colorful ribbons with your child. The manufacturing process is simple, monotonous and does not require much attention. But parents will have the opportunity to spend time with the child, talk and teach him the simple skills necessary in any needlework.
The best DIY garland ideas for a child’s birthday
Garlands can be used in a variety of ways. This can be an ordinary thread with flags and circles, or jewelry with more complex shapes, as shown in the photo below.
The thread itself can be hung vertically. This technique is used by professional decorators when it is necessary to visually divide a room into several zones, for example, to separate the playing space from the festive table.

It is necessary to show imagination by making garlands for the birthday of a child with their own hands. Room decor ideas are practically unlimited. True, parents will have to spend a little time to create such a decor. Decoration can also be used as part of an entertainment program for children.

Garlands allow you to create whole compositions: combining several different types of decorations, you can make clouds with rain or a starry sky with the moon and other planets.
What materials are garlands made of?
The most common option for decorating a room for a child’s birthday is a garland of paper. Do it yourself is very simple. This will require universal materials for creativity such as paper, cardboard, glue, stapler, etc. To create a garland, you can cut various figures. They can be glued, painted, decorated with sequins and beads, folded in the form of origami models, fastened with a stapler and even stitched.
Garlands are made not only of colored paper, some craftswomen use napkins for this. You can make very beautiful balls out of them. For the manufacture of garlands, it is better to use pressed napkins.
In fact, the decoration elements can be made from any materials at hand. Perfect for this:
- food foil;
- medical cotton wool;
- trimmings of multi-colored fabric;
- candy wrappers from sweets;
- corrugated paper "cups" for cupcakes or any other corrugation;
- balloons.
The choice of materials depends on imagination and skill.
Original and non-standard garlands
Even food can make a garland. For this, the rings and pads of ready-made breakfasts, chips, nuts, dried and candied fruits, marmalades and soufflés are suitable. Handle such a garland carefully so as not to spoil its appearance. It is necessary to store the jewelry in the refrigerator, and use it no longer as a decoration, but, for example, for holding a competition.
Below is a photo of a garland for a child’s birthday (with his own hands), which is made of popcorn and ringlets of a prepared breakfast.

Such a garland is not suitable for those who have animals in the house. In an effort to taste the delicacy, they can not only spoil the decoration itself, but also the decorated surface.
This is another simple option for a child’s birthday garland. How to make balls with your own hands from knitting threads, everyone knows. The photo below shows what a wonderful result you can get.

How to make do-it-yourself flags for a child’s birthday party quickly and easily
Make an element - a checkbox can be done using ordinary scissors and a pencil. You just need to draw the necessary shapes and carefully cut them. Then the flags are either fastened with glue or a stapler, or broadcast on a thread.
Such a simple manufacturing method takes a lot of time, and the process itself is monotonous and boring. You can simplify your task by purchasing a figured hole punch. Handicraft stores sell many of these devices, with various shapes and sizes.

Even the simplest and most famous garland-ring can acquire a second life. Hole punch knives are so complex that they can carve real patterns, not just geometric shapes. The following photo is an example of what can be done using a figured hole punch.

A simple device will significantly reduce the operating time. You will no longer need to draw and carefully cut along the lines, just bring the sheet and press the pen.
Helpful hints:
- You can make a garland-ring by buying a finished paper ribbon with a printed pattern. It will only be necessary to cut it into strips and glue it.
- For fabric flags, it is better to take felt, then you will not need to process the curly edges left by the hole punch.
How to securely pin flags in a garland
You can collect the garland on a thread attached to the surface. If the elements need to be hung, then it is worth doing this before fixing the base in place. Flags can be connected to each other using glue or a stapler without thread.
You can save time by stitching items with a sewing machine. Only thick paper / cardboard or fabric tags are suitable for this. You can use the most common threads or find metallic shine on sale. Thick paper figures will need to be placed under the claw of the machine one by one, without gaps. An example of work is shown in the photo below.

Garlands sewn in this way will last longer. They are easier to store, faster to make, and they look no worse than purchased decorative items.
We make a garland of candy wrappers for a birthday
Such a product will turn out beautiful only from whole, unbroken candy wrappers. If they are torn, you can make base flags from cardboard and just stick candy wrappers on them. For a garland of candy wrappers you will need:
- many different candy wrappers;
- strong thread is the basis;
- glue or stapler.
Sci-fi need to choose the most identical in size. If they are colorful and shiny, you can simply roll them in half, drop a little glue in the center and hang them on the base. If the wrappers are large enough and they depict beautiful scenes, you can gently bend one edge and glue the wrapper to the thread as a regular flag or fasten with staples with brackets.

This is a very simple and quick way to save time and get great results. Children will be interested in looking at wrappers and sharing their impressions about which of the sweets tastes better.
Note: parents should take care of the presence of those same goodies on the festive table.
We make a flower garland of colorful napkins
Paper flowers can refresh the atmosphere no worse than real ones. The photo below shows an example of decorating a table with flowers from napkins.


For large flowers, it is better not to take napkins, but special paper for florists. It comes in many different shades and has an interesting heterogeneous texture.
Create a garland of balls
Paper balls coming down from the ceiling on threads of different lengths look very impressive, but also in a tight bunch, balls are a great way to decorate the space. You can verify this in the photo example below.

The easiest way to make such balls is to buy ready-made ones in the store and thread them. Their manufacture is a very painstaking task. You need to cut a large number of circles of colored double-sided paper. Then fold the circles in half and glue them one by one. The more circles, the more voluminous and "full" the ball will be.

The presence of partitions depends on the way the halves of the circles are glued together. Finished balls must be collected on a thread (warp) and attached to the surface.
Such beautiful garlands can be made not only from paper, but also from threads and glue. It is necessary to inflate the balloons, generously coat them with glue and wind the threads. Workpieces must be set aside until the glue dries. Then take the needle and burst balloons. The result is fashionable and interesting jewelry, for example, as in the photo below.

The final form of the product will depend on the method of winding the threads and their thickness. Instead of threads, you can take thick twine or thread from twisted napkins or newsprint. Then the finished balls will look like in the next photo example.

You can also take at least 10 sheets of paper, fold them one to one, fold them with a small accordion and bandage in the middle. Then spread the accordion separately for each sheet. The result is a voluminous and beautiful ball, as in the photo below.

How to make unusual flags - hearts, bows and lanterns
Interesting elements will come out if you cut the tape into strips of different lengths and fasten them in a special way. In more detail, the process of creating hearts can be seen in the photo below.

Element - voluminous bow, perfect for girls' birthday. It is not difficult to make it, but you will have to draw and cut the details manually. For a bow, you need to cut and fasten 3 parts. The manufacturing method is shown in the photo below.

The flashlight element is very similar to a ball, but it is even more difficult to complete it. They do not need to be made large, the smaller they are, the more they attract the eye and delight others. For the manufacture of flashlights you will need cardboard and scissors. First you need to cut a large number of blanks, and then just fasten them with glue or with the help of cut out hooks.

As you can see in the photo, the jewelry is very beautiful. Such bulbs are called flashlights because during the manufacturing process they can easily insert an LED bulb.
Summarize the experience, or Complex constructions of garlands
When decorating premises, it is worth combining several types of garlands and various elements, this option will be the most advantageous. Clouds with rain from garlands have already been mentioned, the photo below shows an example of such a design.

You can also string long strings with small pieces of medical cotton wool and paper stars. By attaching them to the ceiling at short intervals and allowing them to fall to the floor, you can get a fabulous curtain and separate it with the resting place of parents and children. On the garlands, you can hang small surprises and gifts for the kids.

Even the alternation of very simple garlands creates room for the decorator. On the flags, you can put letters, make up the name of the child or a whole congratulation with pictures.

The easiest way to create a festive decor is a garland for a child’s birthday, assembled with 1 hand on 1 thread. It is easy to do, and it does not take much time.
No matter what the parents come up with to decorate their child's holiday, both adults and children will be able to get a lot of pleasure, as well as keep in their memory happy memories of time spent together. One very unusual garland can be created throughout life. It is necessary to hang a thread on the wall and attach photographs of family celebrations and joyful events to it.
It is believed that to make such a product as a garland of flags with your own hands is a couple of trifles. In this regard, they treat him rather frivolously. But using only this decorative decoration, you can almost completely decorate any room. If you can make different garlands and combine them correctly, you can provide any celebration with jewelry using small means, including money.

Flags with pictures
A garland of hand-made paper flags has a number of advantages compared to other ways of decorating festivities, which allows you to choose it among many other decorative elements.

Flags are equally suitable for celebrating a birthday, as well as for corporate parties
So, the advantages of such garlands include the following:
- Cheapness. Paper is inexpensive, and a large amount of paper can produce a huge number of flags. Balls are much more expensive.
- Universality. Flags are equally suitable for celebrating a birthday, as well as for corporate parties. If we take such crafts as, for example, balloons of thread, then they are not suitable for all corporate parties and will not be appropriate for an elderly person’s birthday.
- The ability to use for large-scale events. If you know how to make a garland and flags with your own hands, you can calmly arrange very large events, for example, a wedding for several hundred people. Well-made garlands can decorate a store with a large retail area. If you need help, then perhaps the help of friends, because the amount of work is large.
- Production speed. If you have ready-made flags, you can make a garland of them in just a few minutes. Even if there are no ready-made flags, they can always be printed. The same balls, if you made a mistake with their number, it is almost impossible to get and inflate if there is an hour left before the event.
- Possibility of quick replacement. You can replace paper flags at any moment, the same applies to the entire garland. This allows you to always maintain the appearance of the room in good condition.

You can replace paper flags at any moment, the same applies to the whole garland
It is worth noting that the fact that flags can decorate not only buildings and premises, but also a wedding train. Garlands are very easy to put on cars and removed from them, which allows you to prepare the car for the celebration in a couple of minutes. If you know how to combine them, then even the cheapest car will look just great.
On a note: Garlands with fabric flags can be used several times - this is an additional advantage of this way of decorating festive events.

Garlands of flags
However, before responsible events, such products should be updated to give them a fresh look.

Pink garland of flags
Material for making flags
A garland of flags with your own hands can be made of several types of materials, which makes it possible to experiment by creating unusual interiors - both for holiday premises and on the street. At the same time, you can take into account factors such as weather conditions: wind strength, humidity, if the flags are placed outdoors. As a result, this decoration will look great all the time during your holiday.
Of the main materials used for the manufacture of flags, the following can be noted:
- paper;
- the cloth;
- flag tape.

Garland of printed triangles
On a note: Paper - this is the most common material for making flags for garlands, it is ideal for creating almost any flag.
Usually, thick paper or laminated material is used for this. The latter perfectly resists the effects of moisture, as well as precipitation, as a result of which you can quite use a garland on the street.

Garland of fabric flags
In order for the garland to be bright and festive, colored paper is used. At the same time, work on the decoration allows solving other tasks: for example, flags and garlands for kindergarten, which children make with their own hands from colored paper, allow them to experience not only the unforgettable atmosphere of the holiday, but also learn how to work with scissors, threads, glue and paper .

Garland with bunny
Do-it-yourself garland of flags from fabric is a very common way to decorate almost any room. At the same time, with such flags you can decorate buildings, cars and ships, as the fabric perfectly resists any external influences. Unlike paper, the fabric does not need special preparation for use in the manufacture of garlands.
Almost any pattern can be applied to the fabric. If you take multi-colored rags, then the festive effect will intensify even more. By the way, the fabric can be washed, so that your garland can be used repeatedly.

New Year's garland of flags
As for the flag (or flag) tape, this material is the most convenient, since it is a braid with ready-made flags of various shapes, colors, with inscriptions or pictures, with cloves or without. It can simply be cut in length and immediately hung in place. If you need to hang the braid on a fishing line or wire, then this is not difficult, since many types of such braid have special holes for this purpose.

Almost any pattern can be applied to the fabric.
There are other materials used for the manufacture of these products, for example, plastic or cardboard, but those listed are basic.
Types of garlands from flags
If you decide to make a garland of flags with your own hands, you should know that garlands are made in different ways. Depending on which garland you need and where you will use it, you can choose one or another method of its manufacture. Currently, the following types of these products exist:
- sewn;
- with holes;
- on the grommets.

Sewing garlands - in the manufacture of their flags are sewn to the braid
Sewing garlands - in the manufacture of their flags are sewn to the braid. You can sew them close to each other - in this case you practically do not see the base, and you get the impression of a solid line of flags. These flags look great both indoors and outdoors. In addition, if you use a sewing machine, then with the help of a braid you can quickly make several tens of meters of such garlands.
The second variant of the described festive decoration is a garland of flags with holes. In this case, all the flags made of different materials have one or two holes through which the base is threaded: fishing line, cord or wire. By the way, the holes in the flags (if the flags are made of paper or cardboard) are easily and simply made a hole punch. In this way, you can quickly make do-it-yourself birthday decorations - a garland and flags.

Garland of flags with holes
Important! As for garlands on grommets, this is perhaps the most reliable option in terms of durability (if the flags are also made of durable material).

If necessary, you can make any original garland
Holes in the flags are fixed with grommets - these are special bushings, they can be plastic or metal. Thanks to the grommets, the holes will not tear or tear, and even the base is threaded into them, on which your garland will be hung. It is unlikely that there is a need for such garlands for a one-time home holiday, it is rather a sort of “business option”.
If necessary, you can make any original garland, but they will all be based on these three options. This should be considered when choosing a decor option for the design of buildings and premises. The rest of the flags can have the most diverse shape, as well as size, although the most common - A5.

Flag templates are easy to develop on your own with imagination
What is needed to make a simple garland
In order to independently make a garland for decorating a room, you must first have flags at hand - they can be bought ready-made or made from improvised materials. If you decide to make a garland with your own hands, then for it you can make flag templates using printing. Flag templates are easy to develop on your own with imagination. After developing such templates, it remains to print them using a printer on paper and make stencils, and using stencils it will be easy to prepare the necessary number of flags.
They can be cut with scissors or cut down using a special machine. To design an ordinary home holiday, for example, a birthday, those flags that you cut with your own hands will be quite enough, while it is not necessary to use the classic triangular shape. If you use a stencil in the shape of a heart or any geometric shape, your garland from this will only become more original.
She will need glue, a strong thread, sparkles and paste (pasta in the form of stars). Apply PVA glue to each part with a brush, then, taking another brush, apply silver or gold spangles, you can alternate. Wait until everything dries and gently tie the paste to the rope at regular intervals, as shown in the photo. 


Garland of pine cones
In order to make it look more effective and combine with your interior, the cones can also be painted using acrylic paint. Pour some paint into a disposable plate and dip the bump on all sides (or use a brush). After the paint dries, the cones can be tied to a bright woolen thread of a contrasting shade, for example, red. 
Yarn brushes
If you knit and you have left unused balls of yarn, make a “woolen” garland from them. The brighter and larger the brushes will be, the more spectacular the finished thing will look. 
Wool Pompons
Another option: instead of brushes, make woolen pompons or combine both options. It is convenient to make small pompons with a fork by wrapping wool on it. 

Knitted garland
For her, you can use any old t-shirts, shirts or dresses. The rest of the tape will do. The main thing is that the fabrics are combined in color. Cut the fabric into strips of the same length and width and just tie it to a coarse thread. 
You can also make a charming garland out of dried flowers and attach additional decorative details to it: paper birds, stars or Christmas trees.

Ice garland
For a winter garden or street courtyard, you can use ice garlands. To do this, take the molds for ice, pour water into them, add a few drops of paint to each mold and stir the paint in water. Then cut a long rope and deepen it in each mold. Put the molds in the freezer and wait until the garland freezes. 
Chain garland
This is the easiest option that we all can do from stripes of paper since kindergarten. If you take double-sided paper with metallic, it will look more interesting. 
Garland of sweets
Buy a bag of candy in cellophane wrappers and use a stapler to pin the candies to each other until you get a long chain. 
Paper Christmas trees
First, prepare a paper stencil, according to which it will be necessary to cut the blanks in the form of fir trees. You can use cardboard and old postcards for this. Glue the finished cardboard trees through at an equal distance with glue or fasten with threads. 
Wadding snow
Form lumps of different sizes from cosmetic cotton balls and fix them on the fishing line by threading through the needle. To prevent the balls from moving, you will need a glue gun. 
Gingerbread Cookie
If you are cooking cookies in cookie cutters, be sure to make a few holes before placing cookies in the oven. To make toys and garlands for a Christmas tree from ginger dough is a pleasure. 
Vertical cones
Cut the cones out of colored paper, it is better if it is thick and bright, glue and string on a thread. To keep the cone in place, it can be sealed with a drop of glue from a heat gun or fixed with a small bead. 
Buttons
And with such a mini garland you can decorate indoor plants in the house.Garlands look beautiful all year round, but are especially good for the holidays - New Year, Easter, Birthday or Halloween. You can decorate with a garland the walls, ceiling or windows of any room - from the kitchen to the children's room, as well as a Christmas tree or a mantelpiece. In this material we will tell you 10 ideas with step-by-step master classes on how to make a garland with your own hands from improvised, natural and even waste materials.
Christmas garland of volumetric snowflakes
We present the first idea of \u200b\u200bmaking garlands for the New Year with our own hands - from snowflakes. Probably we all remember how to cut a flat snowflake from a square sheet of paper. This method will help you out if you need to make a garland as soon as possible. However, if you want to make a more elegant decoration, we suggest collecting it from voluminous snowflakes. They are made somewhat longer and more complicated, but the resulting garland will survive more than one holiday.
Instruction:
Prepare paper such as regular office paper, pencil, scissors, a stapler with staples, glue or double-sided tape and thread.
- Divide a sheet of A4 paper in two equal strips.
- Now collect each band into an accordion. You can do this in the following way: fold the strip in half, then fold the half in half again, then bend the quarter in half and continue the action until the entire strip acquires folds. Next, focusing on the fold lines, assemble an accordion.

- Cut one small strip from your accordion, cut it in half, and then draw a pattern on it, according to which you will cut out snowflake patterns. The template is drawn arbitrarily, but so that the edges of the assembled accordion in two or three places remain uncut. An example of a template can be seen in the upper right photo.
- Bend the accordion in half and in the middle fasten it with a stapler.
- Pencil outline the outline of the template on one of the halves of your workpiece, and then cut off the corresponding parts of the picture with scissors.
- Repeat Step # 5 with the other half of the workpiece using the same template.
- Fan each half of your workpiece and glue their ends together.
- Hang snowflake medallions on a beautiful thread, such as silver.

Sewing thread or paper brushes
And now we introduce the idea of \u200b\u200bmaking garlands with your own hands, which is the most fashionable attribute of celebrating birthdays or weddings - a garland with tassels. From our workshop you will learn how to make a large version of the decoration, but by the same principle you can easily make mini-brushes (for example, to decorate the Christmas tree) using smaller paper.

Instruction:
Prepare the following materials and tools:
- Sheets of paper with a silence of 50 × 50 cm or 50 × 60 cm (1 sheet is needed to make 2 brushes);
- Scissors;
- Tape.
- Fold a piece of tissue paper in half, then again in half, but the other way, to make a quarter.
- To create a fringe, start cutting your workpiece into strips (no more than 1 cm wide) before reaching the fold line of about 2.5-3 cm.
- Now cut the quarter with the fringe into two halves along the fold line. You will get two blanks as in the photo below.

- Expand one workpiece and begin to fold it tightly, as shown in the following photo.


- When you completely fold the blank (see photo above), fold it in half and then twist the two halves together to create a loop for hanging on a tape. Fix the loop with transparent glue (e.g. PVA) or thread.

- Make a few more brushes of different colors and hang them on the ribbon.

In this video you can see a detailed master class on how to make a garland of brushes with your own hands.
In the following collection of photos, other ideas of garlands from brushes are provided.

The idea of \u200b\u200ba garland for a child's birthday


Garland of cones in the "snow"
Garland of cones is a natural and durable decoration, especially relevant in the fall, winter and, of course, on New Year's. You can simply take dry and clean cones and tie them to, say, a jute rope. But in order to make the garland truly festive, try decorating the cone scales with “snow” from any white paint. It's time to get old white enamel from stocks!

Instruction:
- Pour a small amount of paint on a paper plate and dip the cone flakes in it.
- Turn the bump so that each of its tip is covered with paint. Set aside the cone to dry and repeat with the remaining ones.

- When all the cones are dry, proceed to hanging them on a thread. To do this, wrap the end of the thread around the bottom of the first bump and tie a knot. Then tie the second, third and all other cones around their lower parts, and tie a knot on the last “link” of the garland.

- Additionally fix the position of the cones with a hot glue gun.
Garland of balls
Balls from paper can be used to create a New Year's garland with your own hands, or any other. It all depends on the colors you choose. To make a garland of balls with your own hands, you will need: glue or double-sided tape, beautiful paper (for example, color or scrapbooking paper), scissors or a special hole punch for cutting circles.

Instruction:
- To make 1 ball, you need to cut out 6 circles of the same diameter from paper. However, you can cut from 3 to 16 circles for one ball. The more circles you use, the more voluminous it will be.
- Fold each circle in half so that the front of the paper is inside.
- Now you can start forming the ball. To do this, glue the resulting halves of the circles with the wrong sides to each other.

- Before gluing the last parts of the ball, pass the tape through its core.
- According to the described scheme, make a lot of balls and fix all of them on the tape.

- If you have a sewing machine, then the process can be accelerated in the following way. Cut out circles of medium-density colored paper (no more than 6 pieces per ball) and lay them in stacks. Keep in mind that paper should be colored on both sides. Next, take turns stitching the stacks on a typewriter, and when the garland is completely “sewn”, simply spread each semicircle of the ball. As a result, you should get something like this decoration.


By the way, by the same principle, but using details cut out in a different shape, you can create a garland of any subject.


Pompoms made of yarn
Depending on what color yarn you take, you can create a garland for any occasion. So, for example, for the New Year you can take white, red and green colors, for Halloween - orange and black, and if you take skeins to the color scheme of the interior, you will get a fashionable decoration.

Do-it-yourself Christmas garland of pompons


There are many ways to make pom-poms with your own hands, but for a garland, the one that allows you to quickly make several balls at once is best.
Instruction:
- Wind the yarn around the legs of the inverted chair as shown in the first top photo.

- Remove the resulting skein from the legs and dress it along the entire length with the rest of the thread, maintaining an interval of about 5 cm.
- Then simply cut the skein into identical balls so that each ball has a tied center.
- Trim the villi and straighten the balls, turning them into balls. If there are not enough balls, repeat the action with another skein.
- Fasten the balls to the tape.
LED garland with flowers from an egg box
And now let's find out how to transform an ordinary LED garland with flowers from ... cells of an egg box. Decoration will turn out not only beautiful, but also corresponding to the idea of \u200b\u200brecycling waste. Moreover, the box can be not only cardboard, but also plastic.

Instruction:
Prepare the following materials and tools:
- Egg packaging (6-12 pcs.);
- LED garland;
- Acrylic paint (in spray or jar);
- Hot glue gun;
- Scissors;
- Stationery knife.
- Cut the box lid and set it aside.
- Using a knife, cut out the cells (for tulips) and / or the sections between the cells (for small or narrow elongated buds) of the box.

- Using scissors, form petals from the walls of the cells. Do not be afraid to experiment and cut the petals of different shapes and sizes.
- Once all the flowers have been cut, proceed to paint them. You can dry the flowers on wooden skewers stuck in the box lid.
- When the flowers dry, cut a small cross at the bottom of each bud.

- Put a bud on each light bulb of the LED garland.
- Now you can hang your garland of flowers in any desired place.

Silent paper tags
Bright colored flags on the ribbon is a classic decoration that is appropriate for any holiday or just for decorating the interior. Today we propose to make an updated version of it, namely from quiet paper or tissue paper and with a fringe.
Instruction:
To make a garland of flags with your own hands you will need: quiet paper / tissue paper of different colors, scissors, a pencil, a plate (any round object that can be circled), a ruler, a ribbon that can be folded in half and glue stick.

- Fold the paper in a stack and draw a circle on the top sheet using a plate.
- Without dismantling the stack, cut out the circles. Then cut the stack of circles into halves.

- Start creating fringe on the blanks. To do this, simply cut the semicircle into narrow stripes, not reaching 1-1.5 cm to the top edge and observing approximately the same interval.
- Now just stick the top edge of each semicircle onto the tape.
- Using the same principle, make a garland of flags and pennants, but use paper of a different color.
Garland of pasta
Curly pasta is almost ready-made garland details that need only to be slightly decorated and strung / fixed on a thread. So, for example, you can use butterflies (bows).


Instruction:
Prepare one or two packs of butterflies, paint, PVA glue, sparkles and a cute thread.
- Paint the butterflies and let them dry.
- When the pasta has dried, grease them with PVA glue using a brush, then sprinkle them abundantly with sparkles. Shake off excess and let the butterflies dry out.
- Tie each pasta to the rope.

If desired, you can replace the bows with any other curly pasta, for example, shells, straws. Not only can you make a garland of bows, any curly pasta and straws as in the photo below will do.
Garland with luminous balls
Small spheres that glow in the dark and seem to hang in the air look very impressive. To make such a garland, you will need to buy a large number of ping-pong balls, prepare a clerical knife (and preferably a breadboard) and, of course, the electric garland itself.

Instruction:
- Cut a cross on each ball with a knife.

- Put a ball on each bulb. Hurrah! The garland is ready!


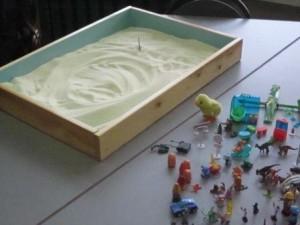 Sand show for a children's holiday
 Beautiful pictures with the Navy Day (34 cards for free) Old postcards with the day of the Navy
 Exercises for the development of creative abilities in children Classes for the development of creative abilities of preschool children