Pattern of winter overalls with two zippers. Children's overalls (we sew to children, a pattern and a master class)
Children's jumpsuit - comfortable and beautiful clothes for little explorers! A patch pocket on the front is suitable for storing small finds, and wide legs will not interfere with freedom of movement. Adjustable straps will extend the life of the jumpsuit for several seasons.
We will show how to build a simple pattern and sew a children's jumpsuit with your own hands in just one evening!
Children's jumpsuit: choice of materials
How to sew a jumpsuit with your own hands? Our model can be sewn both from summer, thin fabric, and in a demi-season version - for example, from jeans. For maximum comfort, the upper part of the jumpsuit is made double. The lower fabric is visible on the lapel of the pocket and the fastenings of the frames, in addition, it plays the role of piping along the edge of the strapless, pocket and upper edge of the jumpsuit. Ideal for the bottom fabric - thin cotton.The color of the fabric should be contrasting or differ by several tones from the facial tissue.
In addition to the fabric, you will need accessories to adjust the strapless jumpsuit. We used a set of a frame with a banner and a simple frame of the same width for each strap. Another option is with buttons. Perform loops on the top of the jumpsuit, and sew buttons on the straps at the required height. In this case, straps need to be sewn with a margin of 5-7 cm in length. You can also buy special fasteners for overalls, both plastic and metal.
To finish the pocket, we sewed a large button to his lapel. Such a pocket can also be decorated with embroidery or applique.
So, let's sew a jumpsuit with your own hands!
We will tell you how to make a pattern of overalls with your own hands, using ready-made trousers or shorts of a suitable size. Prepare a pencil, ruler and scissors, as well as a large sheet of paper. It is most convenient to draw a pattern on graph paper, which is sold both cut into sheets and in a roll. You can also glue several sheets of plain paper, take a newspaper or the remainder of a roll of wallpaper.

Fold the sample in half by placing one leg inside another. Spread the step seam. Circle the outline of the sample on paper: the line of the step seam, the top and the beginning of the side seams. Repeat on the other side of the sheet, straightening the backstitch.
Set aside the required length of the overalls and the desired width from the side seam line from the top line. Make the width loose by adding about 2 cm to the waist and hips.

From the center of the front waist line draw a vertical upward, its length is equal to the desired length of the upper part. Lay to the right half the width of the upper part, it should be less than the width of the chest (the distance between the beginning of the armpits) by 2-3 cm. Draw a smooth lateral line of the upper part, ending it 3 cm above the waist line.
On the back half of the legs draw the same vertical, and then draw the back upper part of the jumpsuit, narrower than the front. Slanted diagonals equal the width of the straps, an average of 3.5-4 cm.
Cut off the top of the overalls from the legs.
Draw the desired pocket outline on the front half. Transfer it to a separate sheet of paper and draw the upper lapel, as shown in the diagram. The height of the lapel is half the height of the pocket itself.
Separately, draw a shoulder strap pattern. Its length can be determined live on the child or measure the length from the waist line of the front to the waist line of the back over the shoulder, and then subtract from there the height of the front and back upper parts of the jumpsuit. Add 10 cm to the resulting value. The width of the strap at the top is 2-2.5 cm, expand the pattern closer to the bottom to 3.5-4 cm.
Cut
FROM BASIC FABRIC
- 2 details of the front half of the legs
- 2 details of the back half of the legs
- 2 straps details
- 1 pocket detail
FROM ADDITIONAL FABRIC
- 1 fold upper front part
- 1 fold upper back part
- 2 straps details
- 1 pocket detail
- 2 parts 5x5 cm (double frame width plus 1 cm)

Working process
- Details from the main fabric and additional fabric
- Two frames with a banner and two narrow frames
- Button, thread, scissors
Stitch side leg seams. Sew over allowances and iron them towards the back. Double stitch.

Stitch step seams, overcast allowances and iron towards the back.

Unscrew one leg on the front side and insert the second one inside, aligning along the central seam. Stitch the central seam, overcast the allowances.


Fold the pocket parts with the front sides and grind, leaving the seam section open. Trim the allowances; in the places of fillet, make triangles.

Turn out a pocket, sweep around the perimeter, slightly bringing up the lower colored fabric. Iron the pocket.

Sew around the perimeter of the pocket. Bend the valve to the front side and fix it by sewing on a button.

Stitch together the straps in pairs from the main and additional fabrics, folding them with the front sides inward. Cut allowances to 5 mm and turn the straps on the front side.


Fold in the rectangular parts for the frames, facing inwards and stitch. Twist, move the seam in the center, iron and stitch.

Insert the frame into the prepared parts, fold in half and sew along the edge.

Stitch the side seams of the upper parts from the main and additional fabrics. Iron allowances to the sides.

Pin or sweep the straps and frames to the top of the main fabric, folding them with their sides inward along the upper edge.

Fold the upper parts from the main and additional fabrics with their faces inward and sew along the entire upper edge. Align and cut the allowances at the fillet points.


Bast the top of the jumpsuit over the top edge. Iron.

Stitch the top of the jumpsuit over the top edge with double stitching.

Stitch the legs to the top, folding them with their faces inward along the waist line. Align the mid-front and back lines and the side seams. Iron allowances up. Tuck the bottom edge of the upper half of the extra fabric and bast it on the allowances, covering them.

Double stitch at the waistline. Stitch the pocket by laying the first line over the existing one, and then completing the second line, as for all finishing seams.

Insert the upper edge of the strap into the frame with the waist, as shown in the photo.

Insert the shoulder strap into the frame sewn to the top of the jumpsuit, as shown in the photo.

Pull the strap up over the waist, allowing access to it. Insert the edge of the strap into the waist and tuck it in, secure it with a pin or bast. Stitch the hem of the strap.

Fold the bottom edge of the legs two times, bast and iron. Sew double stitch.


 I sewed this jumpsuit for the baby at the end of winter - the beginning of spring, when it is still quite cold outside. Then we were still very small, we just lay on walks, so I wanted to sew warm and comfortable clothes. I took a pattern of overalls from the magazine of children's clothing Ottobre (No. 4 - 2004), which, in my opinion, is the best magazine for patterns of children's clothing.
I sewed to size 68 (in height), but this pattern can also be sewn to other sizes: 56-62-68-74-80-86.


In detail 3 - from the bottom +2 cm!
The fabric for overalls is polyester on a synthetic winterizer (quilted), if desired, you can insert another layer of insulation (sherstipon, holofiber). For older children, you can use a maid insulation, tinsulate - they are thin but warm, so they are great for kids who begin to walk themselves, and they just need light clothes that will not hamper their movements. Lining - cotton, knitted. It is better to choose natural fabric, because it is in contact with the face and body of the child.
Details (from the main fabric and lining):
1. Breast - 1 child. with a fold.
2. Side inserts in front - 2 children.
3. Back - 2 children.
4. Sleeve - 2 children.
5. Hood - 1 child.
6. Plank - 1 child.
I supplemented the pattern with a pocket on the chest and lapels on the sleeves and trousers, so that it was possible to close the legs and arms.
In addition, I needed two zippers (I took a length of 40 cm, you can 50 cm), Velcro.

I will dwell in more detail on the process of sewing children's overalls. I coped with this task in a few evenings))
Pocket.
Sew on the wrong side the main fabric of the pocket with a lining, turn it out. Stitch along the edge and sew a pocket on the breast.


Zippers. Sew zippers to the chest, but without lining.

We sweep, then we trim along with the lining fabric on the front side. Similarly, we sew the second half of the zipper to the side inserts of the front.


If the zippers are detachable, then the junction of the zippers can be closed with a patch (I used a piece of brown leather).

Back and sleeves. We perform the middle seam of the back on the main fabric and on the lining separately.

Then we also grind the sleeves along the raglan line to the main fabric and the lining.


We sew a step seam and side. These details of the main and lining fabric are sewn separately. Then we turn out the lining and insert it inside the jumpsuit.
Hood. We sew the details of the hood, leaving the edge open, which is sewn to the neck. We twist, we trim along the edge.


We sew the main fabric of the hood to the collar, and then the lining fabric, to hide the seam we sew with a blind seam or we stitch.

Strap. A strap must be sewn onto the breast so that the neck and hood fit tightly around the neck. We sew the details of the bar, we turn it out, we cut it off. Sew one half of Velcro to the ends of the strap, and sew the other to the hood. The length of the Velcro must be chosen so that it is possible to fasten the bar tighter and weaker.

For tailoring overalls I needed:
- (we are 6.5 months old, but I sewed a jumpsuit of size 74, for growth);
- 1.2 m of the main fabric (I used raincoat fabric);
- 1.2 m of fabric for lining (I used fleece as lining fabric);
- 2 m of insulation (we have cold winters, so I made two layers of double padding polyester);
- 2 one-piece zippers 50 cm long;
- 1 cord 80 cm;
- elastic cord 1.5 m;
- 6 clips and 6 lugs for cords.
I supplemented the pattern of overalls with boots and mittens (patterns are given in full size):


I also changed the fringing of the hood and the backing under the zipper (see below)

Step 1. When cutting parts from the main fabric, I made the following allowances for seams (allowances are given in cm)

When cutting the details of the pad, I did all the seam allowances for 1 cm
The zipper substrate was cut out the same way from raincoat fabric and fleece.

Step 2. In the next step, I superimposed the cut parts (both from the main fabric and the lining details) on the synthetic winterizer and cut it exactly along the contour. Each detail turned out to be warmed by a synthetic winterizer. For the convenience of stitching zippers, I did not cut out the substrate under the zipper from the synthetic winterizer, it is better to fill it with the synthetic winterizer then.


Step 3 Since I used a raincoat fabric as the main fabric, and it slides along the synthetic winterizer, it is necessary to sweep all the details from the raincoat fabric along the edge so that the synthetic winterizer does not stray when sewing.

Step 4Now you need to cut off the excess padding polyester on each part.

Step 5 We lay and embroider the folds on the central lower part of the front with a fold, connect this part with the front yoke.

Step 6 We attach fleece strips to the edges of the resulting central front part (where the lightning will be) (the length of the strip is slightly greater than the length of the zipper, width 3.5 -4 cm). I did this for the convenience of inserting a zipper, and then to close the zipper so that heat would not come out of the jumpsuit.

Step 7 Similarly, we attach the same fleece strips to the sides of the front to the edges (where the zipper will be)

Step 8 Now we connect the front sides and the central front part (at the seams that are located below the section for the zipper, in the photo they are marked in red). Here is the result:

Step 9 Scour the cuts for the zipper. In the photo, I put a zipper in the section to show how it will be sewn.

Step 10 We sew back details on the middle seam. I sewed an elastic on the back, stepping back from the edge of the armhole for about 2-2.5 cm. The length of the elastic is 25 cm. Then you can connect the front and back parts of the overalls along the middle seam between the legs.

Step 11 Stitch the sleeves to the front and back parts of the jumpsuit. We turn off the jumpsuit and sew the seam of the sleeve and the side seam of the overalls (with one seam). Unfortunately, I did not take a photo of this stage.
Step 12 Getting to tailoring the hood. We cut out the fringing of the hood (the pattern is given above). I carved it from faux white fur, and I used fleece on the lining.

Step 13 Mark the fringing of the hood.

Step 14 We cut the seam of the hood, embroider a fringe to it (as shown in the photo).

Step 15 We lay the machine seam, but not where we just swept it away, but stepping back from the basting seam about 1.5 cm. This is necessary in order to then insert a lace into this drawer to tighten the hood. You can make the drawstring for the lace in another way, as it will be more convenient for you or as you think will be more rational.

Step 16 Stitch the details of the hood, cut out of fleece. We put the hoods from the main fabric and from the lining, one into the other, with the front side inward (as shown in the photo).

Step 17 We mix the details of the hood along the front cut (in the photo I hold this place with my hand).

Step 18 Then you need to sew this seam (in the photo is shown in red dotted line).

Step 19 We turn the hood and that's what we got.

Step 20 We fold the details of the substrate for the zipper with the sides inward.


Step 21 Stitch the zipper backing. Just do not make a seam at the junction with the neck, we will sew in the hood there (in the photo this place is circled in red).


Step 22 We cut the seam allowance so that it can be carefully turned out.

Step 23 We turn the substrate on the front side and mash the edge.

Step 24 We combine the backing for the zipper with the hood: the front side of the backing - to the front side of the hood, the lining of the hood - to the backing of the backing. We take out the substrate to the hood and shorten it.

The result should be:

Step 25 Now we apply the front side of the hood to the front side of the overalls and wrap them, then shorten them (in the photo the seam is indicated by a red dotted line).

The connection of the hood, the substrate for the zipper and overalls:


Step 26

So the zipper will be sewn:

Step 27 We proceed to grinding the details of the overalls lining. I did not skip the details from the fleece around the edge, since the fleece does not slip over the sintepon.
The grinding algorithm is similar:
- 1. We connect the front sides and the central front part.
- 2. We notice cuts for lightning.
- 3. We sew back details on the middle seam. No need to grind the gum!
- 4. We connect the front and rear parts of the pad along the middle seam between the legs. Side seams do not need to be sewn yet; they will be sewn along with the sleeve!
- 5. Stitch the sleeves to the front and back parts of the pad. We turn the lining and sew the seam of the sleeve and the side seam of the lining (one seam).
Here's what happens in this step:

Step 28 On the sleeves and on the trouser legs I made drawstrings for the elastic. To do this, it is necessary to cut strips from the main fabric, the width of the strip is 4-5 cm, to determine the length, measure the length of the cut of the sleeve and leg with a centimeter tape and make an increase for the seam (I hope it was clear, maybe the photo will be more clear). We cut from the sides so that there are neat edges at the drawstring.

Step 29 We draw the wings to the sleeves and trousers.

Step 30 Stitch the side parts of the boots, sew them to the trouser legs of the overalls and attach them.

Step 31We take note and attach the trace.

Step 32

Step 33 We knit and grind mittens.

Step 34 We insert the mittens into the sleeve, sew and grind.

Step 35 We turn out. Here's what we got:

Repeat steps 30-35 for padding the jumpsuit.
Step 36 At this step, the jumpsuit looks like this:


Step 37 We combine the front side of the overalls lining and the front side of the hood lining, wipe them and sew them (in the photo the seam is marked with a red dotted line).

Here's what happened:

Step 38 We connect the front side of the coquette from the main fabric with the front side of the coquette of the pad, wipe and sew.

We turn out. Here's what happened:

Step 39 Insert the lining into the jumpsuit. We make stitches in several places manually, thereby combining the jumpsuit from the main fabric and the lining (the stitches should be free). This is necessary so that the lining does not get off. Be sure to connect the shoes and mittens, the rest is at your discretion, but it is better to connect in several more places, so the lining will be securely fixed in the jumpsuit.


Step 40 We insert the zipper into the incision, attach it to the front of the overalls (we don’t touch the lining yet). It is advisable that the zipper teeth be covered with a cloth.


Step 41 Attaching a zipper. My fabric shifted slightly during the sewing, so the zipper cloves did not completely cover the fabric, although I expected to completely close them. But it’s okay, the lightning pad in this case will save us, it is quite wide, inserted from the inside, so it will block the zipper and will be pressed to it.

Step 42 We notice the lining to the zipper on the wrong side of the overalls (on the one hand, we attach the lining to the zipper, on the other hand to the zipper)

Step 43 We parse the seam of the substrate for the zipper and stuff it with a synthetic winterizer, but not very tight. Then we sew this place with hidden stitches.

Step 44 We insert the lace into the drawstring of the hood, sew the button to the substrates for the zipper.

Attention! Make sure that when the zipper substrates are fastened on the button and the zippers are fastened on the jumpsuit, the yoke should fit snugly on the substrates, otherwise there will be free space and heat will come out of the jumpsuit.


Step 45 We insert the elastic bands into the drawstring on the sleeves and legs (you can insert the laces as you like). They play rather a decorative function.


The jumpsuit is ready!
Daughter in a new jumpsuit!

To build a pattern drawing, take the following measurements.
Half neck circumference.
Half chest circumference.
Half hips.
The length of the back to the waistline.
Shoulder length.
The width of the back.
The length of the sleeve.
The length of the trousers on the side.
The length of the trousers to the knee.
Seat height.
Build a drawing.
Back and front halves.
Jumpsuit Length. On the left side of the sheet, draw a vertical line on which you postpone the measurement of the length of the back plus the measurement of the length of the pants plus 4 cm and put points A and N.
From points A and H to the right, draw horizontal lines.
Overalls Width. From point A to the right, postpone the measure of chest circumference (Og) divided by 2 plus 8 cm and put point B. From point B, lower the perpendicular to the bottom horizontal line, mark the intersection point with H1.
Back length to waistline. From point A down, postpone the measurement of the length of the back to the waist line plus 2 cm and put the point T. From point T, draw a horizontal line to the right until it intersects with the BH1 line, mark the intersection point as T1.
Seat height. From point T down, postpone the measurement of the height of the seat plus 2 cm and put point W. From point W draw a horizontal line to the right, the point of intersection with the line BH1, designate Sh1.
Hip line. From point W upward, set aside 1/3 of the measurement of the height of the seat and put point B. From point B, draw a horizontal line to the right, mark the point of its intersection with line BH1 B1.
Knee line. From point T down, postpone the measurement of the length of the trousers to the knee, plus 1 cm and put the point K. From point K, draw a horizontal line to the right, mark the point of its intersection with the line BH1 K1.
Back width. From point A to the right, postpone the measurement of the width of the back divided by 2 plus 1.8 cm and put the point A1.
Armhole Width. From point A1 to the right, postpone ¼ measurements of the half-circumference of the chest plus 1.8 cm and put the point A2. From points A1 and A2, draw down the vertical lines.
Neckline of the back. From point A to the right, set aside 1/3 of the neck half-measure plus 1 cm and put point A3. From point A3, restore the perpendicular upwards, on which put aside 1/10 of the neck half-measure plus 1 cm and put the point A4. Divide the angle AA3A4 in half, from point A3 along the line of dividing the angle, set aside 1/10 of the neck half-measure and set point A5.
Connect the points A4, A5, A with a smooth line.
Shoulder section of the back. From point A1, down, lay 2 cm for normal shoulders, 1.5 cm for high, 2.5 cm for sloping and put point P. Connect points A4 and P with a straight line, on which from point A4 put aside the measure of shoulder width plus 1.6 cm for tucking plus 0.5 cm for landing and set point P1.
From point A4, line A4 P1, set aside 4 cm and put point O. From point O, draw a vertical line on which lay 6 cm and put point cO1. From point O on line A4P1, set aside 1.6 cm and put point O2. Connect the points O1 and O2. From the point O1 along this line, set aside the length of the segment OO1 and put the point O3. Connect the points O3 and P1 with a straight line.
Backhole armhole depth. From point П down, set aside груди measurements of half-circumference of the chest plus 7 cm and put point G. Through point G, draw a horizontal line, the point of its intersection with the line AH, designate G1, with the line limiting the width of the armhole, G2, with the line BH1 - G3.
Armhole line of the back. From point G up, set aside 1/3 of the length of the PG segment plus 1 cm and put the point P2.
Divide the angle G of the armhole in half, from the point G along the line of dividing the angle, set aside 1/10 of the width of the armhole plus 0.9 cm and put the point P3.
The width of the armhole - segment GG2 - divide in half and put the point G4. Connect the points P1, P2, P3, G4 with a smooth line.
Front armhole depth. From point G3 up, set aside ½ of the half-circumference of the chest plus 4.5 cm and put point B1. From point G3 up, set aside ½ of the half-circumference of the chest plus 4.5 cm and put point B1. From the point G2 upward, set aside the length of the segment G3B1 and put the point B2. Connect points B1 and B2 with a straight line.
Neckline. From point B1 to the left, set aside 1/3 of the half-neck measurement plus 1 cm and put point B3.
From point B1 down, set aside 1/3 of the half-neck measurement plus 2 cm and put point B4.
Connect points B3 and B4 with a dashed line, divide it in half. Connect the point of cherishing with a dashed line with point B1. From point B1 along this line, set aside 1/3 of the neck circumference plus 1.5 cm and put point B5.
Connect points B3, B5, B4 with a smooth line.
Auxiliary points for the design of the front line. From point G2 up, set aside ¼
measure the half-circumference of the chest plus 6 cm and put the point P4.
From point G2 upward, set aside 1/3 of the length of the segment G2P4 and put the point P5.
Divide the angle P5G2G4 in half, from the point G2 along the line of dividing the angle, set aside 1/10 of the width of the armhole plus 0.6 cm and put the point P6.
Shoulder section of the front. From point B3, through point P4, draw a straight line. On this line from point B3, postpone the measurement of the length of the shoulder and put point P7.
Front armhole line. Connect the points P7, P5, P6, G4 with a smooth line.
Side cut of the upper part of the overalls. From point G4 lower the perpendicular to
hH1 line. The points of its intersection with the lines of the waist, hips, seat height, knee and the lower horizontal line are designated T2, B2, Sh2, K2 and H2. Point B2 ends the line of lateral sections of the top, below is an auxiliary line for constructing sections of the trouser section.
Front cut line. From point Ш1 to the right, draw a horizontal line on which from point Ш1 put aside 1/10 of the measurements of the half-circumference of the hips plus 0.5 cm and put the point Ш3.
From point Ш1 up, postpone the same segment and put point Ш4. Connect points Ш3 and Ш4 with a dashed line, divide it in half. From the point of division, restore down the perpendicular on which to postpone 0.3 cm. Connect points B1, 0.3, W3 with a smooth line.
Fold line. Divide the Ш2Ш3 line in half, mark the division point with Ш5. Draw a vertical line through point W5. The points of its intersection with the lines of the waist, hips, knee and lower horizontal mark T3, B3, K3, H3.
Bottom line of the front half of the jumpsuit. From point H3 left and right, set aside ½ of the width of the bottom of the trousers minus 1 cm and put the points H4 and H5.
From the point H3 up, set aside 0.5 cm and connect the resulting point in straight lines with points H4 and H5.
Side cut of the front half. Connect points B2 and H4 with a straight line.
Step cut front half. Connect points Ш3 and Н5 with a dashed line, divide this line in half. From the point of division to the left, restore the perpendicular, set aside 1-2 cm on it and connect the resulting line with a smooth line with points Ш3 Н5.
Auxiliary point for the design of the mid-cut line. From point W to the left on a horizontal line, set aside 1/10 of the thigh half-girth measurements plus 0.5 cm and set point W6.
The fold line of the back half. Divide the Ш6Ш2 line in half, mark the division point with Ш7. Draw point Vertical line through point W7. The intersection points of this line with the lines of the waist, hips, knee and lower horizontal mark T4, B4, K4, H6.
Step line extension. From point Ш6 to the left on a horizontal line, set aside 1/10 of the measurements of the half-circumference of the hips plus 2.5 cm and put the point Ш8.
The bottom line of the rear half. From point H6 to the left and to the right, put aside 1/2 measure of the width of the bottom of the trousers 1 cm and put the points H7 and H8. Set aside 0.5 cm from point H6 down and connect the resulting point with straight lines to points H7 and H8.
Side cut back half. Connect points B2 and H8 with a straight line. The intersection point of this line with the knee line is designated K5.
Knee Width. From the point K4 to the left, postpone the length of the segment K4K5 and put the point K6.
Step cut back half. Connect point K6 with a straight line with point H7 and dashed with point W8. From point Ш8 down the dashed line, set aside 1 cm and put the point Ш9. Divide the segment Ш9К6 in half, from the point of division to the right, restore the perpendicular on which you postpone 0.5 cm. Connect the resulting point with a smooth line with points Ш9 and К6.
Mid-cut line. Connect the points T and W9 with a smooth concave line.
The construction of the sleeve.

Length. On the left side of the sheet, draw a vertical line on which to lay off a measure of the length of the sleeve and put points A and H. From these points, draw horizontal lines to the right.
Width. From point A to the right, postpone the width of the armhole from the drawing of the overalls, multiplied by 3, minus 1 cm and put point B. From point B, lower the perpendicular to the lower horizontal line, mark the intersection point as H1.
Okat height. From point A downward, set aside ¾ the depth of the armhole of the back and put point O. From point O, draw a horizontal line to the right, mark the point of its intersection with line BH1 O1.
Okat line. Divide the OO1 line into six equal parts, mark the division points O2, O3, O4, O5, O6. From these points, draw vertical lines upward, and point the intersection with the line AB, A1, A2, A3, A4, A5.
From point O2 up, set aside 1/3 of the height of the eyelid minus 0.5 cm and put points A7 and A8.
From point O6 up, set aside 1/6 of the height of the okat and put point A9.
Connect the points O, A6, A7, A3, A8, A9, O1 with a smooth line.
Bottom line. Continue down the A3O4 line, mark its intersection with the HH1 line as H2. From point H to the right, set aside 2-3 cm and put point H3. Divide the H3H2 segment in half, postpone 0.5 cm from the division point down and connect the resulting point with a smooth line with the points H3 and H2. Set aside 2-3 cm from point H1 to the left and put point H4. Divide the H4H2 segment in half, postpone 0.5 cm from the division point upwards and connect the resulting point with a smooth line with the H4 points and H2.
Article from the site
Winter is coming - a time of merry winter fun and outdoor games. What can cause more tenderness for parents than the sight of children joyfully screaming, running around the snowy alleys and playing snowballs? However, do not forget that winter is also the cold season, when the likelihood of colds is increased. Therefore, for caring and wise parents, winter is an occasion for updating and replenishing a children's wardrobe, because it often happens that children have already managed to grow up from their last year’s winter clothes.
Children's jumpsuit with a hood - we are meeting the winter fully armed
Today we will talk about how to sew a children's jumpsuit with a hood with your own hands. Indeed, the reason for the special pride and tenderness of any mommy will be a child who fearlessly meets the winter not in something bought somewhere in a store or in the market, but in his mother’s hands sewn to provide the maximum level of comfort and warmth.
Contrary to popular belief, it is not required to be a professional in this field to sew children's clothes on your own. The main thing you will need at the same time is a pattern of children's overalls with a hood, inexpensive materials sold now in every fabric store, some skills in cutting and sewing, and a bit of free time.
Cutting and preparation of material
As for the material that we will use - the choice of it entirely depends on your desire and imagination. The main thing when choosing is to take into account that we sew for children, therefore the following requirements are mandatory for the material: it must be practical, strong and, if possible, wrinkle-proof, and at the same time it must repel dirt, dust and moisture from it.
The main fabric should be about 60 per 100 centimeters, the lining is best made of quilted material of the same size. It is clear that the dimensions of the lining are chosen approximately the same. Also, for decoration, you may need a little decorative fabric, we believe that there should not be any problems at all, various shreds and strips of such fabrics can certainly be found in the storerooms of any hostess. You will also need an elastic band of about 30 centimeters in length, a cord of about 70 centimeters, a flat zipper lock about 20 centimeters long and a spool of durable thread.
You can download the finished pattern at the end of the publication. It is best to print it on a printer in the amount of one to one, cut it out, and draw fabric on paper templates. When cutting material, consider that it is necessary to leave allowances of one centimeter.
Start sewing
When assembling the overalls, you first need to grind the middle and shoulder seams on the back. After this, allowances for the seams must be ironed. Then we sew in the hood along the neckline. Now, next in line are the sleeves - we sew them into the armholes. After this, you need to grind the middle seam of the front.
Next, we repeat all these operations for the lining - in fact, we assemble another jumpsuit from it. When the lining is ready, we put it inside the overalls, carefully combine all the seams, sections of the sleeves and the bottom, after which we fasten the lining and measure it. At this stage, it will still be possible to alter something, if it does not turn out exactly as it should (after, of course, you can also fix something, but it will take much more time and labor).
Now you need to grind the side seams into the seams at the sleeves, step seams. After this, allowances in the middle of the front on the front parts of the main and lining fabrics will need to be turned inside out and ironed. At this stage, we grind the zipper, and now we tuck the upper edges of the braid.
As for the neck, it should be tucked on the wrong side, sweep and stitch. Now it remains to pull the cord into the drawstring and fix the stops at its ends. We thread the elastic into the bottom of the sleeve, tighten them and then sew up the hole.
Now we have the hood next in line. On the front and lining fabric, it is necessary to grind the middle seam, align and process the allowances with an iron. After that, put the facial fabric and lining to each other, grind the edges, iron the hood, turning it on the right side.
It remains to decorate our jumpsuit. An applique from the decorative fabric that we prepared is well suited for this. It all depends on your artistic taste and craftsmanship, we sew the applique on the front and our children's jumpsuit is ready. Now, little fidgets are not afraid of winter with its cold weather!
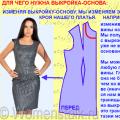 Constructing a dress base pattern and design modeling
 Patterns of children's trousers and sewing master classes Building the back half of trousers
 Building a pattern of vests for boys: the easiest way